Category: Food & Drink

Monday Reflections – Coffee Fun!

I. Love. Coffee.

For the love of coffee

Anyone who has known me for 10 minutes (or maybe less) is aware of this.

Pooh Coffee

I even worked at Starbucks for a couple of years to support my habit. BTW, it’s a great company and part of my retirement plan.

Starbucks to go

Fellow coffee lovers, check out my COFFEE board. It’s full of delicious, hot (or iced), caffeinated fun.

COFFEE - Hug in a Mug

A few years ago I heard about the Clover brewing system and wanted to try it, but there weren’t any Starbucks around that offered it. I thought it would take a trip to Seattle to give the Clover a try. All that changed Saturday. My HH and I went to Downtown Disney (one of the perks of living in central Florida), and the new Starbucks has not one, but TWO Clover machines. It’s a beautiful location, too.

Downtown D Sbux

And the partners are perfect for the happiest place on earth.

Happy Partners

I met Lenny, the friendliness ambassador and partner extraordinaire.

Lenny - Friendliness Ambassador

He gave us our first Clover coffee experience.

Clover Machine

First you choose your coffee and specify hot or iced and size. It’s not that different from ordering a normal cup of coffee. The beans get weighed,

1 Weigh the beans

then precision ground,

2 Grind2 Grind

then the weight is double checked for accuracy.

3 Precision

The Clover is then programmed with the kind of coffee, the type of brew (hot or iced), and the beverage size.

4 Exact Brew


To best show the rest of the brewing process I made a couple of videos.

What a GREAT cup of coffee! When we smelled the coffee when it was freshly brewed, the herbal notes of the Sumatra were prominent. And it was so smooth! Even iced it had to be one of the best coffees I’ve ever had.

I don’t know that a real Pintesting results would count for this, but if I had to give it a score it would be 5 Pins across the board. If you love good coffee and are near a Starbucks location with a Clover brewer, then give this a try.

*Disclaimer: I was not compensated in any way for this post. The opinions are my own (and my handsome husband).

UPDATE:

I associate Pumpkin Spice Lattes with the end of summer and the “official” start of autumn. Even though they came out last week, I held off until today to get my first. It’s a big deal, so of course I took a picture and posted it to Facebook.

First PSL of the Season

The best part was that Facebook face recognition saw the Starbucks Siren as a friend’s face.

Facebook Friend Face  Recognition


Then I was asked if I wanted to tag her.

To Tag a Siren

It took Facebook to recognize the friendship that I have with Starbucks.


Coconut-Pecan Icing and German Chocolate Cake

Aug 31, 2014 by Anne Hernandez

Work Birthdays mean treat days. They give the perfect opportunity to make delicious desserts without the guilt since everyone else helps eat them. The added break time is just an added bonus.

Since the Birthday Girl loves chocolate and coconut, I thought a German Chocolate Cake would be the perfect treat. Another upside about this cake is that the topping won’t get damaged by the Florida heat over the hours during transportation and while it’s waiting to be served. (Read no melty buttercream.)

I had already had a chocolaty butter cake in mind and went to my Everyday and Specialty Cakes board on Pinterest to find a great Coconut-Pecan Icing. After reviewing about a dozen recipes, this pin was the one I thought would best fit the bill. It helped that I had all of the ingredients on hand, meaning I didn’t have to run out to the store for any specialty ingredients. Major bonus. Thank you, Melissa, from Melissa’s Southern Style Kitchen!

Coconut-Pecan Icing and German Chocolate Cake Original Pin

The ingredients; butter, evaporated milk, brown sugar, sugar, corn syrup, salt, egg yolks, vanilla, pecans, and coconut. (Yes, I keep all of the above on hand – in case of a baking emergency. Don’t ask. I’m sure there’s therapy for this, but why not just be prepared to bake?)

Coconut-Pecan Icing and German Chocolate Cake Ingredients - Pintesting

Start by toasting the pecans in a 350°F oven for 6-8 minutes.

German Chocolate Cake Toast the Pecans - Pintesting

I pulled them out of the oven at 7 minutes, and the smell was fantastic. The taste test was amazing, too.

Coconut-Pecan Icing and German Chocolate Cake Pecans Toasted - Pintesting

Melt the butter, evaporated milk, brown sugar, sugar, corn syrup, and salt…

Coconut-Pecan Icing and German Chocolate Cake Heat Ingredients - Pintesting

…until bubbly.

German Chocolate Cake Cook - Pintesting

Next comes the egg yolks to thicken.

German Chocolate Cake Egg Yolks - Pintesting

Temper them so they don’t scramble.

Coconut-Pecan Icing and German Chocolate Cake Tempered - Pintesting Then add back to the pan to finish cooking for about 15 minutes.

Coconut-Pecan Icing and German Chocolate Cake Finish Cooking- Pintesting

Once cooked, pour into a bowl and add the coconut, pecans, and vanilla.

Coconut-Pecan Icing and German Chocolate Cake Mix to Combine - Pintesting

Stir to combine, and let set to cool and thicken more.

Coconut-Pecan Icing and German Chocolate Cake Finished - Pintesting

This is the point where I deviate from Melissa’s recipe and used my own cake recipe. Also, since this was going for a long car ride to work, I thought a 9×13″ would be more practical.

I had some extra chocolate ganache in the fridge, so I piped a border. Then I added the B-day girl’s name. It didn’t turn out as good as I wanted it to, but in my defense it was 5:30 in the morning and I hadn’t had any coffee. Most days I don’t walk and talk before coffee much less bake and decorate a cake. Thanks for understanding.

Coconut-Pecan Icing and German Chocolate Cake Birthday Cake - Pintesting

Jess thought it was sweet (sentiment) and delicious (cake). You can see that the Coconut-Pecan Icing was piled high, and EVERYONE loved it. The next time I make this cake, and I’m DEFINITELY making it again, I’m going to make a layer cake like Melissa did. Then I can edge each layer in chocolate ganache – and NOT write on the top.

Coconut-Pecan Icing and German Chocolate Cake Eat Cake - Pintesting

Now for the Pintesting results.


Overall Results: 4.4 Pins


4 Pins Overall

Accuracy: This Coconut-Pecan Icing recipe is easily as good as what I get at my favorite bakery. It has a wonderful caramely background to support the crunchy-sweetness of the coconut and toasted nuttiness of the pecans.  5 Pins

Rated 5 Pins

Difficulty: Any time you’re making a caramel you are flirting with disaster. I think it’s kind of a culinary rush, but if you’ve ever burned sugar or caramel, you know it’s no laughing matter. The corn syrup and melting the butter and milk with everything all together helps reduce the risk of burning. Another thing to watch is burning the pecans when toasting them. If it smells like they’re done before the timer has gone off, get them out – FAST. Nuts can go from perfection to trash in less than a minute. As long as you don’t get distracted, this recipe will go off without a hitch. But if you take your eyes off for too long, then very bad things can happen and your smoke detector will yell at you. 3 Pins

Rated 3 Pins

Time:  This recipe was ready in the time it took to bake and cool the cake. I started the icing first, then got the cake going. Total time, including cooling was about 40 minutes. I did help the cooling by chilling the metal bowl and stirring often. It’s great when things time out perfectly. 4 Pins

Rated 4 Pins

Cost:  Since I had everything on hand, I’m going by approximate memory of cost for most items. Fortunately most of the ingredients are common to most kitchens. The possible exceptions could be the corn syrup, coconut, and pecans. If you had to buy these three ingredients you’d be under $10 and you’d have leftovers for the next time. 4 Pins

Rated 4 Pins

Practicality:  I’m not sure when I’ve last wanted to sit down and eat a whole bowl of frosting with a spoon, but this would definitely call for it. It makes a LOT and doesn’t take long. I’ve found my new go-to recipe. 5 Pins

Rated 5 Pins


Egg Salad BLTA Sandwich

Jul 14, 2014 by Anne Hernandez

All bloggers get the occasional case of writer’s block. Sitting down to write this post, my brain just wasn’t coming up with a satisfactory intro.

As I was looking for inspiration, I started singing quietly to myself, “Do You Want to Build a Sandwich” to the tune from Disney’s Frozen. Those who are very close to me know that I often break into song, making up words to other tunes. This sent me on a search for other parodies, and there are a lot out there! My favorite is Do you want to go to Starbucks. (Big surprise.)

Do you want to build a sandwich

No more distractions. Focus. Bacon. Bacon is always a good thing… no. Not when you’re coming off of a 30-day health challenge. (Incidentally, I’m happy to be 10 pounds lighter!) Okay, health. How about the health benefits of avocados? Maybe, but it just wasn’t resonating. This sandwich had so many of my favorite ingredients in a delicious sounding combination. How to approach this?

And suddenly – that’s it! These are a few of my favorite things. Yes, now I’m singing in earnest.

This pin caught my eye because I love BLT’s, avocados, and egg salad. I also liked the use of spinach rather than iceberg lettuce. You might remember Chungah of Damn Delicious from my post on her Slow Cooker Beef and Broccoli recipe. She’s at it again, and I’m ready to get on with this Pintest.

(Note: per the blogger’s request, the photo of the original pin has been removed. You can see the original pin and the site by following the links above.)

The ingredients are simple and what you would expect for the recipe.
Egg Salad BLTA Sandwich IngredientsThe egg salad has hard boiled eggs, mayo, mustard, red wine vinegar, and salt & pepper.
Egg Salad BLTA Sandwich Egg Salad IngredientsI use a potato masher to combine these rather than chop the eggs.Egg Salad BLTA Sandwich Use a MasherIt makes perfect egg salad in seconds.Egg Salad BLTA Sandwich Egg Salad Toast the bread – I used Ezekiel bread.

 Egg Salad BLTA Sandwich Ezekiel Bread Toast

Start building the sandwich.

 Egg Salad BLTA Sandwich Build the Sandwich Foundation


Add the rest of the ingredients

Egg Salad BLTA Sandwich Build the Rest of the Sandwich

Top it off and chow down

Egg Salad BLTA Sandwich Finished


This sandwich is a perfect combination of salty, crispy, creamy, tangy, juicy, sweet, and savory. And it’s BIG. This is one mammoth sandwich! I was really hungry and couldn’t wait to eat. It was a case of my eyes being bigger than my stomach. I could only eat half. The handsome hubby had to eat the other half (poor guy). After thinking about it, this sandwich has a lot of healthy components; veggies (spinach), fruit (tomato and avocado), whole grain (Ezekiel bread), and protein (bacon & eggs). Okay, maybe calling bacon a healthy anything is a bit of a stretch, but it really upped the flavor by adding the Umami factor.

Now for the Pintesting results.

Overall Results: 4.55 Pins

5 Pins Overall

Accuracy: The sandwich was as delicious as it looked on the blog. The only thing that a traditional BLT has that wasn’t specified in the recipe is mayo on the toast. However, the creaminess of the egg salad and avocado was more than enough to compensate for that. Also, I’ve never had egg salad with red wine vinegar as a component.. Delicious! 5 Pins

Rated 5 Pins


Difficulty: The sandwich is not complicated, but it does require a bit of preparation. The slicing, toasting, egg-salad-making, and NOT eating all of the bacon after cooking it requires me to give this 4 Pins.

Rated 4 Pins


Time: Most sandwiches take about 2-3 minutes to make. This one took me about 20 minutes due to the bacon. It was totally worth it, but that gives it 4 Pins.

Rated 4 Pins

Cost: The majority of these ingredients are regularly found in my kitchen since we’re trying to eat healthy consistently. The only thing that I had to purchase was the bacon, which I bought by the pound at The Fresh Market so I could get just what I needed rather than a full package. The cost for 1 sandwich was less than you’d pay at a fancy deli – 4 Pins.

Rated 4 Pins


Practicality: This is one of those sandwiches that is good enough to serve to company for a casual lunch, brunch, or dinner. I might not make these every day for a work lunch unless I assembled at work (to keep the bread from getting soggy). But will I be making this again? Oh YES. 5 Pins

Rated 5 Pins


Lemon and Strawberry Detox Water

Jun 20, 2014 by Anne Hernandez

I’m just starting the second week of a 30-day Complete Transformation Challenge to get healthier and lose some weight. I’ve seen a lot of these challenges lately for a variety of products and different number of days (24-day challenge, 30-day challenge, 90-day challenge, etc.) so it seems to be a big thing going on right now. A big part is eating right and drinking lots of water, and also getting appropriate rest, reducing stress, exercising, etc.

To go along with the healthy living, I’m trying to find healthier pins to test. If you’re looking for the most amazing cake for your summer potluck, please visit my cake board – there are LOTS of amazing cakes to try. Eventually I’m going to make one to celebrate something or other, but not during this challenge.

So when I saw this pin for Lemon Strawberry Detox Water, I was super excited to try it! I’ve seen a lot of these waters that are infused with all kinds of fruits, veggies, and herbs. Many sources sing the praises of lemon water first thing in the morning. It sounded good until my mouth decided it didn’t like sour as the first thing I tasted. Lemon with strawberries, however, might be just naturally sweet enough to do the trick.

Lemon Strawberry Detox Water - Original Pin - Pintesting The ingredients are simple and self explanatory. Lemon. Strawberry. Water. I bought two bottles of the Voss brand water because they have a wider mouth, making it easier to put in the fruit, and because that’s what they used in the picture. (The vague “they” is being used since the pin linked to the picture. I searched for an original source, but found none.)

Lemon Strawberry Detox Water Ingredients - Pintesting


I prepped the fruit by washing in a vinegar-water solution from this pin (yes, two for one!) by Jo-Anna from A Pretty Life. Rather than wash them in the sink, I halved the amount and used a very large bowl. I soaked the strawberries and the meyer lemon since the rind was going into the water.

Vinegar wash - Pintesting

After soaking for 7-10 minutes, and stirring occasionally, I rinsed. Wow, did they turn out pretty! The picture of the dirty water didn’t turn out, but the difference was incredible  – and the amount of “stuff” that came off was surprising.

Lemon Strawberry Detox Water - Washed - Pintesting

Slice the fruit, put in the bottles, top with water, and refrigerate overnight.

Lemon Strawberry Detox Water Prepared - Pintesting

The next day, the water looked like this – you can see the fruit leached some of their color.

Lemon Strawberry Detox Water - Pintesting

I have to admit that the first sip was still tart for first thing in the morning. I’m usually a coffee person. However a few sips in, and the strawberry flavor really came out. It was a nice blend. I drank this while working out at the gym. It was tasty, and made me feel like I had upgraded my hydration thereby making me the coolest person at the gym.

Coolest person at the gym aside, here are the Pintesting results for both tests.

Lemon and Strawberry Detox Water Overall results: 4.55 Pins

5 Pins Overall

Accuracy: The infused water was flavorful, and the strawberries helped balance the lemon. I cannot accurately verify the claims to be beneficial to digestion, and clear and healthy skin. I was hydrated afterwards, and my digestion worked just fine (enough said). 5 PinsRated 5 Pins

Difficulty: The process is super simple. Slice the fruit, put in the bottles, cover with water. Getting the fruit into the bottle was much easier than getting it out of the bottle. A wide-mouthed bottle is necessary to make this work; nothing smaller than the Voss if you’re using slices rather than wedges (think lime in a Corona bottle). 5 PinsRated 5 Pins

Time: If including the wash time, which we should, the prep work took about 15 minutes. Waiting overnight took all night long. 3 Pins

Rated 3 Pins

Cost: Because the fruit was going to be infusing the water with the skins on, I chose to go organic so as not to drink a bunch of pesticides. This is highly recommended and worth the added cost. Even so, the total cost of the bottled water and all fruit was $7.00. That’s $3.50 per bottle and the bottles are being re-used. Buying a brand name electrolyte beverage would be cheaper, but who knows what’s in those? For the value of knowing what’s in your water, I’m giving this 4 Pins.

Rated 4 Pins

Practicality: This took very little time to prep, was tasty and natural, made me look beyond cool at the gym, and when I dumped the fruit it made the garbage disposal smell great. 5 Pins

Rated 5 Pins

DIY Fruit & Veggie Wash Overall Results: 5.0 Pins

5 Pins Overall


Accuracy: What a great way to get your fruits and veggies clean! This worked really well, and there was no vinegary smell – even before I rinsed them. 5 PinsRated 5 Pins

Difficulty: There was nothing to this. I preferred to use a large bowl rather than my sink, so I halved the vinegar. Still – float your fruits and veggies, stirring occasionally, for roughly 10 minutes. Done. Easy Peasy! 5 Pins

Rated 5 Pins

Time: 10 minutes… with very little work. 5 Pins

Rated 5 Pins

Cost: One-half (1/2) cup of white vinegar and tap water comes to roughly 25 cents. That’s WAY cheaper than the fancy washes that you can buy in the store. 5 Pins

Rated 5 Pins

Practicality: I’m going to use this when I get my grocery shopping done. Dump everything in and clean it at once. Not only will that get everything clean right off the bat, but it should give me more incentive to get a lot of prepping done ahead of time. (Should being the key word…) 5 Pins

Rated 5 Pins

Sunset Sangria

Summer… Sunsets… Wine… Sangria… That about sums up what happened in my brain when I saw this pin from Lisa’s blog Wine and Glue.

Sunset Sangria - Original Pin

I love wine, and I love Sangria. Sangria seems to be a wonderful opportunity for wine to go on a fun and fruity vacation from it’s serious side. Summer seems like the perfect opportunity for me to help wine to accomplish such a vacation. It all seems to go together so well.

Sunset Sangria Word Cloud


So this was a Pintesting test that was to bring on Summer (and help me celebrate Mother’s Day). Here are the Ingredients. The only “work” involved was washing and prepping the fruit. I needed some special tools for this.

Sunset Sangria - Ingredients

I washed the strawberries and hulled them using a special tool that Lisa mentioned in the post – a straw. I didn’t have any paper drinking straws, so I used the permanent plastic one for my Starbucks Venti cold cup.

Sunset Sangria - Straw

Insert into the bottom of the strawberry

Sunset Sangria - Strawberry

Pop off the top


Strawberry Sangria - Hulled

You can see that there is still a little bit that needs trimming, but overall this does a great job.

Sunset Sangria - Topless

Once hulled and trimmed, the strawberries need to be sliced. Lisa recommended another special tool – an egg slicer, which I happened to have on hand.

Sunset Sangria - Egg Slicer

Just drop in the strawberry, close the lid,

Sunset Sangria - Strawberry Slicer

And you’re done!

Strawberry Sangria - Strawberry Sliced

Slice the oranges, mix the beverages and fruit in a pretty pitcher, and wait overnight.

Pintesting Sunset Sangria

I made this the day before Mother’s Day so that I could enjoy it on my day. If you saw my last post, Chicken Gnocchi Soup (Olive Garden Copycat), then you’ll remember the full dinner picture that included the glass of Sunset Sangria. If not, go there next. Your family, friends, and tummy will thank you. Salude!

Chicken Gnocchi Soup - Supper Served

Here are the Pintesting Results.

Overall Results: 5 Pins

5 Pins Overall

Accuracy: This was a fruity yet balanced sangria. The rum and orange liquor give it zip, the soda gives it fizz, and the moscato and fruit keep it sweet. I liked all the tips that Lisa gave for the strawberries. The nice even strawberry slices made for a lovely presentation. I didn’t drink the whole pitcher (I was the only one drinking), and the strawberries bled their color over the second night turning the Sangria a beautiful rose color that gave it a stronger sunset appearance. 5 Pins

Rated 5 Pins

Difficulty: If you don’t have a straw or egg slicer, you will have to hull and slice the strawberries by hand. Not difficult but a little time consuming. The hard part is waiting overnight for the flavors to meld happily together. 4 Pins

Rated 4 Pins

Time: The prep work took me between 15-20 minutes, just like Lisa said. Because you need to let this set overnight I’m giving this 3 Pins.

Rated 3 Pins

Cost: The moscato was on sale for less than $6, the orange liquor was $2 for the little bottle,the soda was $1 on sale, the rum was a gift that I had hiding in the back of the wine cooler ($0), the strawberries are in season and were $2 for the container, and the oranges were about $4 for a total cost of $15 for the pitcher. That’s $3-$4 per serving – 5 Pins

Rated 5 Pins

Practicality: With summer starting, I can see this as a quick make ahead beverage for party planning. (If you have little ones, you could skip the alcohol and use white grape juice. Just don’t mix up the pitchers!) The next time I’m going to make two pitcher as Lisa suggests. 5 Pins

Rated 5 Pins

Chicken Gnocchi Soup (Olive Garden Copycat)

May 25, 2014 by Anne Hernandez

Chicken Gnocchi Soup

Some of the best things in life can come from the most random and unexpected places. For example, a couple of weeks ago some colleagues and I were talking about Pinterest while sitting around the lunch table. I had mentioned the Olive Garden Copycat Minestrone Soup recipe that you make in a crockpot. Two of them piped up and mentioned the Olive Garden Chicken Gnocchi Soup – how it was the best thing EVER. Did I like it?

*Cricket. Cricket. Cricket.*

How had I missed this? I’ve eaten at the Olive Garden more times than I can count, but can’t remember seeing this on the menu, much less having had this soup. “Well, can’t you find a recipe on Pinterest?” And of course, I did in about 2 seconds. This Pin by Reeni of Cinnamon Spice & Everything Nice came to the top of the search list.

Chicken Gnocchi Soup - Original Pin

Fast forward to Mother’s Day. My girls are on the other side of the country and the handsome hubby had to work. This year I was on my own, so I did what I wanted to do without any guilt. I thought about this soup and decided that it’s what I wanted for my Mother’s Day supper (along with a pitcher of Sunset Sangria – post to follow).

Wait, did someone ask, “what’s gnocchi”??? Gnocchi is this wonderful pasta made from potatoes that cooks into fluffy light clouds of pillowy pasta perfection. I went shopping and found this gnocchi at my Super Target. It was in the pasta aisle along with the rest of the Archer Farms brand pasta. I was lucky enough to hit the jackpot of savings that day; it was on sale, there was a Cartwheel discount, and I used my Red card. I love getting a good deal!

Chicken Gnocchi Soup - Gnocchi

The Pintesting:

Here are the rest of the ingredients. Reeni suggested using a rotisserie chicken, so that’s what I did. I used the breast meat for the soup, and the rest went to other uses.

Chicken Gnocchi Soup - Ingredients

I regret to say that I made the soup and forgot to take the pictures. The good news is that it was such a basic soup recipe that I know you can do this. UPDATE: I have remade the soup and took step-by-step pictures – just for you.

Heat the butter and olive oil.

Pintesting Chicken Gnocchi Soup - Heat EVOO & Butter

Add the aromatics.

Pintesting Chicken Gnocchi Soup - Add aromatics


Season and saute them until they’re softened.

Pintesting Chicken Gnocchi Soup - Sautee until softened

Add the flour to make a roux.

Pintesting Chicken Gnocchi Soup - Add flour for roux

Cook the flour for a minute.

Pintesting Chicken Gnocchi Soup - Cook flour

Add the chicken broth a cup at a time to incorporate, then add the cream.

Pintesting Chicken Gnocchi Soup - Add broth & heavy cream

And the chicken and simmer it for 20 minutes.

Pintesting Chicken Gnocchi Soup - Add Chicken

Then add the cooked gnocchi and spinach.

Pintesting Chicken Gnocchi Soup - Add spinach

This is what it looked like in the bowl topped with fresh grated Parmigiano Reggiano.


Pintesting Chicken Gnocchi Soup - Plated

And THIS is what it looked like with the garlic bread, salad, and Sangria. Happy Mother’s Day to me!

Chicken Gnocchi Soup - Supper Served

The taste was AMAZING! I completely agree with my work friends. The soup was creamy and rich, but not heavy. The gnocchi was light and almost creamy. It was so good that the handsome hubby had two and a half bowls.

The Pintesting Results:

Overall Results: 4.55 Pins

Pintesting Seal 5 Pins


Accuracy: Having never had the original soup, I’m basing this solely on Reenie’s recipe and her blog description. “It doesn’t matter if you’ve eaten this soup before or not. You’re bound to like it. It’s the kind of soup that hugs you from the inside out and the outside in.” The soup was restaurant quality, flavorful, and surprisingly easy to make. 5 Pins

Rated 5 Pins

Difficulty: This is a simple soup recipe, as stated above. The “worst” part, if you can call it that, was cooking the gnocchi in a separate pot. Many soup recipes have you to cook the pasta/noodles/rice/etc. in the soup. I have a feeling that due to the cream, it would have made the gnocchi heavy instead of fluffy. This would be a good recipe for a culinary novice. 4 PinsRated 4 Pins

Time: Reeni gave a prep time of 20 minutes and cook time of 45 minutes. My prep time was about 10 minutes, perhaps because I cooked the gnocchi while the rest was cooking, and I used a rotisserie chicken? Start to finish I made the soup in about 30-35 minutes. 4 Pins

Rated 4 Pins

Cost: The most expensive ingredient for this recipe was the rotisserie chicken, which I got in the cold deli section, at a cost of less than $6. I only used the breast meat, so figure about half of that. I already mentioned that I hit the savings jackpot on the gnocchi. The recipe made enough soup for supper plus a couple days of lunch leftovers. 4 Pins

Rated 4 Pins

Practicality: This is a delicious soup that’s hearty enough to serve for supper with a salad and bread (as I did), but light enough that it can be served as a soup course if you’re entertaining with a multi-course meal. It came together easily and didn’t require any special equipment or cooking skills, and you don’t have to run to the Olive Garden every time you get a craving. 5 Pins

Rated 5 Pins

***Just a note: I received no compensation from the Olive Garden or Target. All opinions are my own.***


Skinny Pina Colada Smoothie

May 18, 2014 by Anne Hernandez

Do you like Pina Coladas? Gettin’ caught in the rain? I love the song Escape. I always smile when I hear it. It makes me think of a wonderful vacation on a secluded, white sand beach. Of course there would be a delicious beverage with some fruit and a little umbrella as I’m walking on the beach, soaking up the sun with my handsome hubby.

It’s always the skinny version of me in these dreams. According to this Forbes article, a Pina Colada has 644 calories – YIKES! Pina Colada Smoothies come in at 600 calories for a 20-oz Smoothie King beverage (that’s 360 calories for 12 ounces). You can get a “skinny” version for 400 calories for a 20-oz Smoothie King beverages (that’s 240 calories for 12 ounces).

Skinny Pina Colada - Original Pin

I saw this pin for a Skinny Pina Colada Smoothie by Averie from her blog Averie Cooks. Her recipe came in at just under 200 calories for 12-oz. The song started playing in my head, and I needed to make one of these. Thankfully I had most of the ingredients on hand So after a quick trip to the store, I pulled out the blender that would render a delicious frozen concoction…wait, that’s the wrong song and drink. I want a Pina Colada… so let’s get on with the Pintesting!

I decided to go with coconut milk to get as authentic as possible. The banana was about a day away from being banana bread fodder, so the day before this test I peeled and froze it. I think that was helpful in keeping the smoothie texture. Maybe.

Skinny Pina Colada - Ingredients - Pintesting

Combine everything except the maraschino cherries in a blender.

Skinny Pina Colada - In the Blender - Pintesting


Blend until smooth.

Skinny Pina Colada - Blending - Pintesting


Pour into a glass and garnish with the cherries.

Skinny Pina Colada - Done - Pintesting


The only thing missing from this recipe was the beach, steel drum music playing in the background, and a paper umbrella in my drink. I didn’t have any toothpicks or little umbrellas on hand , so my cherry sunk to the bottom floated prettily on top (when balancing on the sinking cherry).

So here’s the Pintesting Results:

Overall Results: 5 Pins

5 Pins Overall

Accuracy: The smoothie had the nice consistency of a smoothie; thick but not too thick so that it could still pass through a straw. The pineapple and banana blended smoothly. I used flaked coconut so there was still a bit of the texture there; it’s what I would have expected. The smoothie was sweet enough without being not too sweet. It had the tropical pina colada flavor with the pineapple and coconut without the mega calories that usually accompany the beverage… and it was yummy without guilt. 5 Pins

Rated 5 Pins

Difficulty: By using the canned pineapple, this recipe was a matter of dumping everything into the blender and run until smooth. It doesn’t get much easier than that. 5 Pins

Rated 5 Pins

Time: From start to finish (including running some soapy water through the blender to make clean-up easy) was 8 minutes. 5 Pins

Rated 5 Pins

Cost: I had most of the ingredients on hand, but went to pick up some coconut milk for this ($3.85). I figured I might as well get the whole effect and bought the maraschino cherries, too. The total cost (using canned pineapple, since fresh is more expensive) was ~$3.00 on the outside (including the splash of rum that I added). The local Smoothie King Skinny Pina Colada Smoothie was $4.87 with tax for a 20-oz. – $2.92 adjusted for 12-oz. – and they didn’t offer rum. The cost is pretty spot on, but because coconut milk and agave aren’t found in the average household, 4 Pins.

Rated 4 Pins

Practicality: This would be a yummy breakfast (sans the rum), or a healthy twist on a cocktail (with the rum). It took only minutes to make, and I didn’t have to drive anywhere to pick one up. 5 Pins

Rated 5 Pins

Salad Swag: 3 Cures for the Common Salad

Apr 29, 2014 by Anne Hernandez

Bringing your lunch to work is a great way to save money and eat healthy. If the thought of taking your own lunch brings images of bologna sandwiches, bruised fruit, and pre-packaged “pastry” – think again! Bento lunches are all the rage. Sandwiches, wraps, and flatbreads have had healthy and delicious overhauls. Even packaging has improved, allowing for more and better options.

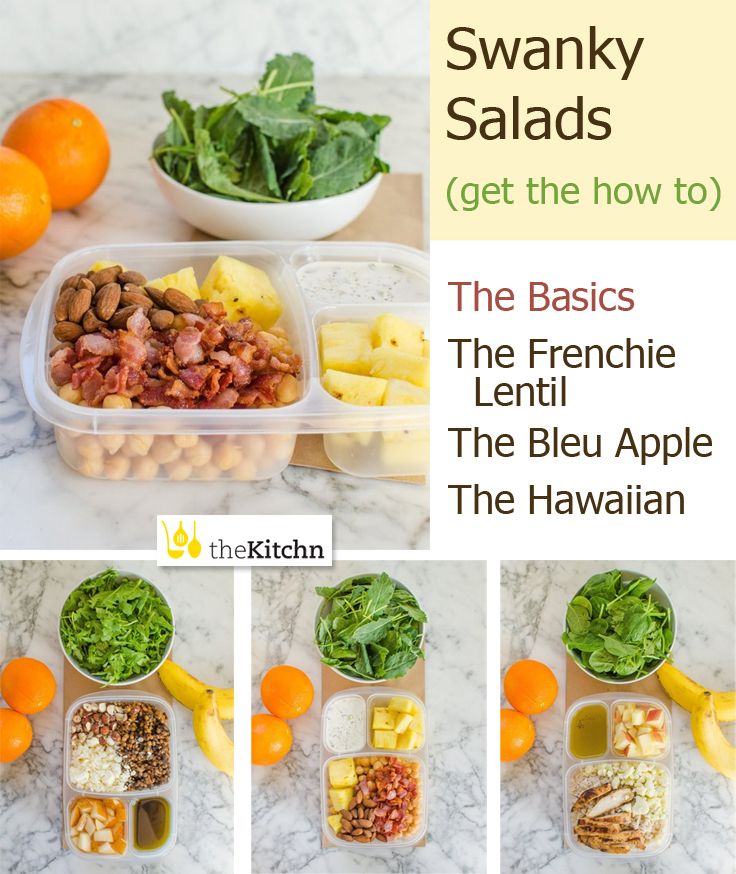
When I saw this pin for Salad Swag: 3 Cures for the Common Salad from the folks at The Kitchn, I knew this would be a great lunch test.

Salad Swag - Original Pin

The Pin linked via Kelly’s blog and site, It’s not Just Lunch. If you need some ideas for lunches and packaging, Kelly is a FANTASTIC resource. Her blog has lots of recipes and ideas, as does her cookbook, and she has links for not only her own lunch packaging system (can you say successful “momtrepreneur”?) but also other bento and lunch ideas.

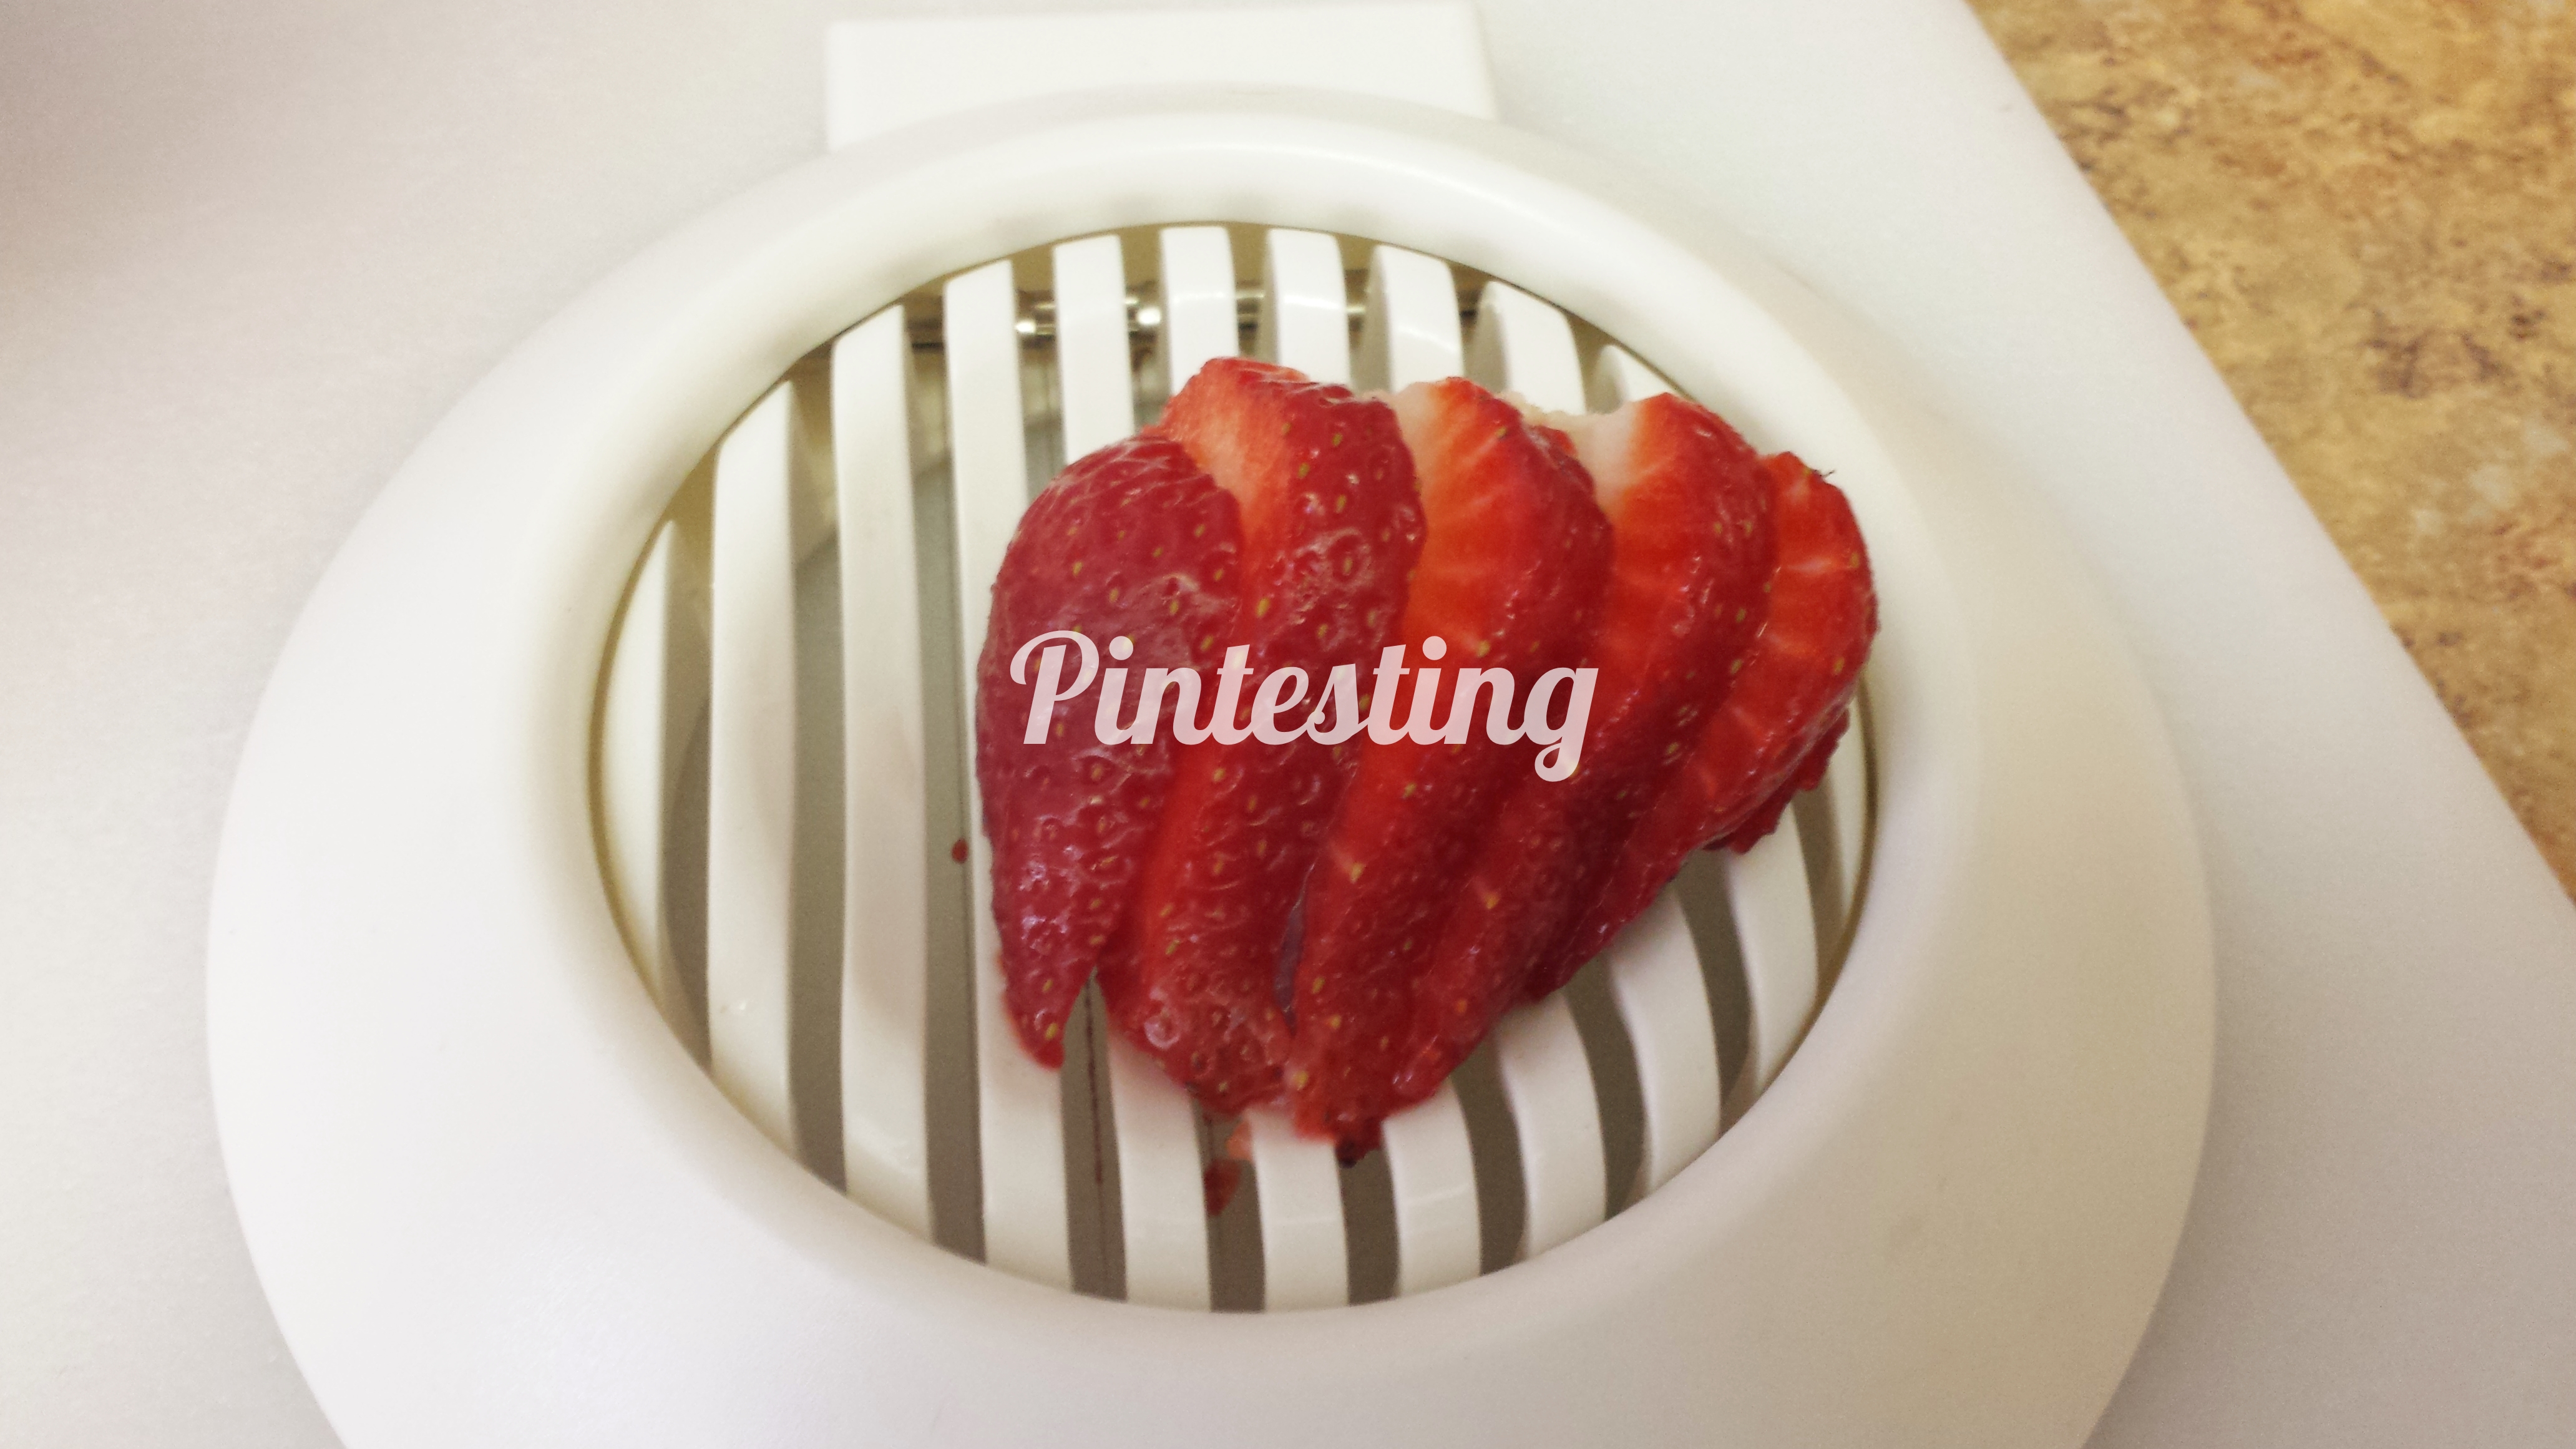
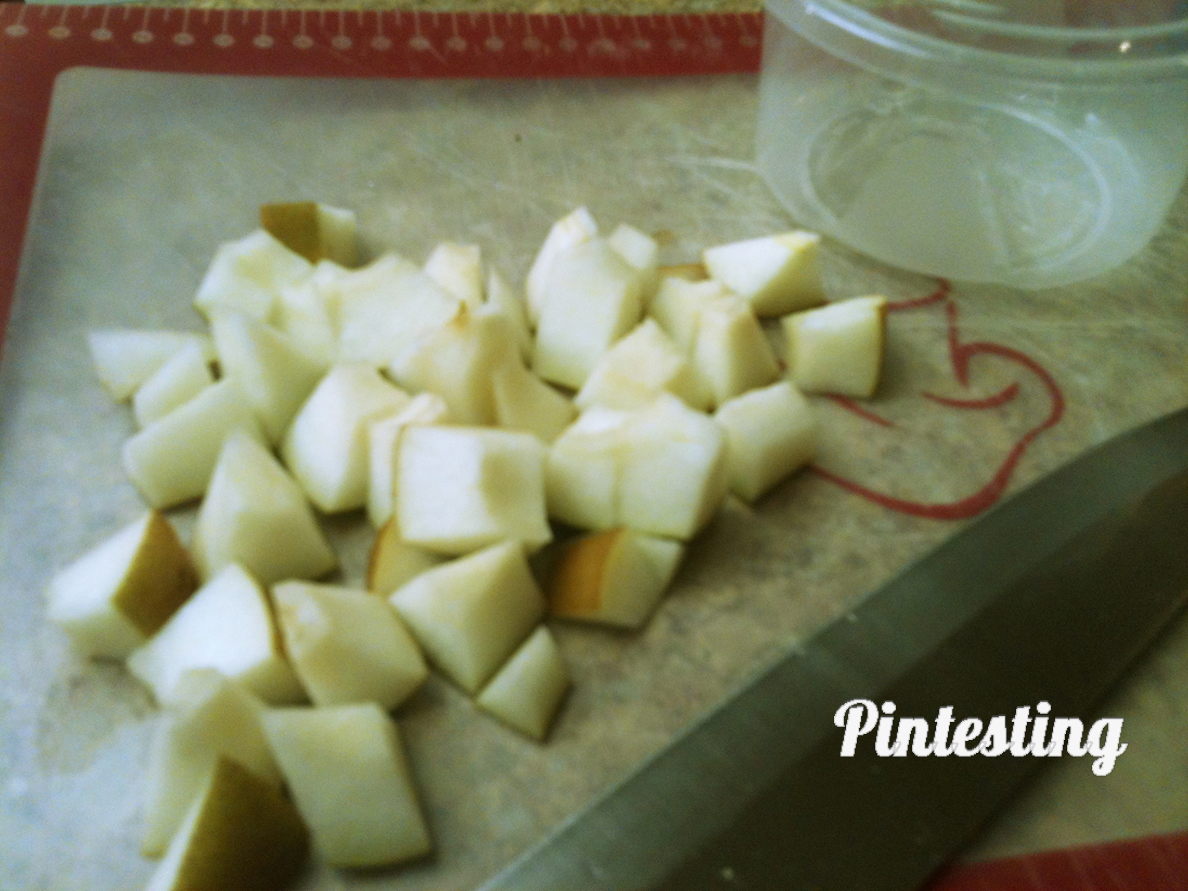
BONUS TEST: Two of the salads call for chopped fresh fruit (pear and apple). Since I like my job, and they frown upon bringing a knife to work, I went with the tip given for keeping the fruit from turning brown; store it in a bit of water.

I chopped the fruit (pear pictured).

Salad Swag - Cut Pear - Pintesting

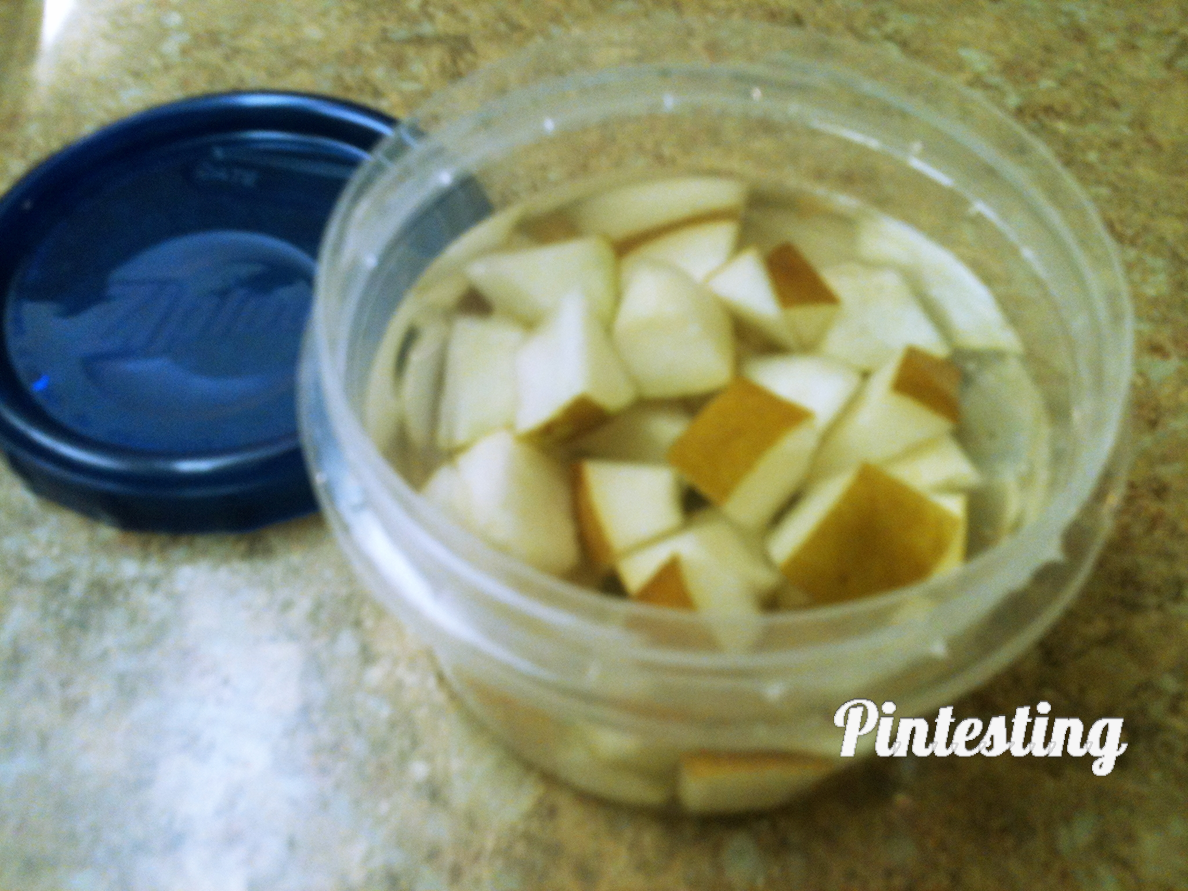
…Put it in a small container, and covered with water.

Salad Swag - Cover with Water - Pintesting

This was a good way to keep the fruit from turning brown, and it did not turn mushy.

Salad Swag - Keep from browning - Pintesting

The only down side is that it’s a bit awkward to drain if using a single-unit container like in The Frenchie Lentil. It was a lot easier draining the apples in the lunch system I used for The Bleu Apple. Read on to see the details.

Back to salads – three of them! Rather than post a pile of ingredients for all three salads, I’ll show each one individually.

NOTE: none of these recipes have measurements, so I eyeballed the pictures and went for a rough estimate.
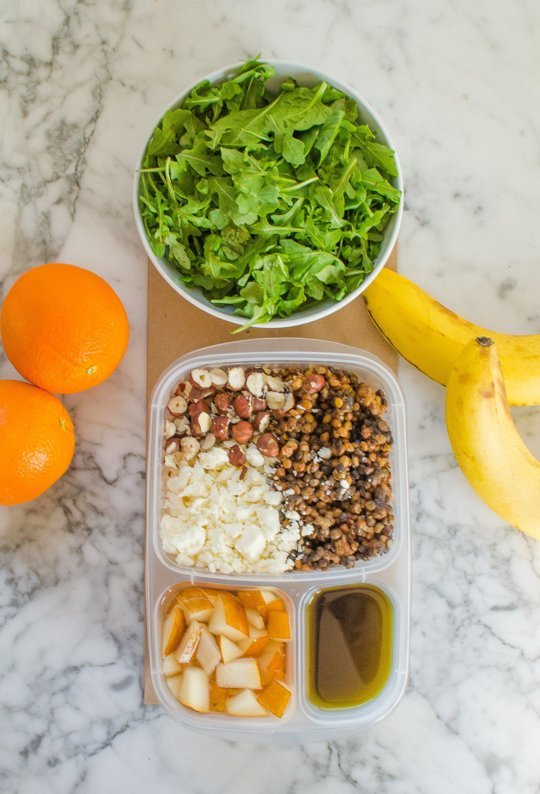
* THE FRENCHIE LENTIL

This salad calls for cooked lentils, rough chopped hazelnuts, chopped fresh pear, crumbled feta, arugula, and balsamic vinaigrette.

Salad Swag - The Frenchie Lentil - Original

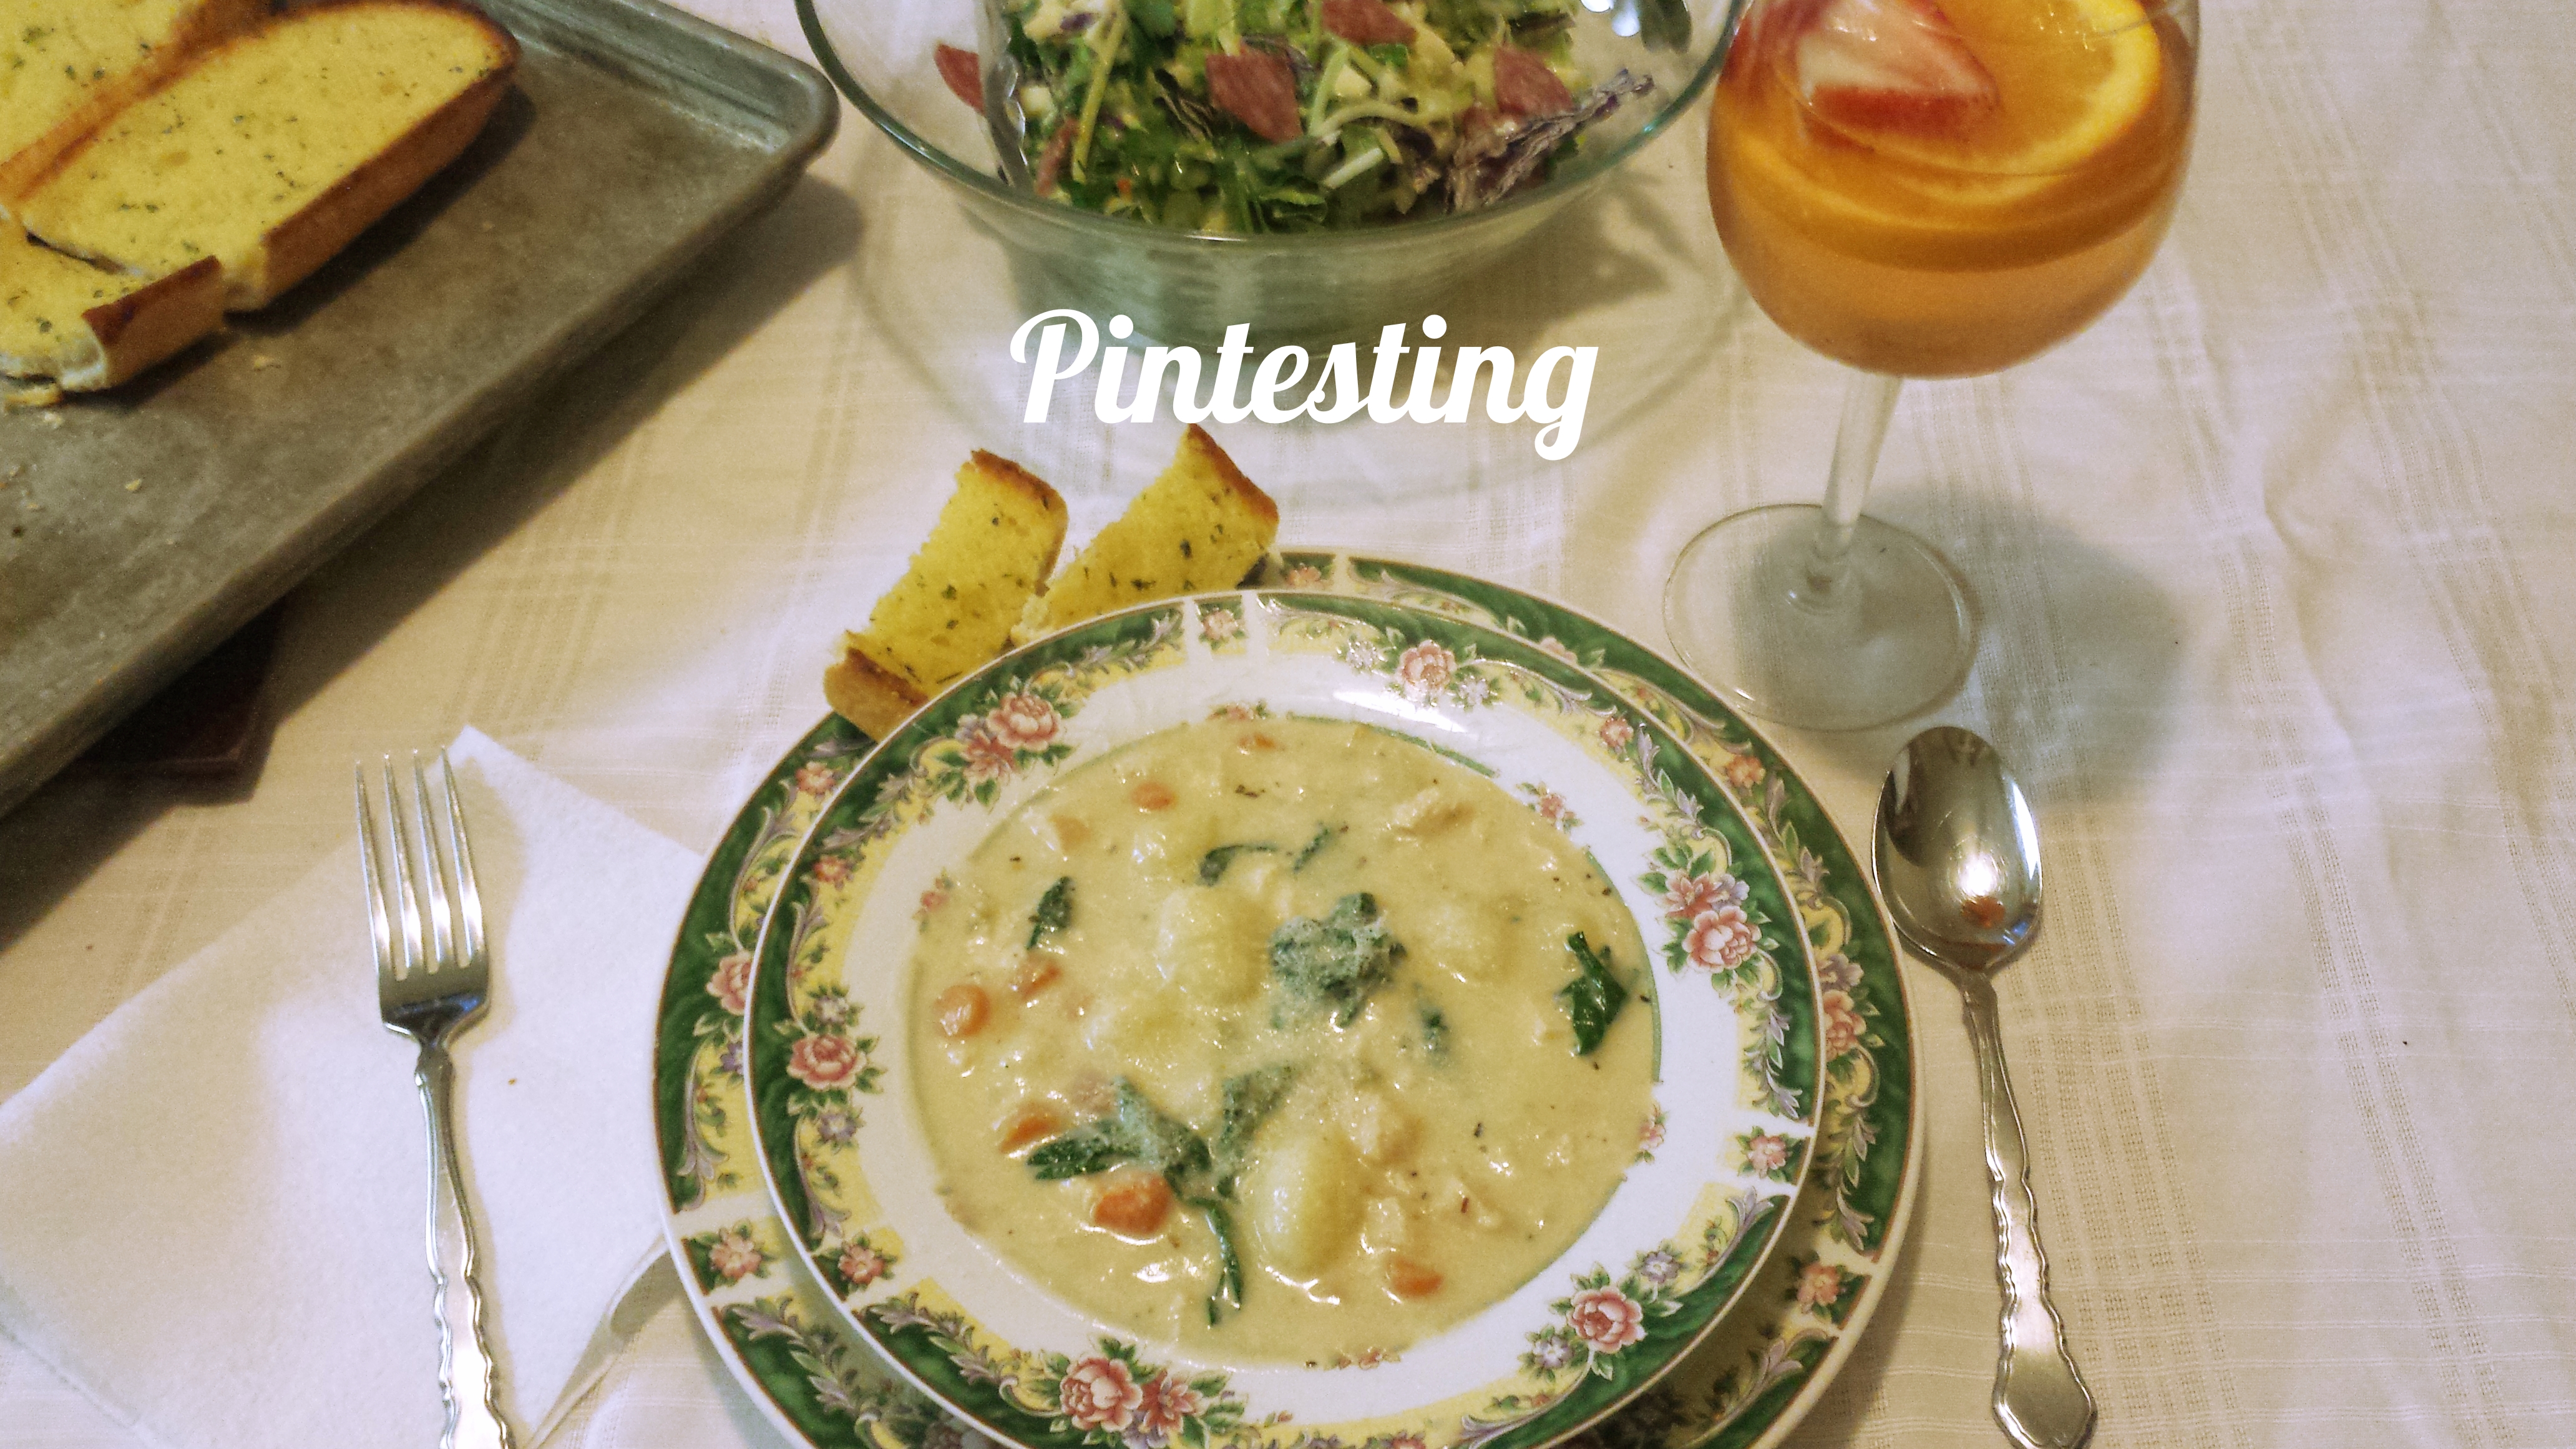
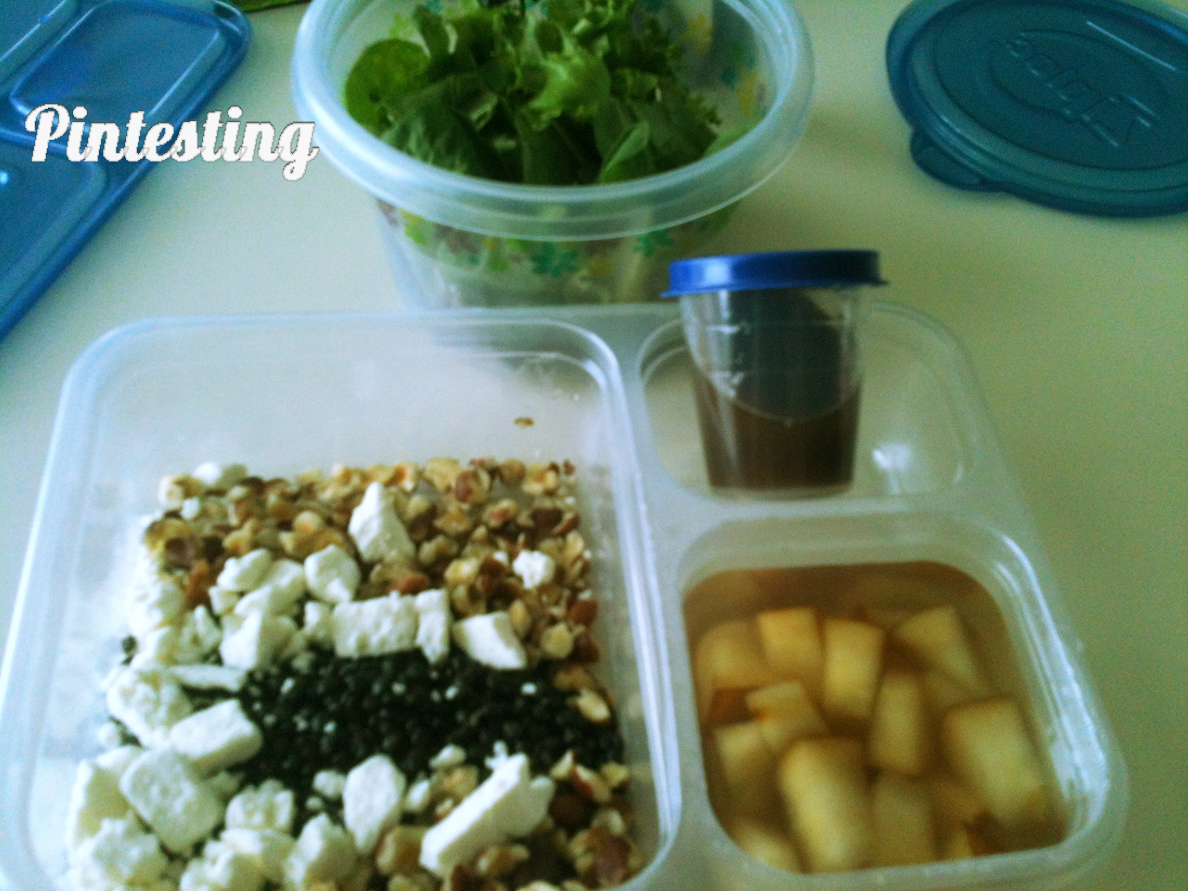
I took my pictures at the lunch table at work.

Salad Swag - The Frenchie Lentil - Pintesting

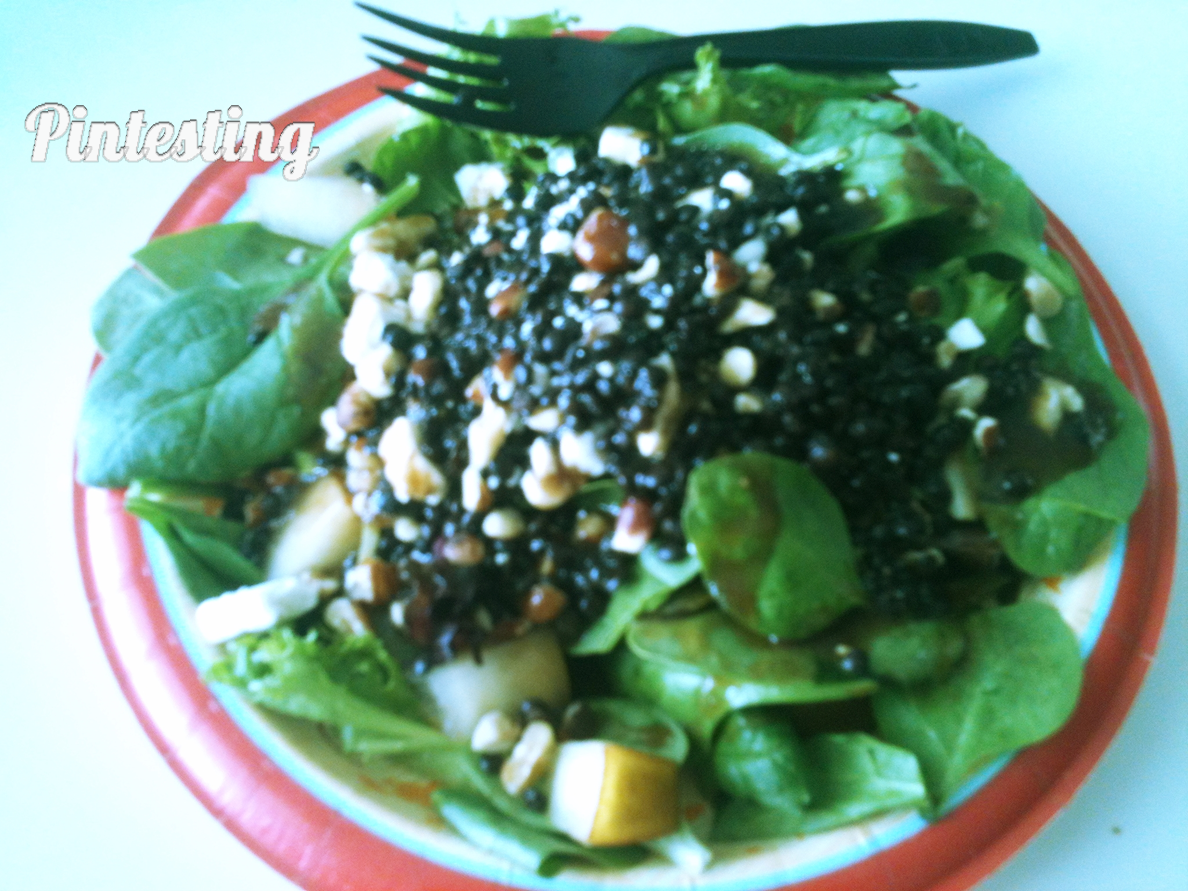
Although the photo isn’t as fancy, the plated product looked nice and tasted nicer. You can also see how draining the pears would be more difficult with a single-unit container. I also put the dressing in a separate container to make it easier to pour on the salad and make clean-up a bit easier.

Salad Swag - The Frenchie Lentil Served - Pintesting

I would not have thought of putting lentils in a salad, but I’m glad that The Kitchn did. They added a heartiness and meatless protein. The nuts gave a nice texture contrast and added to the protein, keeping me full all afternoon. The pears added a hint of sweet which played nicely against the saltiness of the feta. A filling and delicious salad that was perfect for lunch.
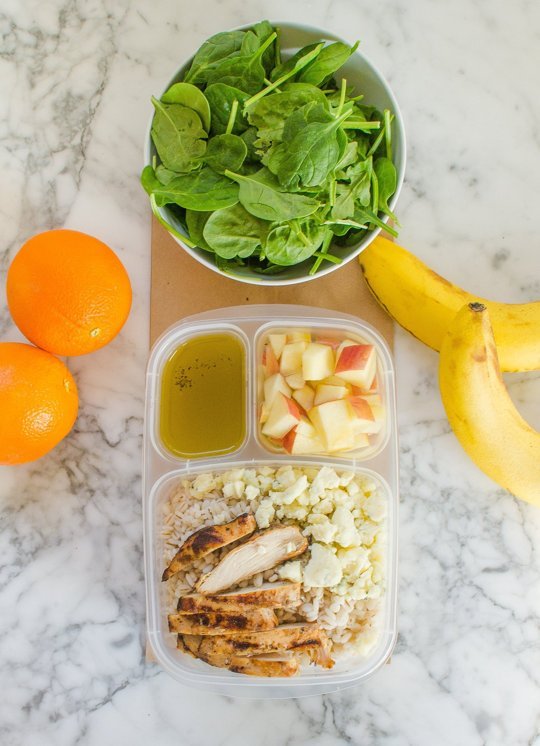
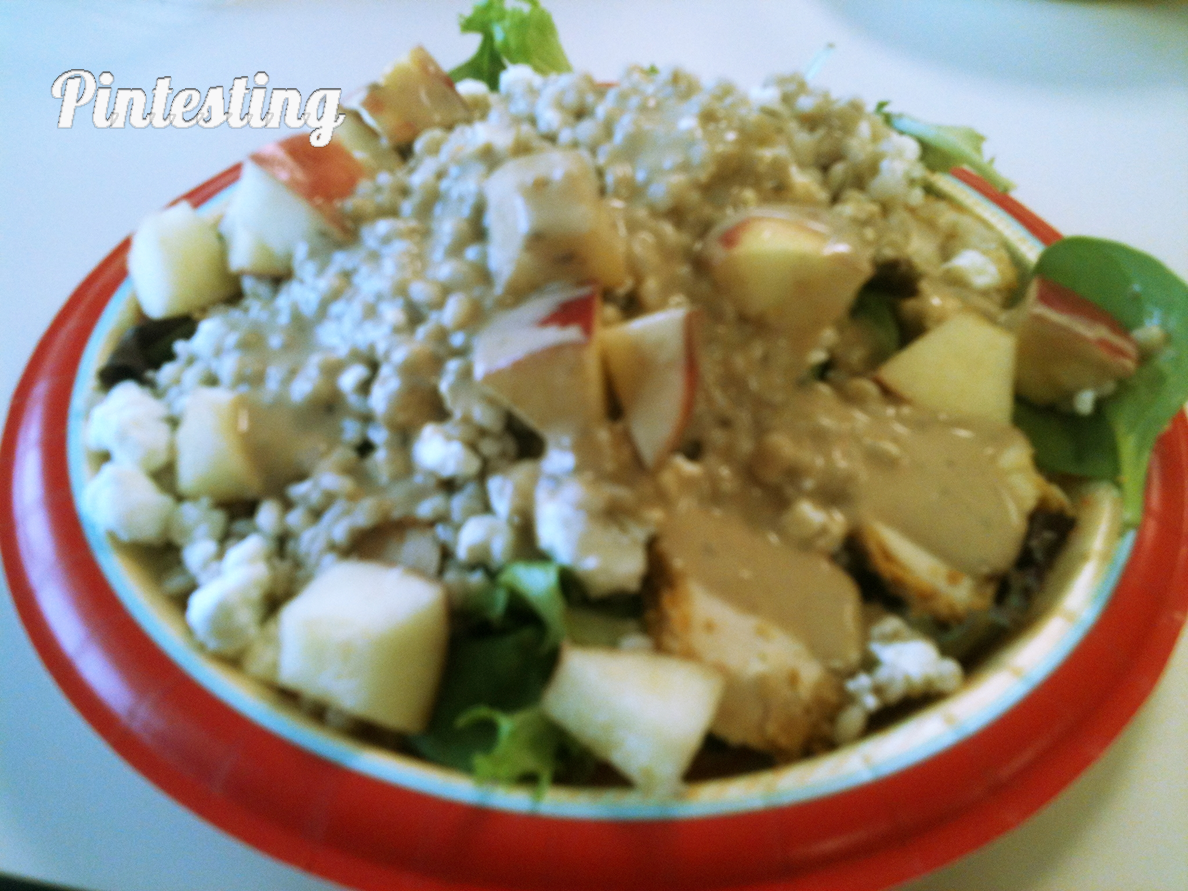
* THE BLEU APPLE

This salad calls for chopped apple, bleu cheese crumbles, cooked and cooled pearl barley, chicken breast, baby spinach, and lemon vinaigrette.

Salad Swag - The Bleu Apple - Original

I made a couple of changes – some accidental – with my lunch. I used leftover shake and bake chicken breast on my salad (rather than get another pan dirty at 0-dark-thirty in the morning). When I picked up the bleu cheese at the store, I accidently grabbed crumbled goat cheese and didn’t notice until I was packing the lunch. Goat cheese it is. Finally, when I went to make the vinaigrette, my lemons were bad. *sigh* Creamy balsamic vinaigrette.

Salad Swag - The Bleu Apple - Pintesting

On this day I used the Rubbermaid Lunch Blox Sandwich Kit. This lunch system comes with four containers and an ice-pack cooler that all snap together whichs keep things from falling all over my lunch bag and organized. Because the containers are all separate, it made draining the apples much easier and the dressing had it’s own container, too. The one “side” container that you don’t see held a small piece of leftover cake. Since it’s not part of the recipe I left it out of the picture.

Salad Swag - The Bleu Apple Served - Pintesting

The combination was still fantastic. The apple was crisp and sweet (but not too much so). The goat cheese was creamy and added a nice tanginess. The pearl barley was chewy and hearty – a nice addition to a salad. The chicken was, well, chickeny. The creamy balsamic dressing tied everything together very nicely. It was another great lunch.
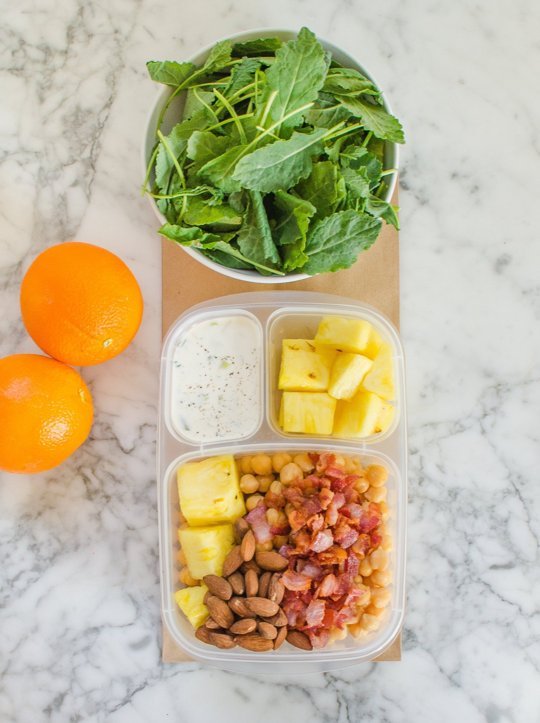
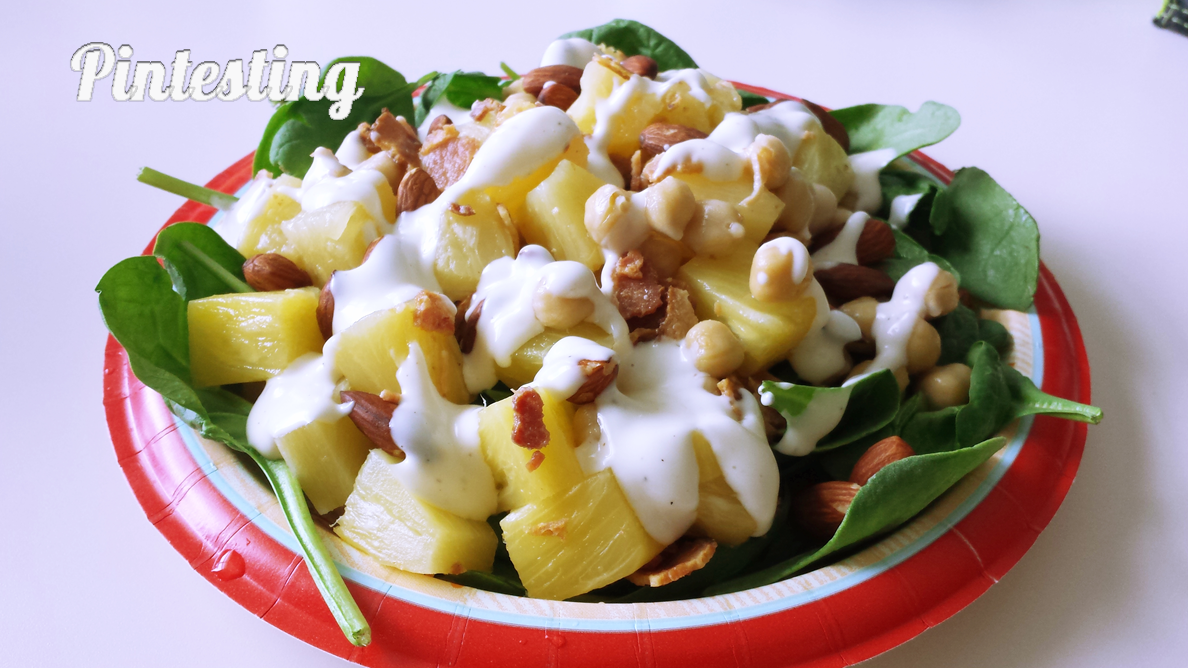
* THE HAWAIIAN

This salad calls for pineapple, almonds, bacon, chickpeas, baby kale, and ranch dressing.

Salad Swag - The Hawaiian - Original


I used canned chickpeas, drained and rinsed, and substituted the rest of the bag of baby spinach. Waste not, want not.

Salad Swag - The Hawaiian - Pintesting

This was the hardest to get to lunch, because the bacon kept disappearing. I have no idea how it happened. Let’s just say I’m thankful my salad got some.

Salad Swag - The Hawaiian Served - Pintesting


Once again, this salad played a symphony of tastes. The sweet, juicy pineapple was a lovely contrast to the crispy, salty bacon. The chickpeas were creamy in contrast to the crunchy almonds. And the coolness of the ranch dressing brought it all home.

Each one of these salads was delicious, filling, and anything but boring. I had enough leftovers of ingredients to make The Frenchie Lentil again for lunch, and even made The Bleu Apple for a light late supper for two.

Now for the Pintesting Results:

Overall Rating: 5 Pins

5 Pins Overall

Accuracy: All three of the salads were extremely flavorful and filling. There were no measurements given, which nearly brought it down to 4 pins, but I like that you can modify the salad to your own tastes. Even though I had a few substitutions of my own, everything was delicious. 5 Pins

Rated 5 Pins

Difficulty: Some of the salads required a bit of prep work such as cooking and cooling lentils, pearl barley, or chicken, chopping fruit or nuts, etc. Not as easy as opening a salad kit, but definitely not hard. 4 Pins

Rated 4 Pins

Time: Each salad requires something with a cooking time of 20-30 minutes; lentils, pearl barley, or bacon. The chicken breast can be cooked on a George Foreman Grill in about 10 minutes. The rest is quick work. 4 Pins

Rated 4 Pins

Cost: These are restaurant quality salads that you would cost about $10 in most moderately priced chain restaurants. Each salad had a variety of ingredients, but most would make more than one salad. The Bleu Apple was the most expensive salad due to the chicken; roughly $4.50. The Frencie Lentil and Hawaiian both came in at $4.00 each. That’s what you’d pay for a Mc Fast Food lunch, only you’re getting a healthy, nutritious and delicious lunch that won’t make you feel guilty. 4 Pins

Rated 4 Pins

Practicality: These salads are easy to make ahead and have ready for the week. They’re a cost effective way to bring your lunch that’s anything but boring. 5 Pins

Rated 5 Pins


Slow Cooker Beef and Broccoli

Apr 25, 2014 by Anne Hernandez

I love our neighborhood Chinese take out place for a quick dinner that doesn’t make me feel completely guilty for not cooking. One of our family favorites is Beef and Broccoli. It’s got broccoli, therefore it must be healthy.

Sure, that’s my story and I’m sticking to it.

When I saw this pin by Damn Delicious for Beef and Broccoli in the slow cooker my first reaction was skeptical at best. Beef and Broccoli is a stir fry… but then I read Chung-Ah’s post and recipe in detail and it sounded extremely plausible. Why not? Definitely worth giving a test. To the wok crock pot!

Slow Cooker Beef and Broccoli - Original Pin

The Pintesting:

The ingredients were easy to find at my local grocer. (There’s also brown sugar that didn’t make it into the picture, but did make it into the dish.)

Pintesting Slow Cooker Beef and Broccoli

Trim and thinly slice the meat, and put in the crock pot.

NOTE: The recipe called for 2 lbs of chuck roast. By the time I trimmed it to my liking, I had 1 1/2 pounds left. There was still a LOT of meat.

Pintesting Slow Cooker Beef and Broccoli

Make the sauce together.

Pintesting Slow Cooker Beef and Broccoli

Toss the meat with sauce and cook for 90 minutes. Crock pot cooking usually takes a minimum of 4-6 hours and up to 10-12 hours, depending on the recipe. I was a little concerned that this wouldn’t be long enough, but…

Pintesting Slow Cooker Beef and Broccoli

This is what the meat looked like after cooking for 90 minutes. Oh, and I forgot to mention how amazing the sauce smelled.

Pintesting Slow Cooker Beef and Broccoli

Add the broccoli and cornstarch slurry (to thicken the sauce).

Pintesting Slow Cooker Beef and Broccoli

Cook for another 30 minutes.

Pintesting Slow Cooker Beef and Broccoli

Serve w/ rice – OMG!!!

My handsome husband said that this was better than the take-out place, and that’s saying a lot. The meat was unbelievably tender and flavorful and the sauce was perfect. The broccoli was fully cooked but not mushy. We both also like that we knew exactly what is in our food – no mystery ingredients.

The Pintesting Results:

Overall Rating: 4.55 Pins

Pintesting Seal 5 Pins

Accuracy: This recipe really captures the flavor of take-out Beef and Broccoli made at home. Using the slow cooker was a brilliant idea on Chung-Ah’s part. The beef was very tender, but not to the point of shredding, the sauce was fantastic, and the broccoli was completely done without being mush. (I don’t like mushy veggies.) 5 PinsRated 5 Pins

Difficulty: The hardest part of this recipe was trimming the roast. I have a tendency to go a bit overboard with that, and since the cooking time (2 hours total) isn’t the normal 6-8 hours in a slow cooker, I didn’t want to have hunks of fat or stringy meat. You don’t have to go to the same lengths of trimming – Chung-Ah didn’t mention it in her recipe. The rest was super simple; whisk together the sauce, toss in the broccoli and cornstarch slurry. Easy Peasy. 5 Pins

Rated 5 Pins

Time: Because this is a slow cooker recipe, I look at it with a bit of a curve. The prep time was roughly 10-15 minutes – mostly because of my obsessive trimming of the roast. Still, not bad. Since the crock pot did the rest without my assistance (just the add-ins after 90 minutes), this gets 4 Pins.

Rated 4 Pins

Cost: The Roast was the most expensive part of the meal, but I was fortunate to get it on sale for about $7. The broccoli was also on sale. I did have to purchase a lot of the sauce ingredients for the 1st time, but even so this will make a LOT of Beef and Broccoli before you run out. The total cost was less than two orders of take-out, it makes 4 servings, and you’ll be able to re-use lots of the ingredients. But because most kitchens might not have the sauce ingredients as a staple, I’m giving this 3 Pins.

Rated 3 Pins

Practicality: If you need a quick fix for Beef and Broccoli take-out, hit up your local restaurant. If you want amazing flavor and are willing to wait 2 hours with minimal work, then this is a great way to go. I like that I know what’s in it, how it makes the house smell amazing, and the “yum” noises of approval. It’s a great recipe to throw into the crock pot before soccer or piano or shopping. I also like that my kitchen isn’t covered in splattered grease from stir frying. 5 Pins

Rated 5 Pins

Grilled Cheese Cook-off/Grill-off/Throwdown

Apr 13, 2014 by Anne Hernandez

It’s National Grilled Cheese Day! My personal humble opinion is that a grilled cheese sandwich is comfort food at it’s finest – especially when accompanied with tomato soup. Grilled Cheese + Tomato Soup = Happy Anne!

So when my handsome hubby showed me this article this morning, I KNEW what I’d be having for lunch today. (The things I do for this blog.) Unfortunately the article wasn’t pinnable (is that a word now?), so I had to find a similar one to make things official. This is PINtesting, after all. Thankfully, the folks at the Kitchn had already obliged and I found this pin on the topic.

Grilled Cheese Cook-off - Original Pin

The articles said that using mayo rather than butter would give the sandwich a nice crust, one described as french toast like, and also a nice tangy flavor that butter didn’t provide. These are the qualities that I’m looking for in this grill-off.

So with no further ado, on to the Pin Test!

Grilled Cheese Cook-off - Ingredients - Pintesting

This had a total of 4 ingredients; the cheese (Sharp American), the bread (whole wheat), butter and mayo.

Grilled Cheese Cook-off - The Cheese - Pintesting

I used 2 1/2 slices of cheese per sandwich. This keeps an even amount of cheese on the whole sandwich for better cheesey distribution.

Grilled Cheese Cook-off - Mayo vs. Butter - Pintesting

The sandwich on the left was spread with mayo, and the sandwich on the right was spread with butter. (Outside only for both sandwiches.)

Grilled Cheese Cook-off - First Side - Pintesting

I preheated the pan to medium-high so that it would be warmed, then reduced the temperature to medium before dropping the sandwiches in to grill.

Grilled Cheese Cook-off - Second Side - Pintesting

Each sandwich was dropped into the pan within 5 seconds of each other.

Grilled Cheese Cook-off - Grilled Mayo - Pintesting
Grilled Cheese Cook-off – Grilled Mayo
Grilled Cheese Cook-off - Grilled Butter - Pintesting
Grilled Cheese Cook-off – Grilled Butter

Each sandwich was flipped in the order in which they went in to keep the cooking time even; about 2-3 minutes on each side.

Grilled Cheese Cook-off - Grilled Cheese Sandwiches - Pintesting

The bread was toasted nicely for both sandwiches. There wasn’t a noticeable distinction between the butter or mayo “greased” sandwiches. Neither gave a crust like french toast. The cheese was evenly melted on both sandwiches, as well.

Grilled Cheese Cook-off - Grilled Cheese Taste Tested - Pintesting

The only discernable difference that I could tell was the taste. The buttered sandwich had the traditional grilled cheese taste that I’ve known since childhood. The mayo-ed sandwich had a bit of a tang; not overpowering, but definitely there.

Honestly, I don’t think either one had a huge advantage over the other. But if you ever run out of butter and HAVE to have a grilled cheese sandwich at that very moment and don’t want to run out to the store, now you have options.

So here are the official Pintesting results.

Overall Rating: 4 Pins

4 Pins Overall


Accuracy: Both articles gave promises of an unbelievable crust that would come with using mayo rather than butter, described as french toast like in one article, and also a tangy flavor. While I definitely got a nice tang with the mayo, the crust was not any different than the buttered sandwich. Because the crust was not elevated to heights of glory, this gets 4 Pins.

Rated 4 Pins

Difficulty: The method for making a grilled cheese sandwich with either spread is exactly the same. Since neither is difficult, 4 Pins.

Rated 4 Pins

Time: The total time to make either version is about 5 minutes from start to finish. 5 Pins

Rated 5 Pins

Cost: I had to run to the store to pick up the cheese, because we don’t normally buy any kind of American sliced cheese. However, I think it’s the best to use for a grilled cheese sandwich because of the superb meltability. It was on sale for less than $3.00 for the 16-slice package. Add the cost of 2 slices of bread and a schmear of butter or mayo (all of which were on hand) and you’re looking at about $1 per sandwich. 5 Pins

Rated 5 Pins

Practicality: I don’t know that I would go out of my way to grab mayo vs. butter for a grilled cheese sandwich unless I was making something more gourmet that would be accentuated by the tang that came with the mayo. Adding tomato and bacon might make it a better choice, for example. If you were out of butter, this is a helpful trick. Since this is such a toss-up I’m going right down the middle and giving it 3 Pins.

Rated 3 Pins