Category: Latin/Hispanic Cuisine

Puerto Rican Style Corned Beef

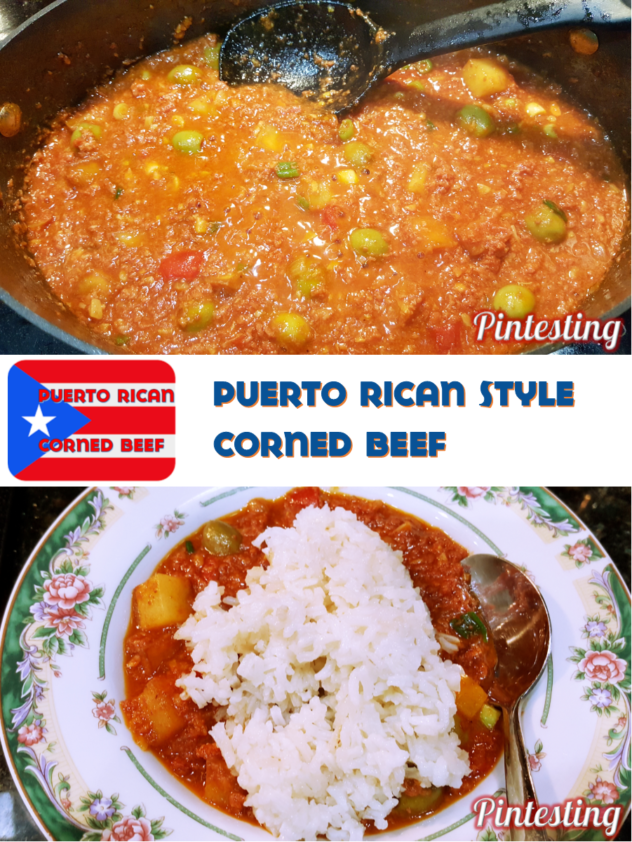
I’m an American with a melting pot in my personal gene pool; some of which is Puerto Rican thanks to my mom. My dad gave me a cool anglo mix of English, Irish, and German. This means I can cook and dance in all kinds of languages – just don’t ask me to speak them all. This year there have been a lot of hurricanes; two of which hit the Caribbean really hard, specifically Puerto Rico. I’m thankful that my family there is okay, so I wanted to do a post of one of my most favorite Puerto Rican comfort foods, Puerto Rican Style Corned Beef. It’s not anything like the Irish corned beef that is served with cabbage (which really isn’t all that Irish, but that’s for another Pintesting). This is more like a stew that is best served over rice. I always go to this pin for the recipe by Tammy of The Self Taught Cook.

Pintesting Puerto Rican Corned Beef

I will tell you up front that there is one addition that I make to the Puerto Rican Style Corned Beef which is how my family has always made it. We add olives. If you are familiar with Hispanic cooking then you could add alcaparrado; a mixture of pimento stuffed green olives and capers. I didn’t have any on hand, so olives it is.

NOTE: If you’re going to serve this with rice – as you should, start that first. That way everything will be ready to eat at the same time. I love it when a meal comes together perfectly.

The Pintesting:

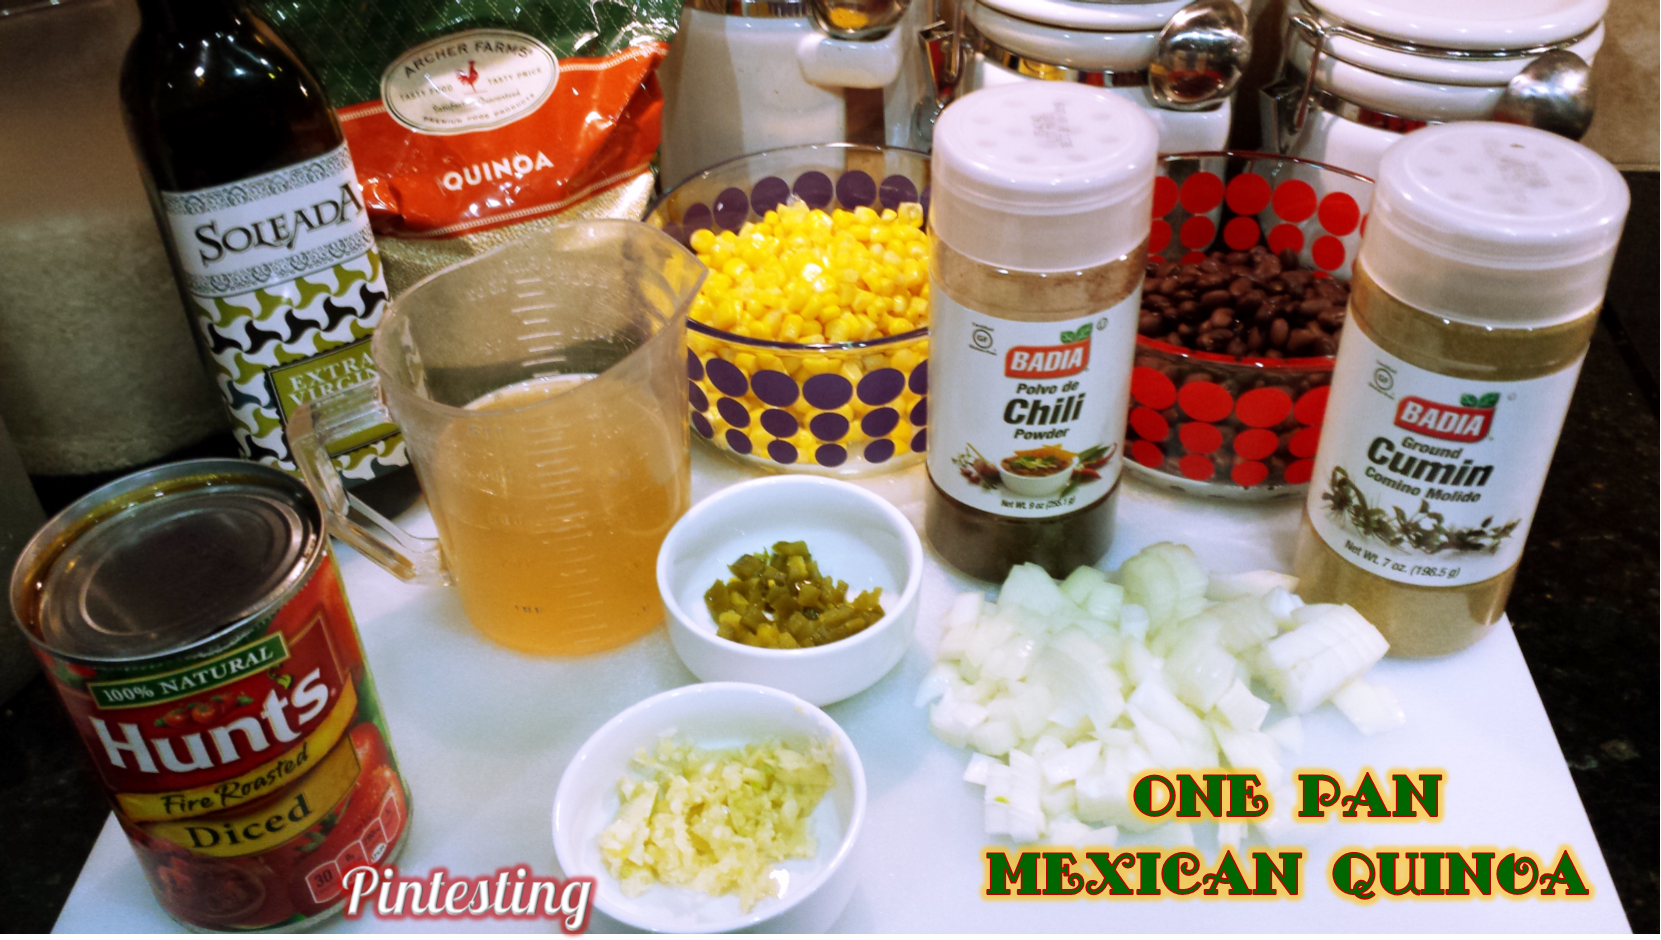
The Ingredients are easy enough to find in most grocery stores. Look in the ethnic aisle for Adobo (all-purpose seasoning salt) and Sazon (get the one with coriander & annatto). Any good chicken bouillon will do if you can’t find the one pictured below and don’t let the canned corned beef throw you. Stick with me on this.


Pintesting Puerto Rican Corned Beef

Heat the oil and fry the potato. Be careful to not splash the oil and burn yourself.

Pintesting Puerto Rican Corned Beef

Remove the potato to drain on paper towels and set aside.

Pintesting Puerto Rican Corned Beef

Add the white onion, red pepper, and garlic to the pan and saute until tender but not browned.

Pintesting Puerto Rican Corned Beef

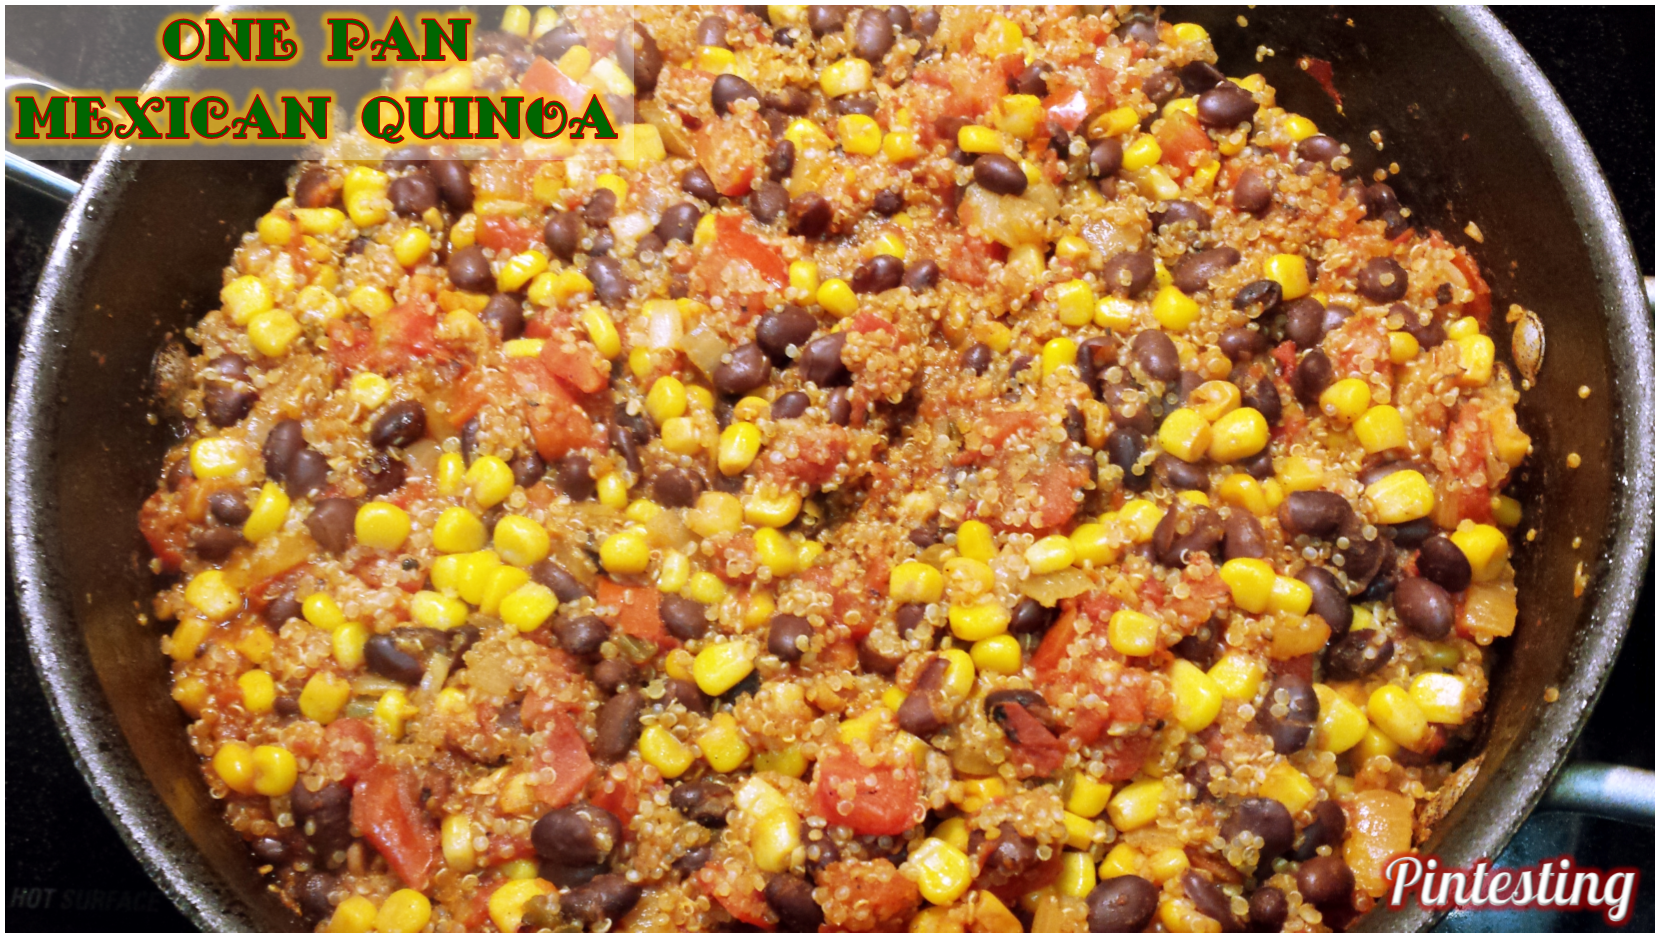
Add tomato sauce, seasonings, and broth.

Once it’s all simmering, add the canned corned beef. Break it up with your spoon as your stirring everything.

Pintesting Puerto Rican Corned Beef

This is when I add in the olives or alcaparrado.

Pintesting Puerto Rican Corned Beef

Let this simmer for about 15 minutes then add in the potato and green onions.

Pintesting Puerto Rican Corned Beef

Cook this for another 5 minutes or so to heat everything through.

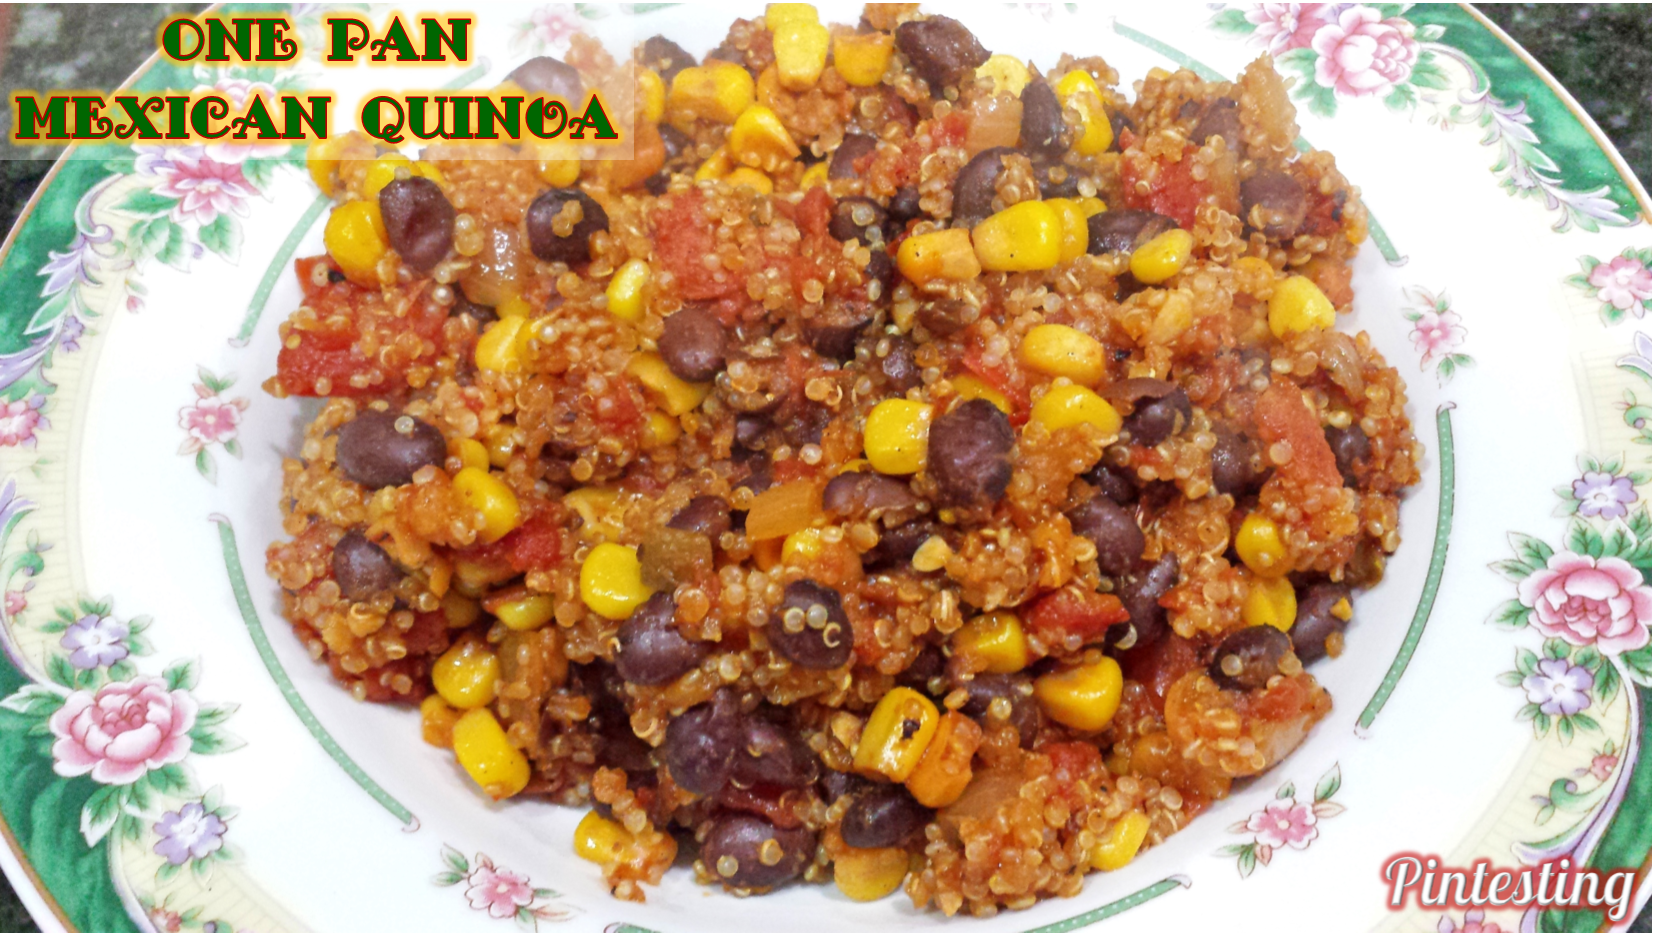
Your rice should be done now so dinner is ready to eat!

Pintesting Puerto Rican Corned Beef

This is the kind of comfort food that warms you on a cold day; the kind that can help soothe your heart when you’re worried about your loved ones after a hurricane. Comfort comes in many forms and mine comes from the kitchen – like soup when you’re sick.

Please continue to pray for all those who were affected by the 2017 hurricane season and help as you are able.

The Pintesting Results:

Overall Results: 4.85

Pintesting Seal 5 Pins

Accuracy:  This recipe is just like how I remember eating this as a child (if you add the olives). The taste and texture are perfect and it always comes out right. 5 Pins

Pintesting Rating - 5 Pins

Difficulty:  There is a bit of peeling and chopping in the prep work and the frying (and removal) of the potatoes could cause splattering if you’re not careful. 4 Pins

Pintesting Rating - 4 Pins

Time:  The prep work took about 7 minutes and the cook time was roughly 20 minutes. The total time – including the rice – was about half an hour. That’s a lot of flavor and comfort for a quick meal. 5 Pins

Pintesting Rating - 5 Pins

Cost:  Most of the ingredients are staples in my home. If you had to buy everything except the oil (which is in most kitchens), it would cost roughly $20 – less at a Hispanic store. Served with rice, this will feed 4-6 servings. . . unless your husband goes back for thirds. 5 Pins

Pintesting Rating - 5 Pins

Practicality:  This recipe comes together very easily and quickly. It’s perfect for a quick weeknight meal or you can add a salad and some tostones with garlic sauce to make a heartier Sunday supper. The leftovers, if you have any, are delicious the next day, too. 5 Pins

Pintesting Rating - 5 Pins

Mexican Grilled Corn

 I love grilling season and since I live in Florida that’s pretty much all year. It wasn’t always that way. I used to live up north in the frozen tundra of Michigan which has about 6 months of normal grilling season (unless you’re one of those die-hards who grills from your garage after you’re done snow blowing the driveway).  It’s also where I first tried the most amazingly flavorful take on corn on the cob known as Mexican Grilled Corn or Street Corn, or if you want to get real; Elote. I had always eaten corn on the cob with butter and salt; never like this. Recently I saw Mexican Grilled Streat Corn as an appetizer at a local Mexican restaurant and wanted to make it at home. I had pinned this pin for Mexican Grilled Corn by Veronica of The Vegetarian Ginger and was ready to try it.
Pintesting Mexican Grilled Corn
It’s time to do this Pintesting.

The Pintesting

The ingredients include grilled corn, spices, mayonnaise, and cheese.

Pintesting Mexican Grilled Corn
First, brush the corn with olive oil and season with salt and pepper. Then grill it until it’s done, turning it every few minutes so that it cooks evenly; for a total of about 10 minutes or so. My HH did this part since he’s our grillmaster.

Mayonnaise? Yes, mayo. If you’ve never tried this just trust me on this. It’s how this is done.

Pintesting Mexican Grilled Corn

Slather a good coat of mayonnaise on the corn like butter.

Pintesting Mexican Grilled Corn
 Coat the corn well so that the seasoning blend will stick.
Pintesting Mexican Grilled CornBlend the mixture of spices and then sprinkle all sides of the corn as liberally as you’d like. Don’t worry if it looks like a lot; the seasoning blend is more flavorful than spicy hot.
Pintesting Mexican Grilled Corn
 Finish by sprinkling all sides of the corn with the grated Parmesan cheese. Go ahead and coat it well.
Pintesting Mexican Grilled Corn
This is going to get all over your fingers – and you’re going to be very glad about that. This tastes so good! We were making all kinds of Mmm and Yum sounds while we ate.

The 2nd Pintesting:

I made this again within a week, except this time I used the more traditional Cotija cheese. It’s a Mexican hard crumbly cow’s milk cheese described as similar to both parmesan and feta. It crumbled easily onto the corn and I can see why it’s perfect for Elote.

Pintesting Mexican Grilled Corn

Notice the little shaker of the spice blend above the cotija? We liked the first Pintesting results so much that we mixed the blend ahead to use whenever we want to grill some Mexican Street Corn.

Pintesting Mexican Grilled Corn

This time I only got a picture of one because they disappeared as soon as I could make them. Something about hungry people wanting delicious food. My HH likes the Cotija cheese better – he says it’s creamier than the parmesan and he is not wrong.

A few notes on this Pintesting:
  • DON’T mix everything and then spread it on the corn. Read the recipe directions thoroughly and follow the steps or you’ll have an unpleasant mess.
  • DO let a grill master grill the corn for you while you assemble the remaining ingredients if you have someone else doing the grilling.
  • DO be as subtle or generous with the spice mixture and cheese as you’d like. I was moderate with the seasoning and heavier with the cheese.
  • DO use either the Parmesan or Cotija cheese – or even a mixture if you’d like. They’re both delicious. My HH likes the Cotija better – he says it’s creamier.
  • DO have a napkin ready but feel free to lick your fingers.

The Pintesting Results

Overall Results: 4.85 Pins
Pintesting Seal 5 Pins

Accuracy:  This recipe turned out just like the Veronica said that it would and it tasted just like the Mexican Grilled Street Corn that I remember from the street vendors. 5 Pins

Pintesting Rating - 5 Pins
Difficulty:  The directions were clear and easy to follow. Grill. Schmear. Blend. Sprinkle. Sprinkle. Eat. However, since there is open flame involved I’m giving this 4 Pins.
Pintesting Rating - 5 Pins
Time:  The total time for this was about 20 minutes including the corn shucking, grilling, and seasoning. It times out well if you’re grilling burgers, kabobs, steak, or anything else. 5 Pins
Pintesting Rating - 5 Pins
Cost:  Corn on the cob is very inexpensive in the summer. I got 5 ears of corn for $2. The mayonnaise and spices were already in my cupboard and are common to most kitchens as is grated parmesan. The total cost for Veronica’s recipe with parmesan was less than $3 or $0.60 per serving. The cotija cheese was $5.49 for a bag that will make at least 10 recipes so it has no impact on the price per serving. 5 Pins
Pintesting Rating - 5 Pins
Practicality:  We have already made this 3 times since the first Pintesting and I’m sure we’ll make it often. Whichever cheese option you choose, this is great to serve with Mexican food, grilled food, as an appetizer, and it’s vegetarian, too. The spice blend can be adjusted to suit your taste and can be applied as lightly or as generously as you’d like. 5 Pins
Pintesting Rating - 5 Pins

Cuban Guava Pastries – Pastelitos de Guayaba

Mar 19, 2017 by Anne Hernandez

Of the many reasons that I love living in Florida, the authentic quality and diversity of world cuisines is close to the top of my cultural list. You could eat food from every continent and most countries and only travel up to 20-30 minutes from home. Most places give a cultural feel with the music and décor as well. Some of my favorite places to go are Cuban restaurants. The music makes me want to dance, the people are so friendly, and the food is delicioso. A while back I brought in some assorted Cuban Guava Pastries – Pastelitos de Guayaba to share with my coworkers and I was the hero of the day. These are they pastries that I shared.

Pintesting Cuban Guava Pastries - Pastelitos de Guayaba

Pastelitos are puff pastries that are usually filled with guava or cheese or both. They flaky, lightly sweet, and perfect with a cup of good coffee in the morning or afternoon. When I saw this pin from My Big Fat Cuban Family, one of the blogs that I follow, I knew I had to try making these. Who doesn’t want to make something delicious and be the work hero twice?

Pintesting Cuban Guava Pastries - Pastelitos de Guayaba

The Pintesting:

There are only four ingredients. Some restaurants and pastelerias sprinkle course sugar after the egg wash or brush with a sweeter glaze, but I don’t like my pastries too sweet so this was perfect for me. The guava paste is found in most grocery stores in the ethnic aisle.

Pintesting Cuban Guava Pastries - Pastelitos de Guayaba

Line a baking sheet with parchment paper (or a Silpat). Unfold one of the puff pastries onto the parchment.

Slice the guava paste thinly and put two for each pastry. One box of (2) puff pastries will make 9 pastelitos.

Pintesting Cuban Guava Pastries - Pastelitos de Guayaba

Spread some of the softened cream cheese on the guava paste. Some places sweeten the cream cheese with a little sugar before putting it in the pastry. I find the guava paste very sweet and the plain cream cheese balances the overall flavor.

Pintesting Cuban Guava Pastries - Pastelitos de Guayaba

When all of the guava paste has cream cheese, unfold the other puff pastry and put it on top. Try to line it up with the bottom pastry.

Pintesting Cuban Guava Pastries - Pastelitos de Guayaba

Cut all the way through to make 9 little pastries, then make little cuts on each top pastry.

Pintesting Cuban Guava Pastries - Pastelitos de Guayaba

Egg wash the top of the pastries and then bake them until they’re golden brown and beautiful.

Pintesting Cuban Guava Pastries - Pastelitos de Guayaba

While the pastelitos are baking, do yourself a favor and make some Cuban coffee or café Cubano which is a lot like sweetened espresso. I prefer my coffee with milk (like a café latte), so I get café con leche. (Look how much authentic culture I’m putting into this post.)

Pintesting Cuban Guava Pastries - Pastelitos de Guayaba

That’s it! You can serve these warm or at room temperature. I was pleasantly surprised at how 4 ingredients could make such a tasty treat. And yes, I was the work hero again for bringing these in. These are so easy to whip up that you can be a hero and bring delicious culture to your friends and family, too.

Pintesting Cuban Guava Pastries - Pastelitos de Guayaba


The Pintesting Results:

Overall Results: 5 Pins

Pintesting Seal 5 Pins

Accuracy: These not only turned out just like the recipe (and video tutorial) said they would, but they also tasted like the ones that I bought at the Cuban restaurant. Everyone at work raved over them. 5 Pins

Pintesting Rating - 5 Pins

Difficulty: With only four ingredients and no mixing, chopping, or serious prep work, this recipe is very kid friendly with adult supervision. I just recommend that an adult does the cutting to separate the pastelitos. 5 Pins

Pintesting Rating - 5 Pins

Time: The preparation took about 7 minutes and my baking time was 25 minutes. The total time was about half an hour so I’m giving this 5 Pins.

Pintesting Rating - 5 Pins

Cost: The puff pastry was about $3.00 and the guava paste was just over $1.00. The total cost for 9 pastries was less than three pastries from the restaurant. 5 Pins

Pintesting Rating - 5 Pins

Practicality:  This is one of those recipes that you can keep the ingredients on hand and whip up at a moment’s notice. They’re quick, easy, and oh so delicious. 5 Pins

Pintesting Rating - 5 Pins

One Pan Mexican Quinoa

There seems to be a new obsession with short food videos on social media, especially Facebook. Videos made by Tasty, Buzzfeed, and Tip Hero are bringing food porn to a whole new level.

We like and share them thinking, “What a great idea. I need to try this,” but rarely follow through and make it.

Then I saw this pin for  One Pan Mexican Quinoa also make it onto my Pinterest feed, and I knew it was time to put it to the test. Here’s the video.

https://youtu.be/N6f8vlCw-uk

This recipe video is by Tip Hero, but they gave the inspiration credit to Chungah of Damn Delicious. I’ve tested her Egg Salad BLTA Sandwich and Slow Cooker Beef and Broccoli and both got great results. This made me more confident in the probability of success.

The Pintesting:

The ingredients are straight forward and easy to find.

Pintesting One Pan Mexican Quinoa

Sauté the aromatics, then add the beans, corn, and tomatoes.

Pintesting One Pan Mexican Quinoa

Then add the quinoa, seasonings, and broth.

Pintesting One Pan Mexican Quinoa

Cover and cook for 20 minutes and it’s done.

Pintesting One Pan Mexican Quinoa

This was going to be served with diced avocado as the recipe suggested, but the one we got was over-ripe so we had to throw it out. Here’s how it looked without any toppings.

Pintesting One Pan Mexican Quinoa

This has a bonus of being super healthy without trying hard. Don’t be scared to try it even though it’s vegan, gluten-free, and dairy-free. It’s also versatile. You can change or add more veggies, switch the broths, play with toppings; make it your own.

Pintesting One Pan Mexican Quinoa - Pinterest picture with the original post picture and Pintesting's updated picture

The Results:

OVERALL RESULTS: 4.85 Pins

Pintesting - 5 Pins Overall Rating

Accuracy:  This recipe was as delicious, easy, and fast as the video showed. 5 Pins.

Pintesting Rating - 5 Pins

Difficulty:  This is an easy recipe with little cutting/chopping. Using canned beans and veggies really simplified things. However, using jalapenos or other hot peppers requires caution as the juices can cause burning to your skin or eyes. Many sources say to always wear rubber gloves when seeding and chopping hot peppers. Because of this, I’m giving it 4 Pins.

***UPDATE: 07/28/2017*** I substituted a small can of green chilies instead of the jalapeno (because it’s what I had on hand) and it turned out great. choose your preferred heat level and just add it in with the tomatoes. EASY!

Pintesting Rating - 4 Pins

Time:  This took less than 30 minutes from start to finish. It required minimal prep work, and most of the time was just for simmering. 5 Pins

Pintesting Rating - 5 Pins

Cost:  Most of the ingredients are less than a dollar. At $9.50 for 30-oz, the quinoa was the most expensive ingredient, but I only needed 3 out of 29 quarter-cup servings, and that’s less than a dollar for the quinoa. Total cost was less than $2/serving. 5 Pins

Pintesting Rating - 5 Pins

Practicality:  When I served this, HH ate two bites and gave it a thumbs up. He ate two more bites and gave it two thumbs up. This is fast, easy, healthy and delicious. It’s a perfect dinner for busy weeknights. 5 PinsPintesting Rating - 5 Pins