Category: Entrée

One Pan Mexican Quinoa

There seems to be a new obsession with short food videos on social media, especially Facebook. Videos made by Tasty, Buzzfeed, and Tip Hero are bringing food porn to a whole new level.

We like and share them thinking, “What a great idea. I need to try this,” but rarely follow through and make it.

Then I saw this pin for  One Pan Mexican Quinoa also make it onto my Pinterest feed, and I knew it was time to put it to the test. Here’s the video.

https://youtu.be/N6f8vlCw-uk

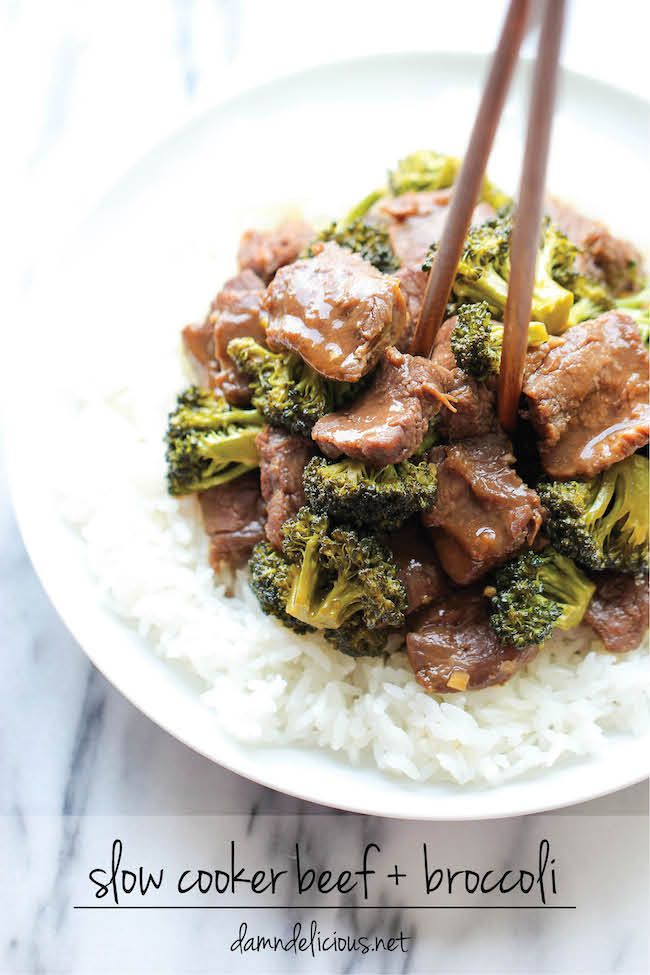
This recipe video is by Tip Hero, but they gave the inspiration credit to Chungah of Damn Delicious. I’ve tested her Egg Salad BLTA Sandwich and Slow Cooker Beef and Broccoli and both got great results. This made me more confident in the probability of success.

The Pintesting:

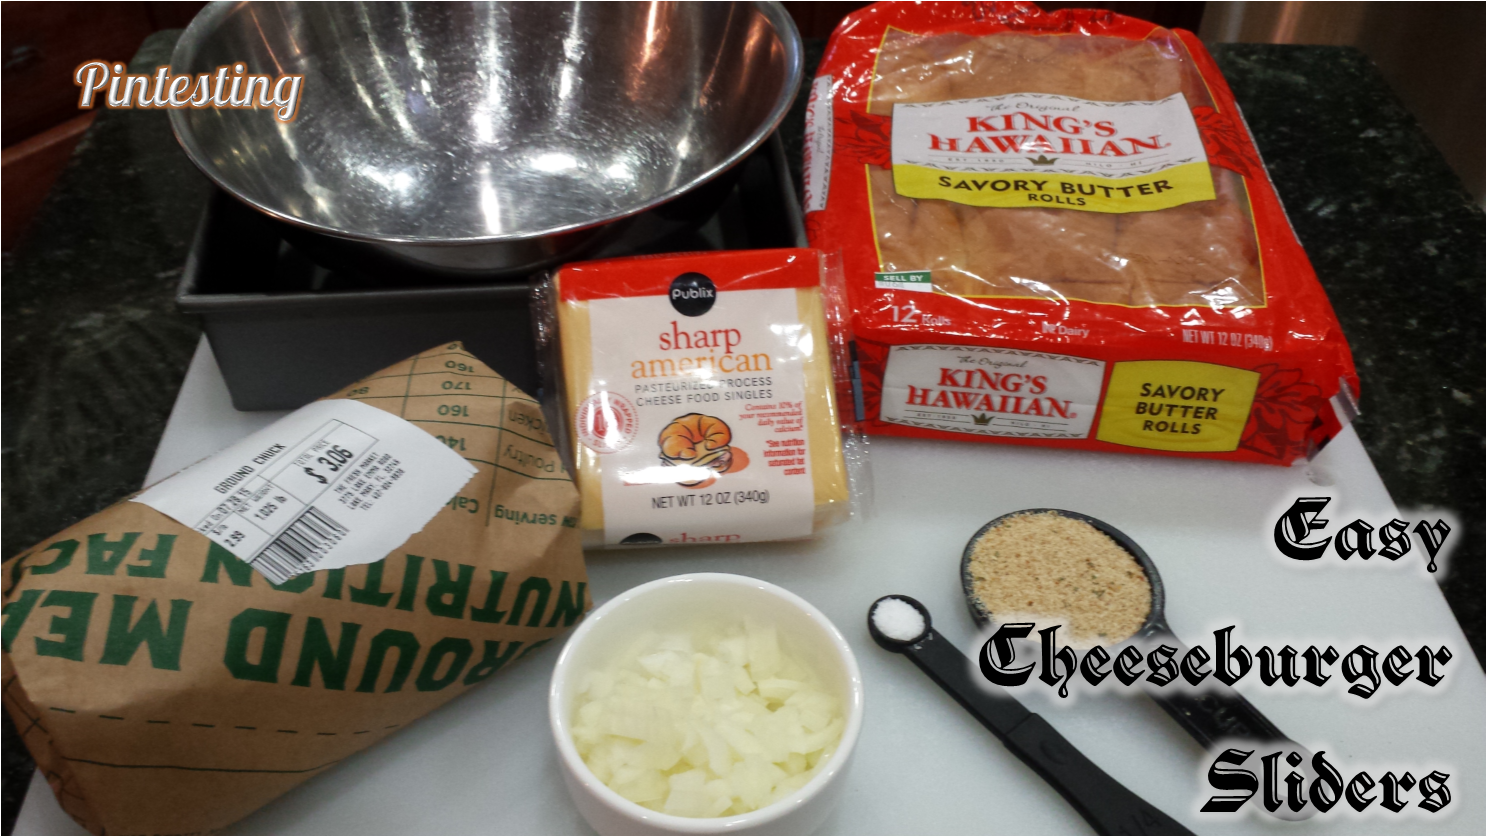
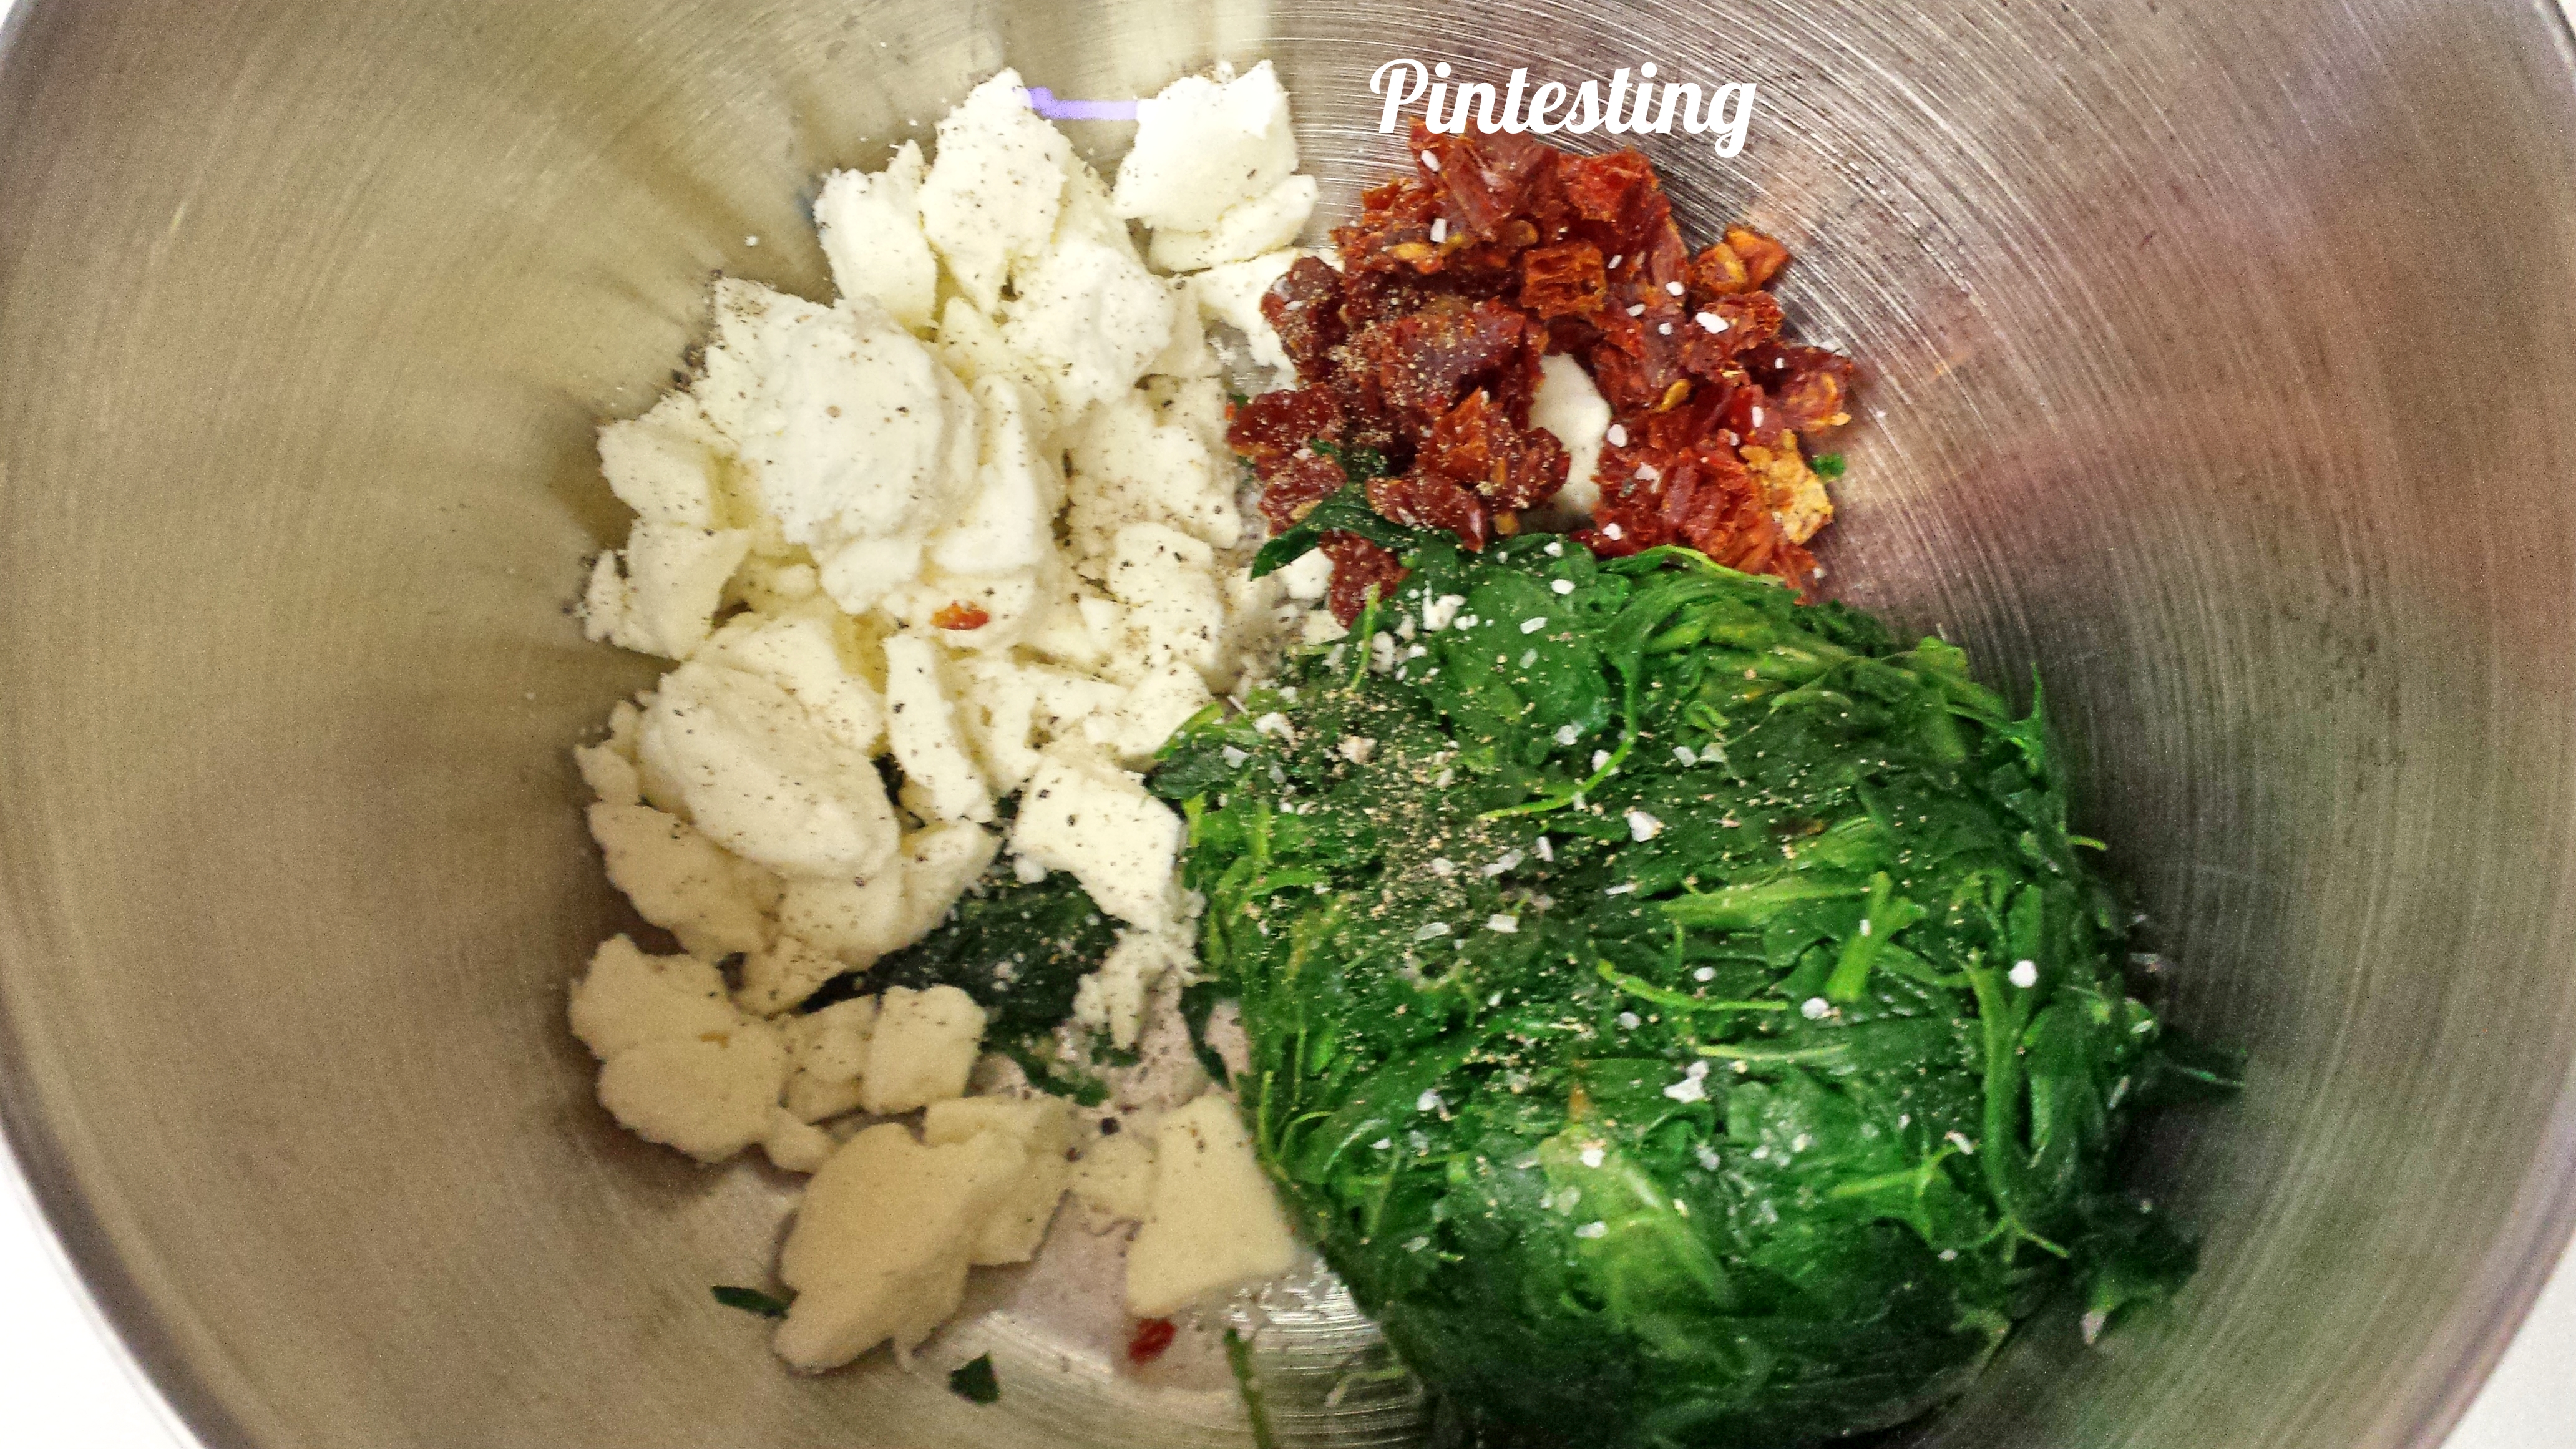
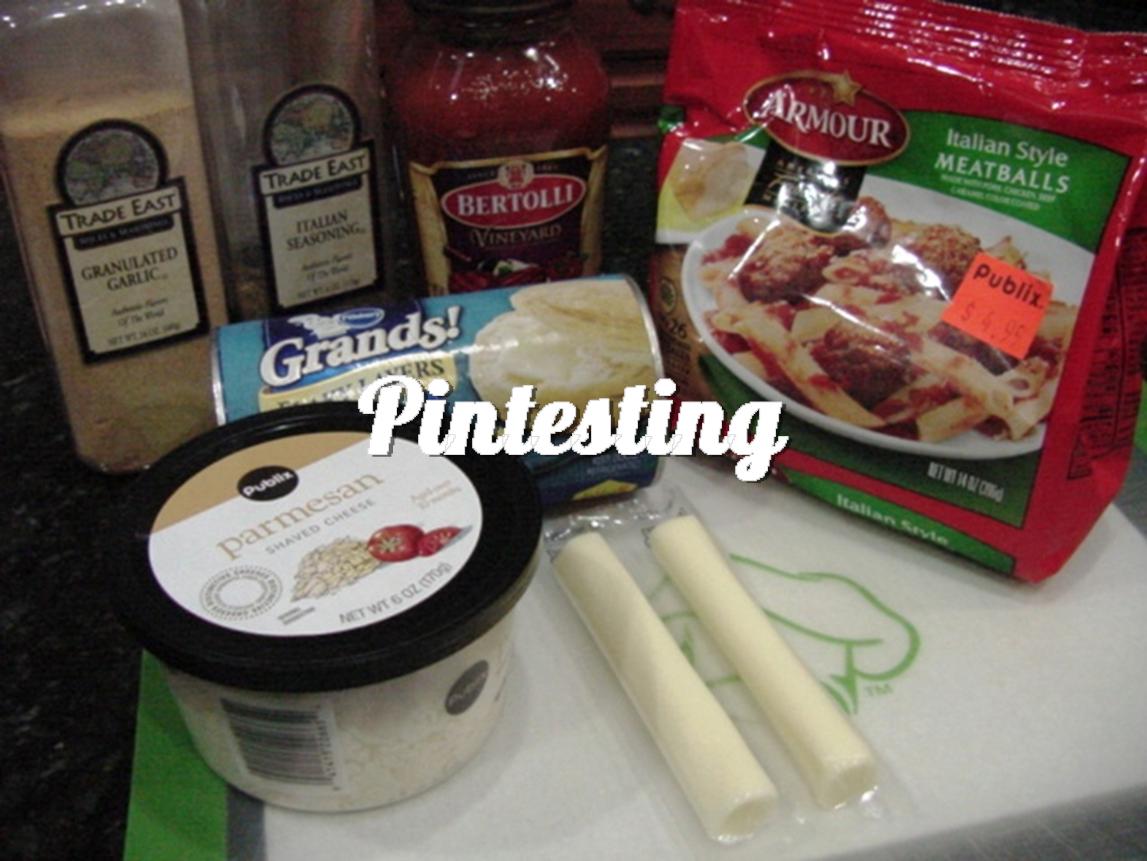
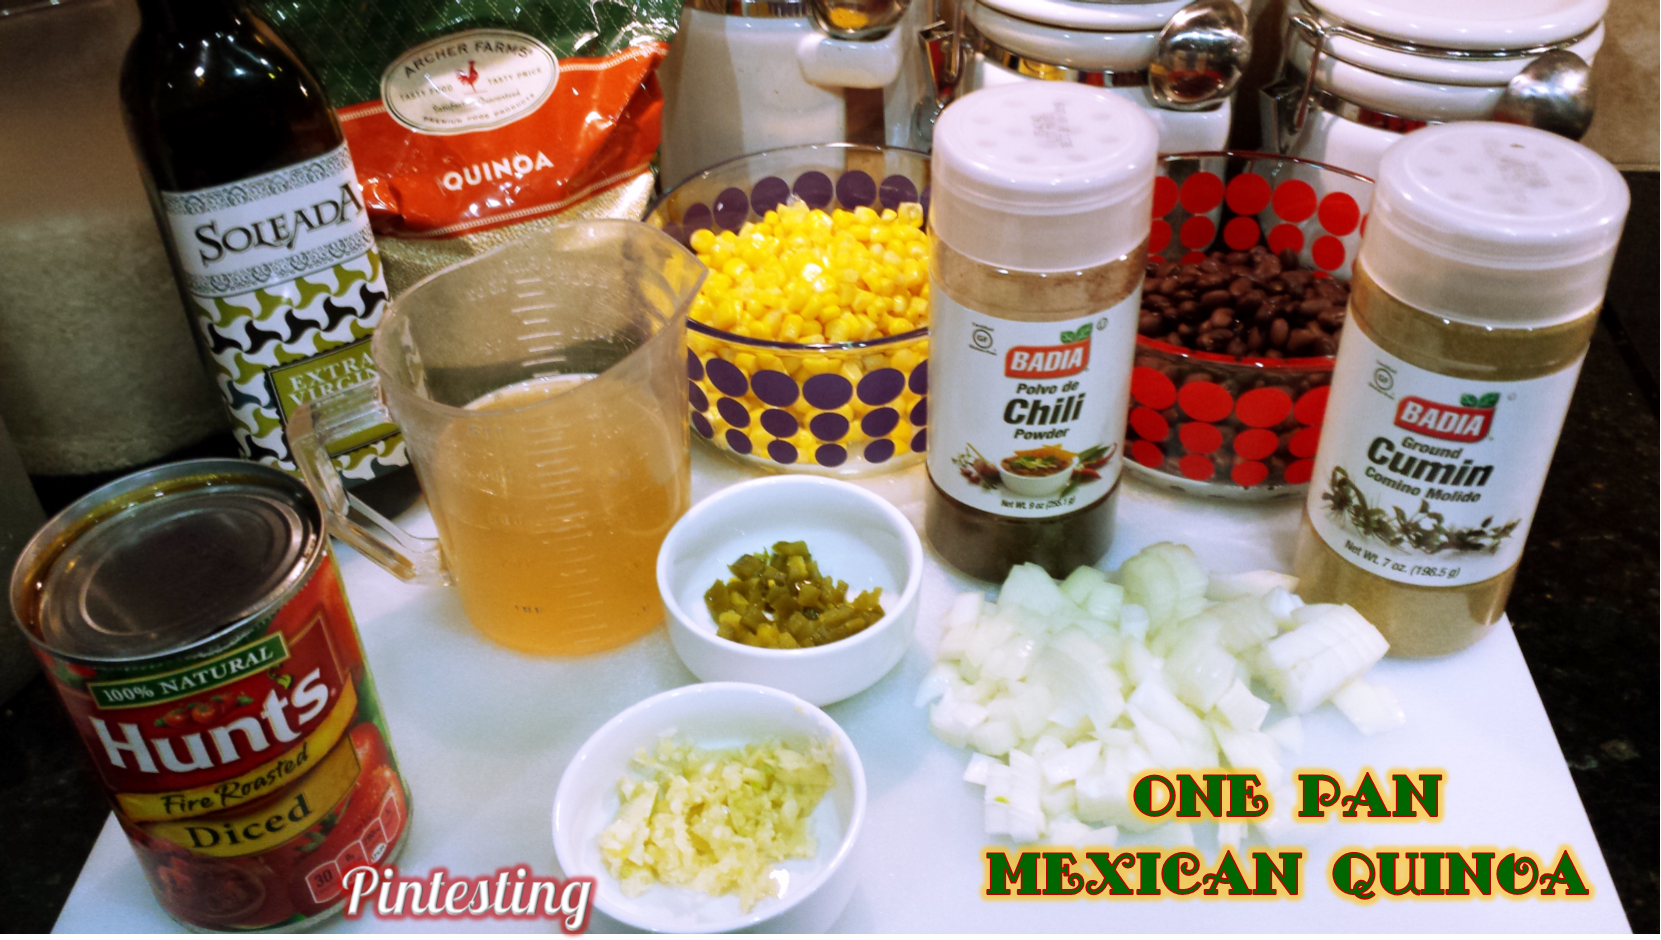
The ingredients are straight forward and easy to find.

Pintesting One Pan Mexican Quinoa

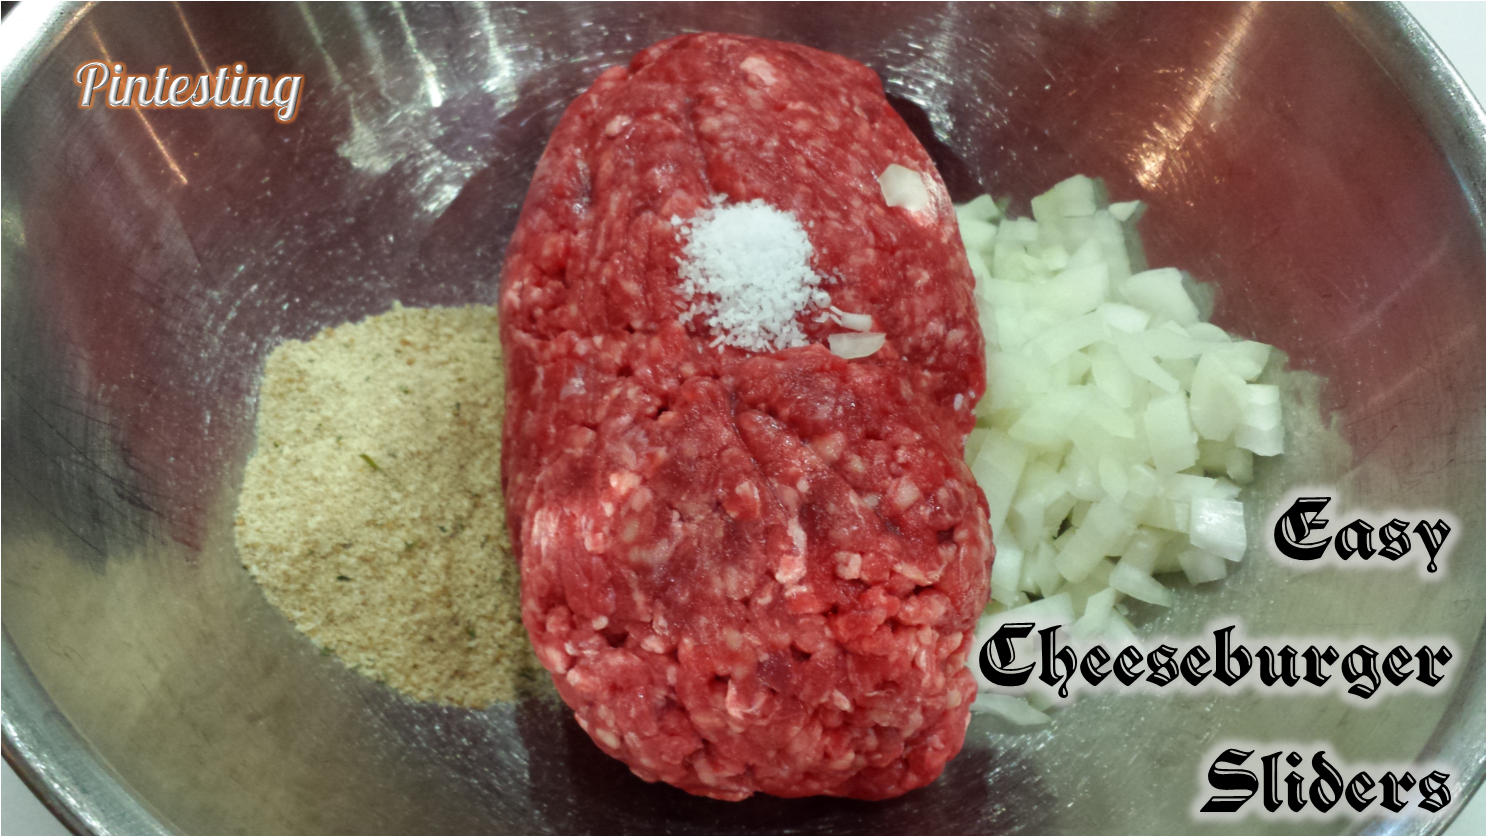
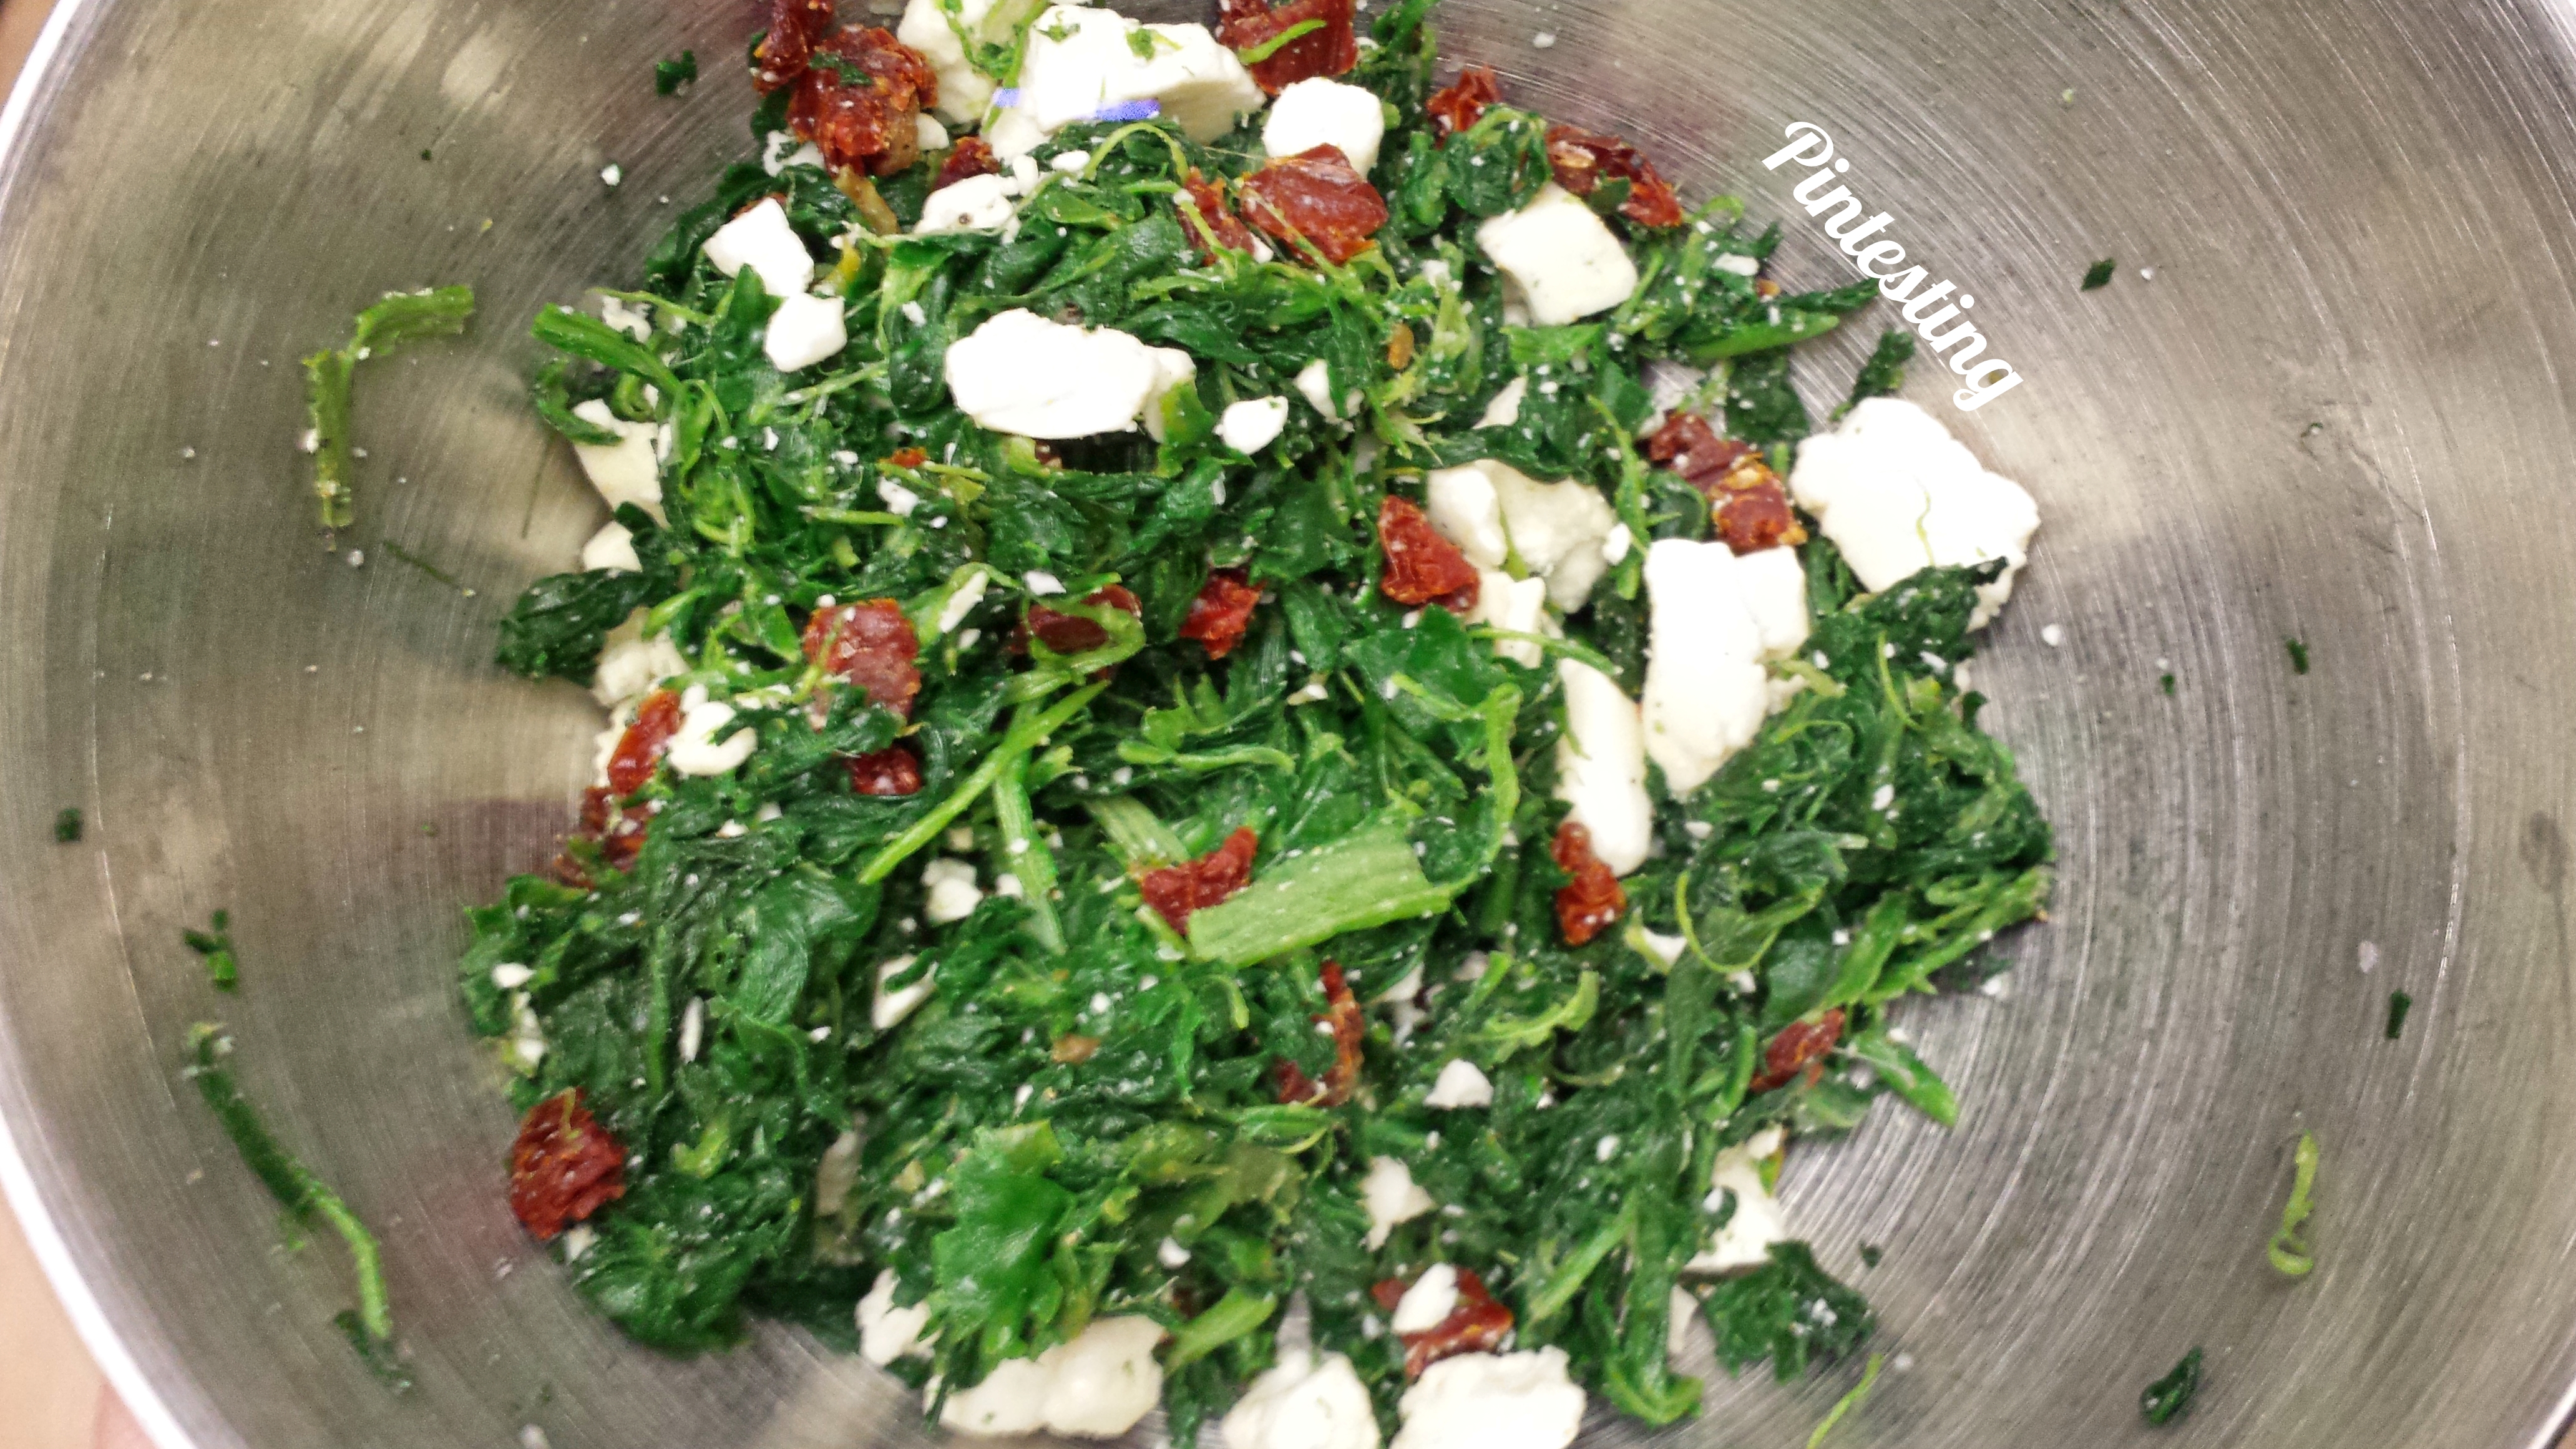
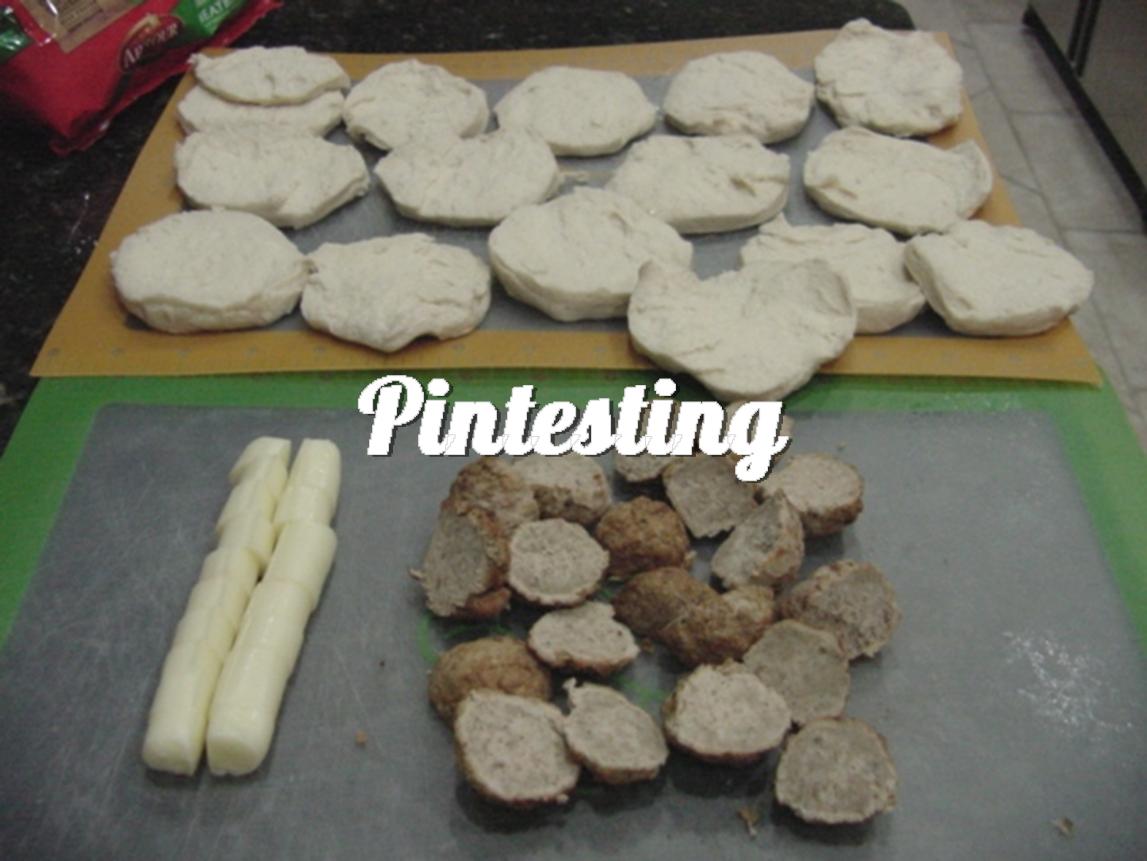
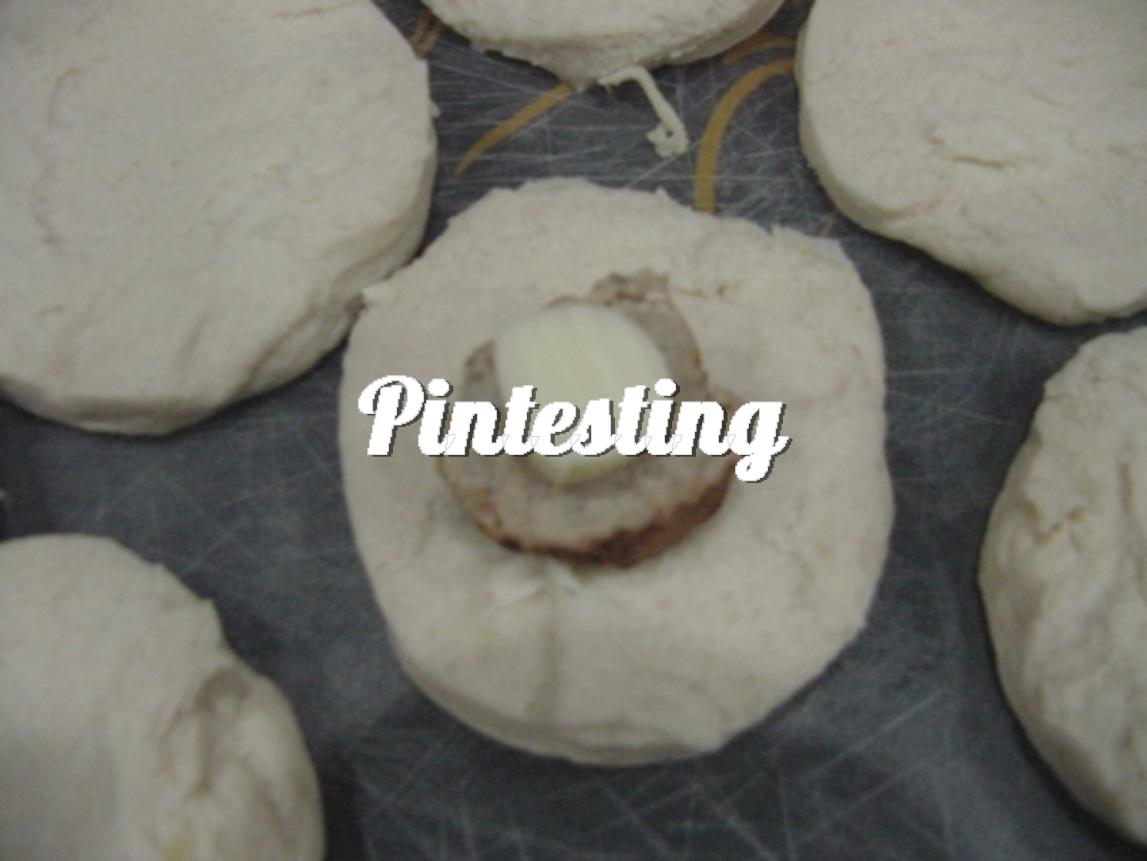
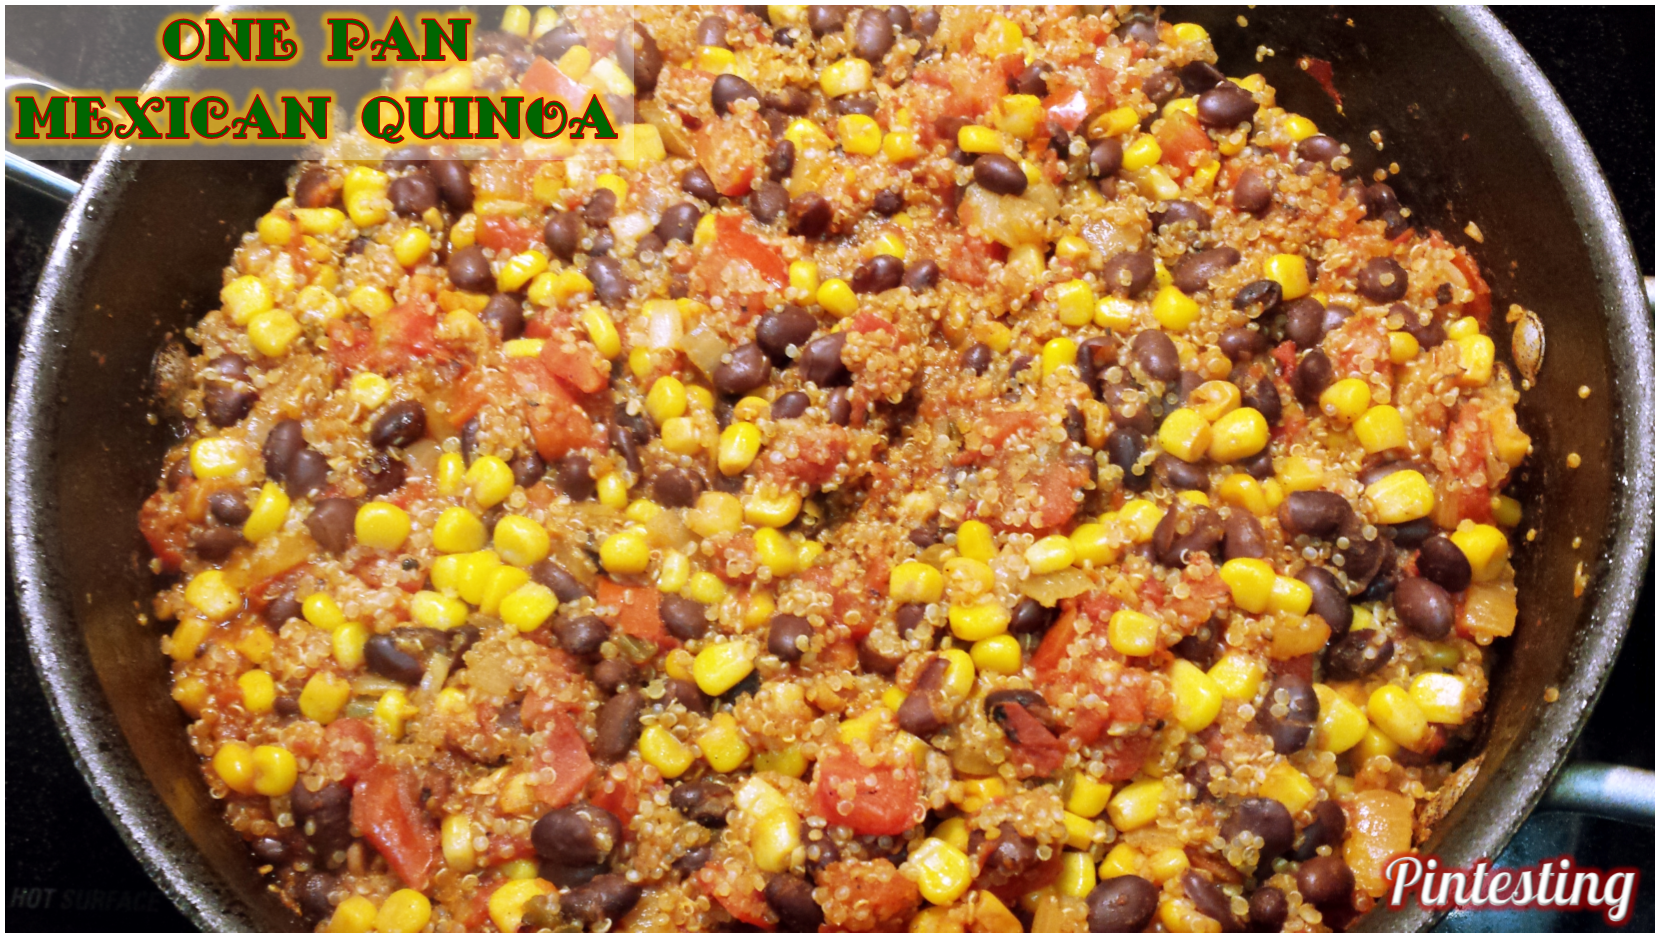
Sauté the aromatics, then add the beans, corn, and tomatoes.

Pintesting One Pan Mexican Quinoa

Then add the quinoa, seasonings, and broth.

Pintesting One Pan Mexican Quinoa

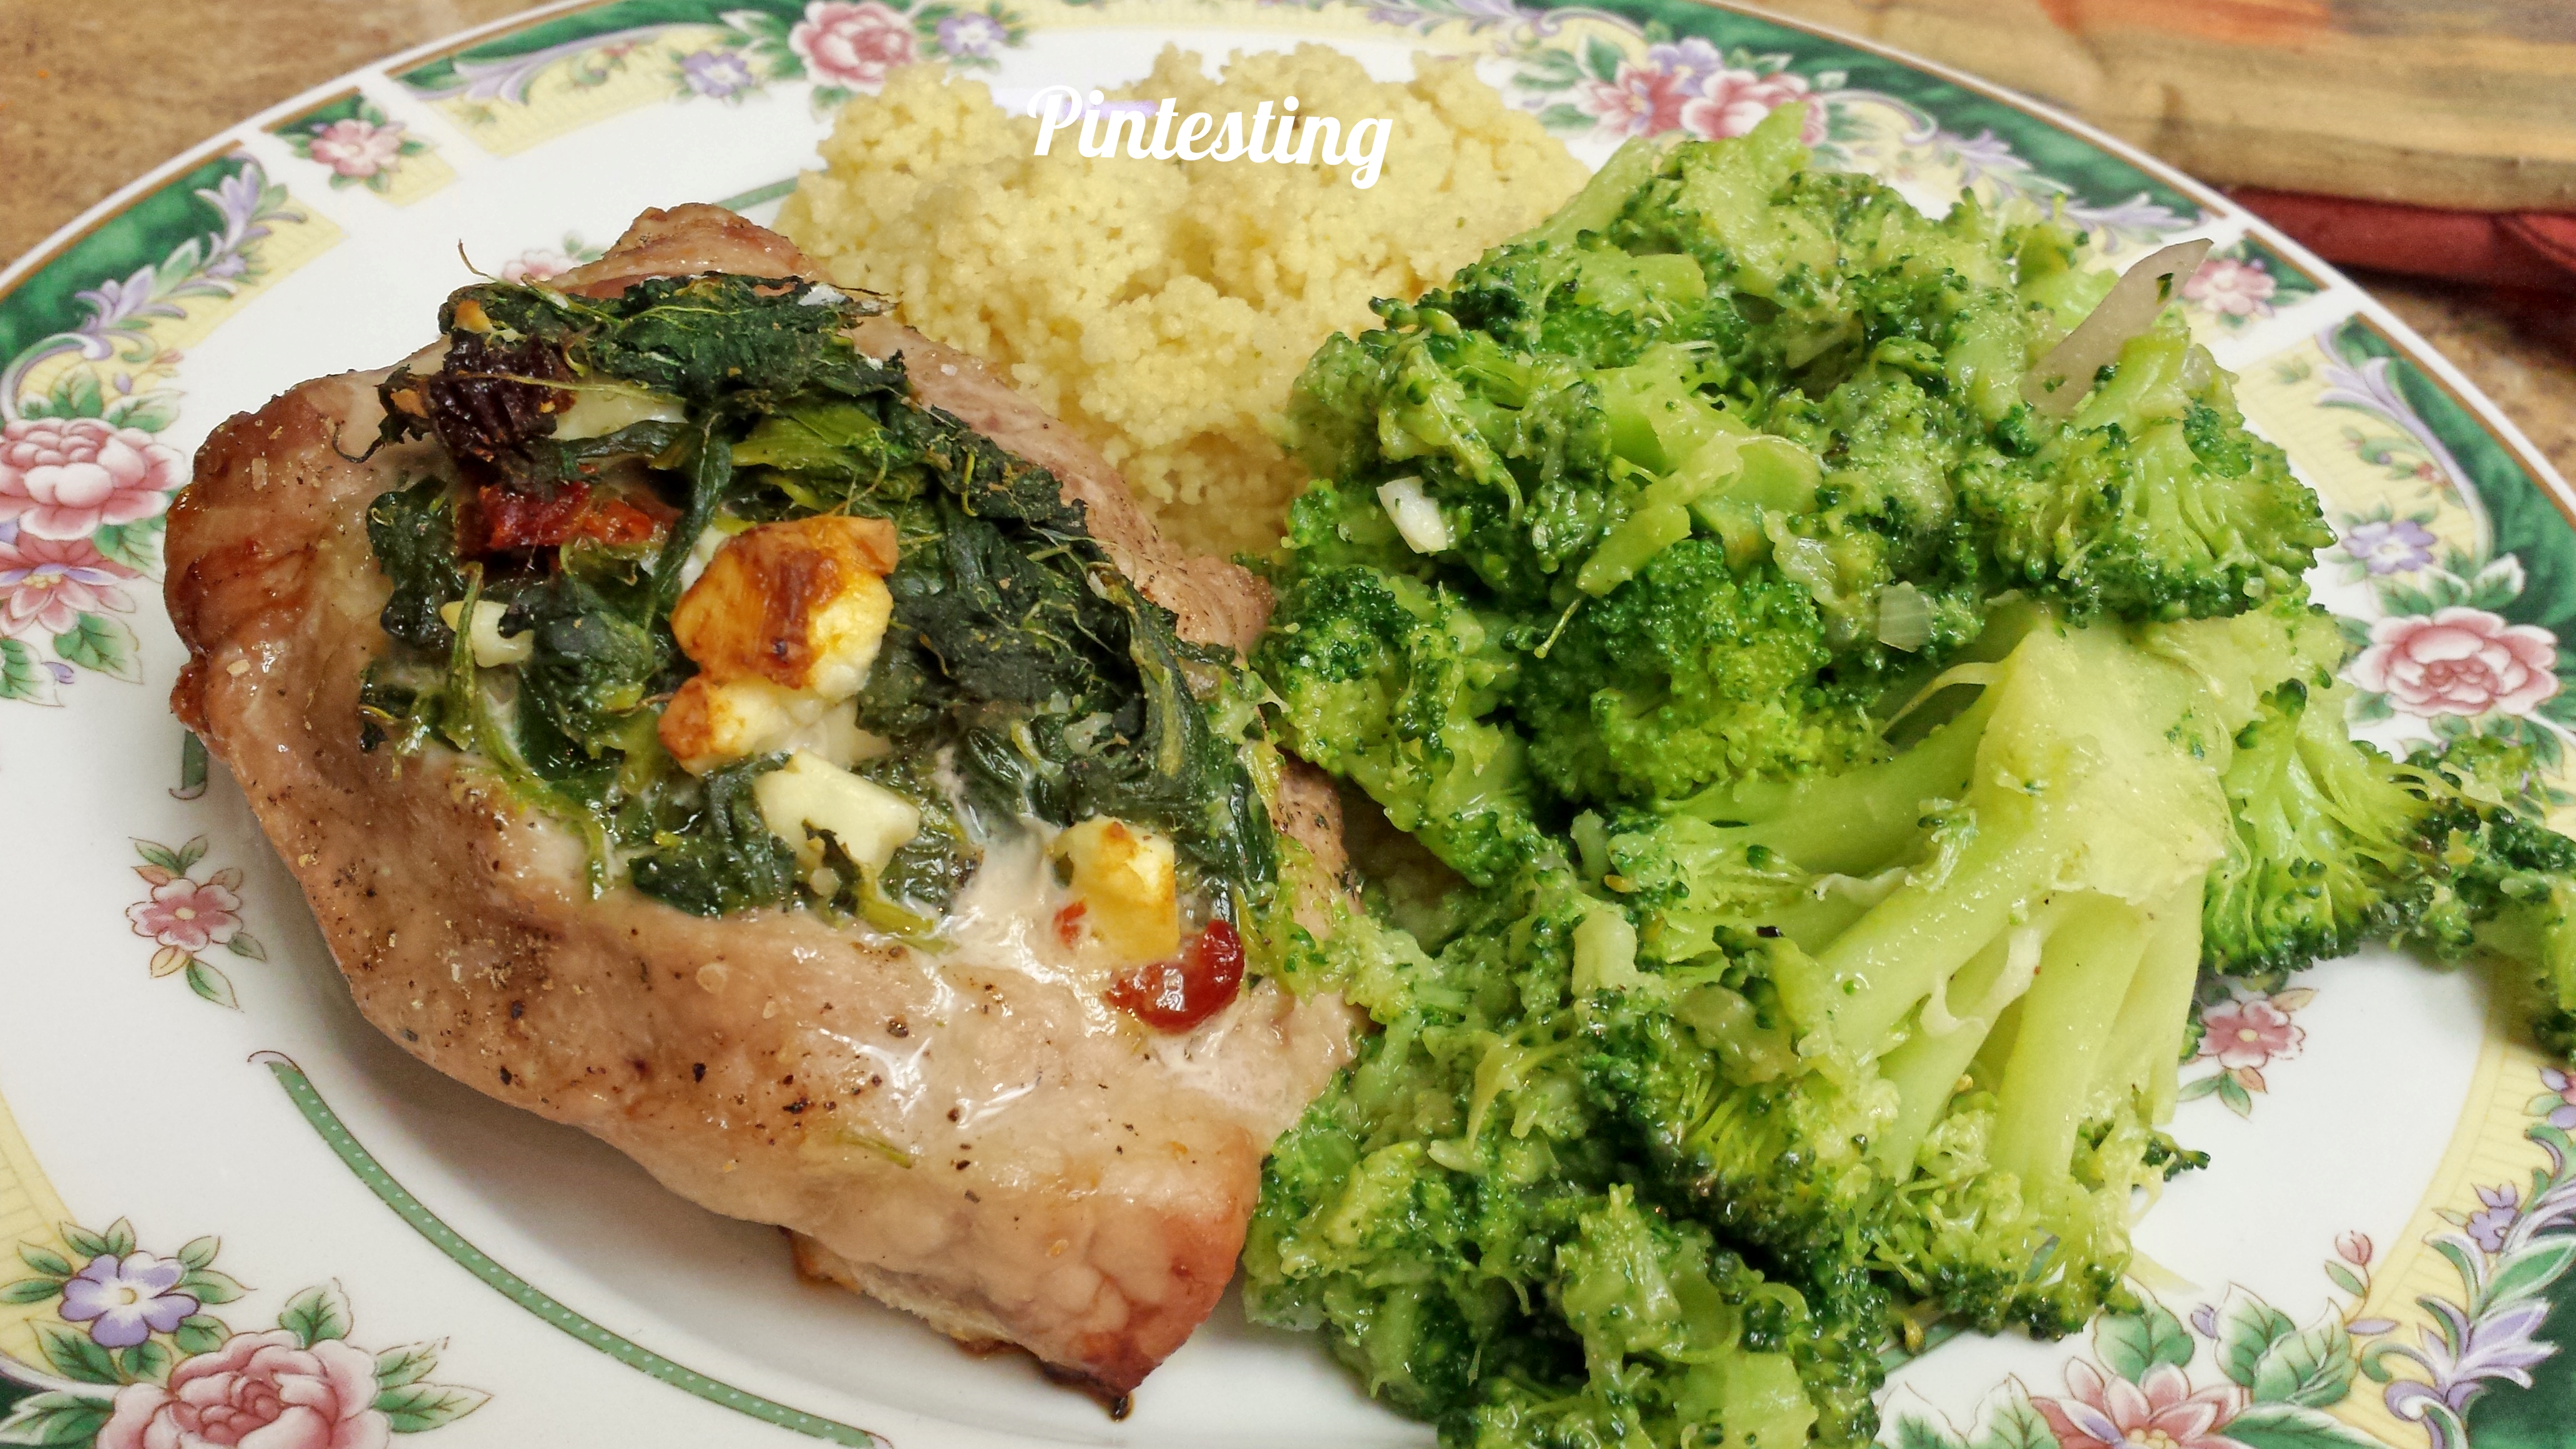
Cover and cook for 20 minutes and it’s done.

Pintesting One Pan Mexican Quinoa

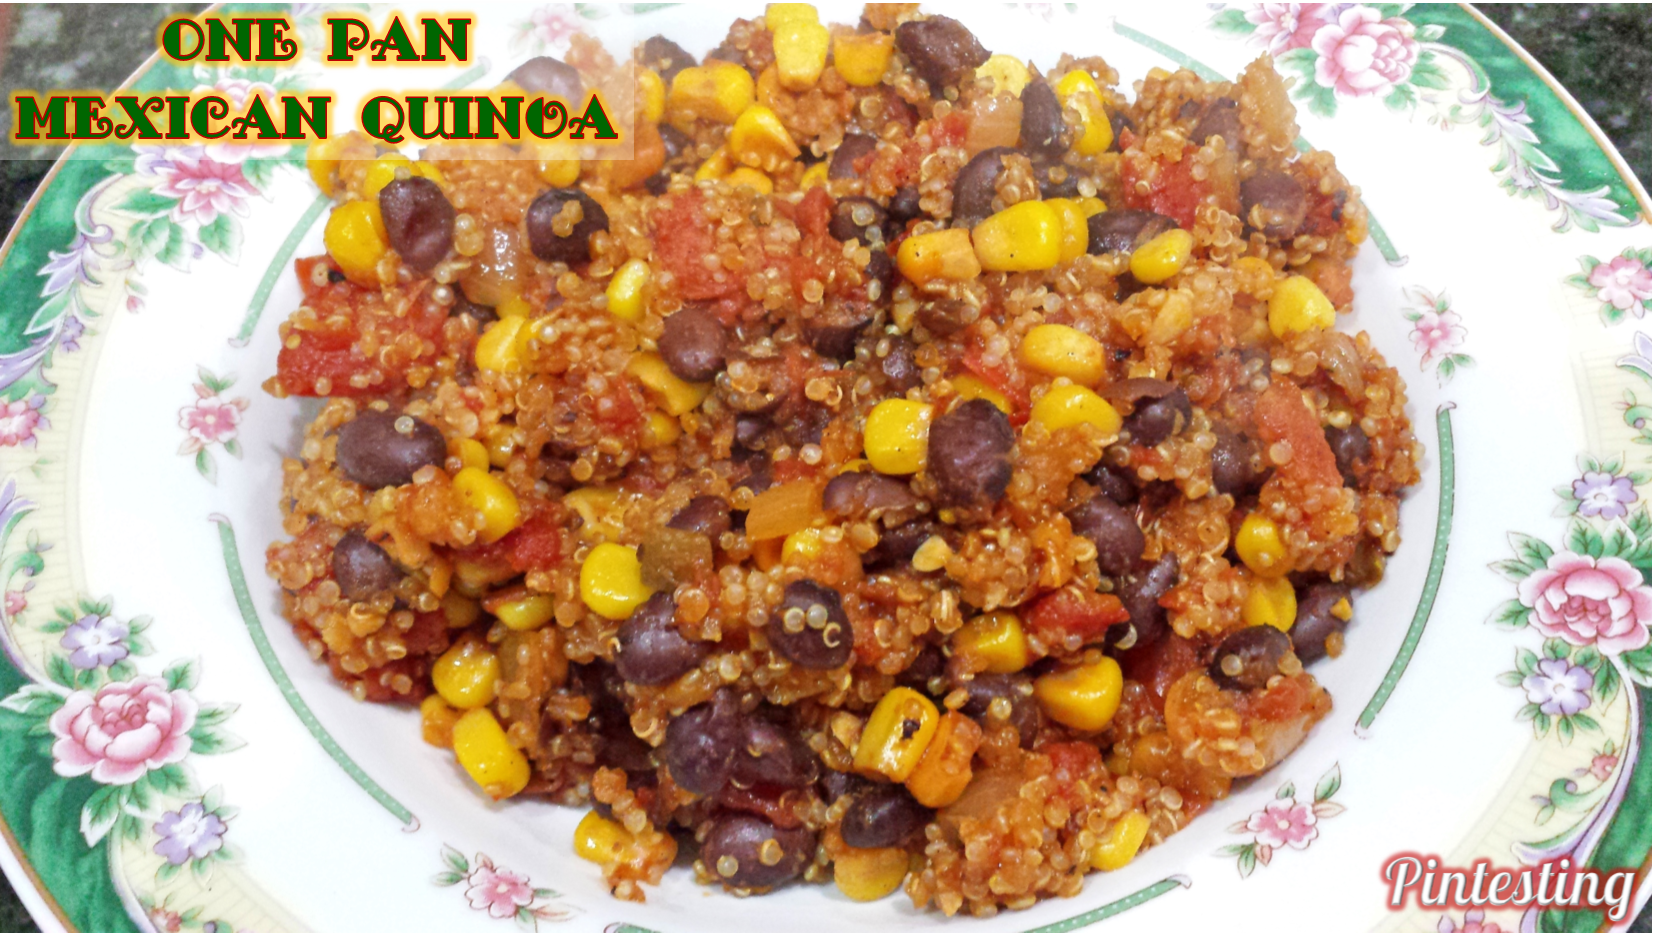
This was going to be served with diced avocado as the recipe suggested, but the one we got was over-ripe so we had to throw it out. Here’s how it looked without any toppings.

Pintesting One Pan Mexican Quinoa

This has a bonus of being super healthy without trying hard. Don’t be scared to try it even though it’s vegan, gluten-free, and dairy-free. It’s also versatile. You can change or add more veggies, switch the broths, play with toppings; make it your own.

Pintesting One Pan Mexican Quinoa - Pinterest picture with the original post picture and Pintesting's updated picture

The Results:

OVERALL RESULTS: 4.85 Pins

Pintesting - 5 Pins Overall Rating

Accuracy:  This recipe was as delicious, easy, and fast as the video showed. 5 Pins.

Pintesting Rating - 5 Pins

Difficulty:  This is an easy recipe with little cutting/chopping. Using canned beans and veggies really simplified things. However, using jalapenos or other hot peppers requires caution as the juices can cause burning to your skin or eyes. Many sources say to always wear rubber gloves when seeding and chopping hot peppers. Because of this, I’m giving it 4 Pins.

***UPDATE: 07/28/2017*** I substituted a small can of green chilies instead of the jalapeno (because it’s what I had on hand) and it turned out great. choose your preferred heat level and just add it in with the tomatoes. EASY!

Pintesting Rating - 4 Pins

Time:  This took less than 30 minutes from start to finish. It required minimal prep work, and most of the time was just for simmering. 5 Pins

Pintesting Rating - 5 Pins

Cost:  Most of the ingredients are less than a dollar. At $9.50 for 30-oz, the quinoa was the most expensive ingredient, but I only needed 3 out of 29 quarter-cup servings, and that’s less than a dollar for the quinoa. Total cost was less than $2/serving. 5 Pins

Pintesting Rating - 5 Pins

Practicality:  When I served this, HH ate two bites and gave it a thumbs up. He ate two more bites and gave it two thumbs up. This is fast, easy, healthy and delicious. It’s a perfect dinner for busy weeknights. 5 PinsPintesting Rating - 5 Pins

Easy Cheeseburger Sliders

Jul 30, 2015 by Anne Hernandez

The other day was National Hamburger Day. Who comes up with these “holidays”? Well, thank you to whomever, because even though I’m not a huge carnivore, I LOVE a good burger.

Burgers are like pizza in that there are so many different ways to approach them: big and juicy, stuffed with fillings, thin with a quick sear, to tiny little sliders. I used to love getting the sliders in the cute little boxes. Does anyone else remember these?

White Castle Burgers

When I saw this pin for Easy Cheeseburger Sliders by Kristina Vanni, I was all in! These use King’s Hawaiian rolls and a really different method for cooking. I went straight to the store to pick up the ingredients, and got cooking.

Pintesting Easy Cheeseburger Sliders - ORIGINAL PIN

The Pintesting:

The recipe calls for 2 lbs of hamburger. Because it’s just my Handsome Hubby and me, we didn’t need to make 2 pounds worth of sliders, so we halved the recipe with some help from Taste of Home website, and from the kitchn website for what size pan to use. Did you know that half of a 9×13 pan is an 8×8? I love learning new things!

Pintesting Easy Cheeseburger Sliders

Mix the ground meat, bread crumbs, onion, and salt in a bowl.

Pintesting Easy Cheeseburger Sliders

Put the mixture in a pan, press it nice and flat, then poke it with holes with a fork.

Pintesting Easy Cheeseburger Sliders

Bake it (SO much easier than grilling or pan frying a bunch of burgers). Look at that shrinkage!
Pintesting Easy Cheeseburger Sliders

Cover it with cheese and pop it back into the oven for a couple more minutes.

Pintesting Easy Cheeseburger Sliders

The big square cheeseburger patty came out of the pan easily, and I cut it into 9 squares to fit the buns.

Pintesting Easy Cheeseburger Sliders

Here you have the final results. Yes, I made 9 sliders. Yes, there are only 8 in the picture. My HH snatched one before I could stop him. He says that they smelled too good to wait.
Pintesting Easy Cheeseburger Sliders

The Pintesting Results:

Overall Results: 4.85 Pins

Pintesting Seal 5 Pins

Accuracy:  These cheeseburger sliders were very easy to make, as the title says. They produced a lot of delicious, juicy burger without having to flip a bunch of minis a bunch of times. I would pick these over their fast-food version any day. 5 Pins

Pintesting Rating - 5 Pins

Difficulty:  The recipe title didn’t lie. By baking the meat mixture in a pan, you let the oven do the work. 5 Pins

Pintesting Rating - 5 Pins

Time:  This one was a tough call. If you were making a regular burger vs. a slider, it takes about 5-10 minutes depending on how you like your burger cooked. These took 30 minutes of cooking time. That’s not a long time to cook supper, but it is longer than traditional burger cooking methods. 4 Pins

Pintesting Rating - 4 Pins

Cost:  These are an inexpensive way to feed a crowd, or to make ahead as for freezing. (Cheeseburger sliders ready to heat and eat? Yes please!) My local Fresh Market has ground chuck on sale every Tuesday for $2.99/lb. If you look at the ingredients picture, you’ll notice that the package of meat was $3.06. Add the cost of the rest of the ingredients, and that’s about 50 cents per slider. I was full at 2 sliders; HH was full at 3. The extra 4 sliders made both of our lunches – much better than fast-food. 5 Pins

Pintesting Rating - 5 Pins

Practicality:  If you need to feed a crowd, then these are absolutely the way to go. They were simple, juicy, flavorful, and I didn’t feel guilty about throwing away a bunch of cute cardboard boxes. Since the oven does the cooking, you don’t have to stand and flip anything. These are absolutely going into my recipe box! 5 Pins

Pintesting Rating - 5 Pins

Spinach, Feta, and Sundried Tomato Stuffed Pork Chops

Oct 20, 2014 by Anne Hernandez

Sometimes Pinspiration strikes at the most random times; for example, while walking through the grocery store at 5:15 pm while you have no idea what you’re going to make for supper. There were these beautiful thick boneless pork chops on sale. When I say thick, I mean about 2 inches thick – perfect for splitting and stuffing.

Pintesting - Spinach, Feta and Sundried Tomato Stuffed Pork Chops - THICK Pork Chops

After a quick search on my cell phone, I found this pin for Spinach, Feta and Sundried Tomato Stuffed Pork Chops by Mary Kay of Homemade Cravings. Our family loves Mediterranean flavors, we had most of the ingredients, and it appeared simple and healthy, so this seemed like a great choice.

UPDATE: I’m sorry to say that the Homemade Cravings blog is no longer available. However, I have Mary Kay’s permission to link to the archived page and to print her original recipe which is at the bottom of the page.

Pintesting - Spinach, Feta and Sundried Tomato Stuffed Pork Chops - Original Pin

The Pintesting:

There are only 6 ingredients. The recipe calls for 1/2 cup chopped spinach but doesn’t specify fresh or frozen. I had frozen chopped spinach on hand, so that’s what I used. It also calls for 4 pork chops, but since it’s just the HH and me we used two and saved the extra stuffing to use in omelets. Also, the recipe called for pork chops with the bone in. I think these work well with or without the bone.

Pintesting - Spinach, Feta and Sundried Tomato Stuffed Pork Chops - Ingredients


You really want to use thick chops for this recipe. You can see that they’re thicker than my 1/2 cup measuring cup.

Pintesting - Spinach, Feta and Sundried Tomato Stuffed Pork Chops - THICK Chops

Mix the spinach, feta, and sundried tomatoes in a bowl.

Pintesting - Spinach, Feta and Sundried Tomato Stuffed Pork Chops - Filling


Season with salt and pepper

Pintesting - Spinach, Feta and Sundried Tomato Stuffed Pork Chops - Filling Mixed

Cut a slit in the pork chops, season with salt and pepper, and stuff them.

Pintesting - Spinach, Feta and Sundried Tomato Stuffed Pork Chops - Chops stuffed

The recipe says to soak toothpicks to secure the chops, then grill them. Our grill happened to be out of gas, so we chose to bake them standing up like they’re pictured.

Pintesting - Spinach, Feta and Sundried Tomato Stuffed Pork Chops - Supper

As you can see, this worked very well. The meat was moist and flavorful, and the stuffing was delicious. I served these with couscous and broccoli. I’d like to try them grilled the next time we make them just to see if it adds another level of flavor.

The Recipe:

Pintesting - Spinach, Feta and Sundried Tomato Stuffed Pork Chops - ORIGINAL RECIPE


The Pintesting Results:

Overall results:  4.7 Pins

Pintesting - 5 Pins Overall Rating

Accuracy:  As I hoped, this was a simple yet delicious entree. The pork chops were juicy, and the flavors of the stuffing really made a delicious combination. It executed just as the recipe said. 5 Pins

Pintesting Rating - 5 Pins

Difficulty: You get a lot of taste for as simple as this recipe is. Mix a few ingredients, season, slice, stuff, and grill (or bake). You want to use caution when cutting the chop so that you don’t go all the way through, but i didn’t feel that was increasing the difficulty level. 5 Pins

Pintesting Rating - 5 Pins

Time: This would be perfect for a 30-minute-meal if you’re grilling. Since I baked them, it took a bit longer – about 45 minutes. Still, that isn’t very long for supper. The rest of the meal came together while they were in the oven. As a bonus, the extra stuffing ingredients make a fantastic omelet filling, so that cuts down on breakfast time the next day. 4 Pins

Pintesting Rating - 4 Pins

Cost: I was fortunate to get the thick boneless pork chops on sale – BECAUSE they were on sale. I also lucked out because I had bought sundried tomatoes on a buy one get one free sale, too. I don’t know that every kitchen normally stocks feta and sundried tomatoes, so I’m giving this 4 Pins.

Pintesting Rating - 4 Pins

Practicality: The simplicity, fast preparation, and delicious flavors of this were wonderful. The HH really enjoyed it and said he’d like to have it again. I also love that, in our case, we could use the filling as a way to get extra veggies and pump up the flavor of breakfast, too.  5 Pins

Pintesting Rating - 5 Pins


Slow Cooker Beef and Broccoli

Apr 25, 2014 by Anne Hernandez

I love our neighborhood Chinese take out place for a quick dinner that doesn’t make me feel completely guilty for not cooking. One of our family favorites is Beef and Broccoli. It’s got broccoli, therefore it must be healthy.

Sure, that’s my story and I’m sticking to it.

When I saw this pin by Damn Delicious for Beef and Broccoli in the slow cooker my first reaction was skeptical at best. Beef and Broccoli is a stir fry… but then I read Chung-Ah’s post and recipe in detail and it sounded extremely plausible. Why not? Definitely worth giving a test. To the wok crock pot!

Slow Cooker Beef and Broccoli - Original Pin

The Pintesting:

The ingredients were easy to find at my local grocer. (There’s also brown sugar that didn’t make it into the picture, but did make it into the dish.)

Pintesting Slow Cooker Beef and Broccoli

Trim and thinly slice the meat, and put in the crock pot.

NOTE: The recipe called for 2 lbs of chuck roast. By the time I trimmed it to my liking, I had 1 1/2 pounds left. There was still a LOT of meat.

Pintesting Slow Cooker Beef and Broccoli

Make the sauce together.

Pintesting Slow Cooker Beef and Broccoli

Toss the meat with sauce and cook for 90 minutes. Crock pot cooking usually takes a minimum of 4-6 hours and up to 10-12 hours, depending on the recipe. I was a little concerned that this wouldn’t be long enough, but…

Pintesting Slow Cooker Beef and Broccoli

This is what the meat looked like after cooking for 90 minutes. Oh, and I forgot to mention how amazing the sauce smelled.

Pintesting Slow Cooker Beef and Broccoli

Add the broccoli and cornstarch slurry (to thicken the sauce).

Pintesting Slow Cooker Beef and Broccoli

Cook for another 30 minutes.

Pintesting Slow Cooker Beef and Broccoli

Serve w/ rice – OMG!!!

My handsome husband said that this was better than the take-out place, and that’s saying a lot. The meat was unbelievably tender and flavorful and the sauce was perfect. The broccoli was fully cooked but not mushy. We both also like that we knew exactly what is in our food – no mystery ingredients.

The Pintesting Results:

Overall Rating: 4.55 Pins

Pintesting Seal 5 Pins

Accuracy: This recipe really captures the flavor of take-out Beef and Broccoli made at home. Using the slow cooker was a brilliant idea on Chung-Ah’s part. The beef was very tender, but not to the point of shredding, the sauce was fantastic, and the broccoli was completely done without being mush. (I don’t like mushy veggies.) 5 PinsRated 5 Pins

Difficulty: The hardest part of this recipe was trimming the roast. I have a tendency to go a bit overboard with that, and since the cooking time (2 hours total) isn’t the normal 6-8 hours in a slow cooker, I didn’t want to have hunks of fat or stringy meat. You don’t have to go to the same lengths of trimming – Chung-Ah didn’t mention it in her recipe. The rest was super simple; whisk together the sauce, toss in the broccoli and cornstarch slurry. Easy Peasy. 5 Pins

Rated 5 Pins

Time: Because this is a slow cooker recipe, I look at it with a bit of a curve. The prep time was roughly 10-15 minutes – mostly because of my obsessive trimming of the roast. Still, not bad. Since the crock pot did the rest without my assistance (just the add-ins after 90 minutes), this gets 4 Pins.

Rated 4 Pins

Cost: The Roast was the most expensive part of the meal, but I was fortunate to get it on sale for about $7. The broccoli was also on sale. I did have to purchase a lot of the sauce ingredients for the 1st time, but even so this will make a LOT of Beef and Broccoli before you run out. The total cost was less than two orders of take-out, it makes 4 servings, and you’ll be able to re-use lots of the ingredients. But because most kitchens might not have the sauce ingredients as a staple, I’m giving this 3 Pins.

Rated 3 Pins

Practicality: If you need a quick fix for Beef and Broccoli take-out, hit up your local restaurant. If you want amazing flavor and are willing to wait 2 hours with minimal work, then this is a great way to go. I like that I know what’s in it, how it makes the house smell amazing, and the “yum” noises of approval. It’s a great recipe to throw into the crock pot before soccer or piano or shopping. I also like that my kitchen isn’t covered in splattered grease from stir frying. 5 Pins

Rated 5 Pins

Crock Pot Spicy Buffalo Ranch Chicken

May 31, 2013 by Anne Hernandez

Does anyone else have a busy life? Dumbest. Question. Ever. Trying to balance all of life’s aspects requires about 32 hours a day, but we only get 24. That’s why I LOVE crock pot cooking. It’s a HUGE time saver! Simply dump (or carefully layer) the ingredients into the magical appliance, turn it on, and walk away. Hours later I come home to a house that smells amazing and dinner (or supper, depending on where you are in the world) is DONE! I have some family favorite recipes but am always on the lookout for something new. I found such a recipe while perusing through Pinterest and spotted this pin for Crock Pot Spicy Buffalo Ranch Chicken from Tammilee’s Tips. Three ingredients that look like a cross between BBQ Chicken in texture and Buffalo Chicken in taste.

THREE INGREDIENTS – I’m in! Let’s try this.

The Pintesting:

http://www.tammileetips.com/2013/01/crock-pot-spicy-buffalo-ranch-chicken/

So here are the ingredients; chicken, buffalo sauce, and ranch mix.

Pintesting Crock Pot Spicy Buffalo Ranch Chicken

Dump everything into the crock pot.

Pintesting Crock Pot Spicy Buffalo Ranch Chicken

Turn it on low, then walk away. For those who have an aversion to leaving a kitchen appliance on all day – especially if you’re not home to watch it (yes, I know you’re out there and it’s okay), just put the crock pot on your stove top. I have a friend who just couldn’t leave a crock pot on her counter to cook while she was gone to work. When I suggested this, it made everything okay and she started making crock pot meals 3-4 times a week. Don’t ask or question, just do it.

After you get home (6-8 hours later), it will look like this.

Pintesting Crock Pot Spicy Buffalo Ranch Chicken

Shred the chicken. I used the two carving forks that came with my knife set because of their long handles which allowed me to shred it in the crock pot without getting my hands too close to the food or the hot sides.

Pintesting Crock Pot Spicy Buffalo Ranch Chicken

There, the chicken is DONE! Since this is buffalo chicken, I wanted a side that would balance the spiciness. What could be better than the traditional carrots and celery with ranch? How about a coleslaw salad with lots of carrots and celery and a ranch-slaw dressing? YES! So here’s my non-recipe recipe.

Pintesting Crock Pot Spicy Buffalo Ranch Chicken

One bag of coleslaw, about half of a bag of shredded carrots, and 3-4 stalks of celery chopped small.

Pintesting Crock Pot Spicy Buffalo Ranch Chicken

For the dressing, I used equal parts of coleslaw dressing and ranch dressing.

Pintesting Crock Pot Spicy Buffalo Ranch Chicken

Toss it all together and serve. That’s 5 minutes for a super yummy salad!

Pintesting Crock Pot Spicy Buffalo Ranch Chicken

We’re trying to lose some weight in my family, so when I asked if the chicken should be served with or without the buns, the unanimous response was without. Here’s our supper, and I have to say it was amazing! Tons of flavor with a nice balance between the coolness of the slaw and the heat from the chicken. It makes a lot, so it’s perfect for sharing. The next time I make this, I will try making buffalo tacos with the combo. Now, for the Pintesting results.


The Pintesting Results:

Overall Results: 4.85 Pins

Pintesting Seal 5 Pins

Accuracy:  This captured the fun of Buffalo Wings, but in a form that’s easy to cook and serve without the messy fingers and moist towelettes. My husband and I don’t like lots of heat, so we used the regular buffalo sauce rather than the extra hot. I’d try mild if I could find it. If it’s still too much for your heat index, then try substituting a little barbecue sauce or add a bit of brown sugar. Even though it was spicier than just about anything we usually cook, we couldn’t stop eating – it was that good. 5 Pins

Rated 5 Pins

Difficulty:  Three ingredients, dump, walk away, shred, eat, good. Folks, it doesn’t get much easier than that. 5 Pins

Rated 5 Pins

Time:  I struggled with this because on the one hand, the prep was almost nonexistent. I literally dumped the bag of frozen chicken breasts into the crock pot, poured the bottle of buffalo sauce on top, then sprinkled the ranch mix. Two minutes tops. Once I got home, it took about 3 minutes to open the lid and shred the chicken. That’s 5 minutes, which would normally get 5 Pins. On the other hand, I feel like I have to account for the 8 hours of cook time while I was at work, which would normally get about 2-3 Pins if you were actively cooking for that length of time. I decided to go between the two, and look at it similarly to required chilling time. It’s necessary, but you’re not doing anything so I’m giving this 4 Pins.

Rated 4 Pins

Cost:  The chicken breasts were about $6.50 for the bag and by far the most expensive ingredient. Total cost was about $10.00. But since this makes a lot of food, and will serve a family of 4 with plenty of leftovers, I’m giving it 5 Pins.

Rated 5 Pins

Practicality:  Any crock pot meal is very practical for busy weekdays. The lack of chopping or other prep work makes this recipe even easier to throw together. It would also be PERFECT for a Super Bowl party. This would be great for any kind of party! 5 Pins

Rated 5 Pins

Meatball Bubble Biscuits

Feb 24, 2013 by Anne Hernandez

This is the second of two Pin Tests that I made one evening for supper. I thought it would be great to be able to do a two-for-one meal. The theory was a good one, but not everything turned out exactly as I had hoped. The first post (voted first by my readers) was for Baked Parmesan Tomatoes. You can read about the results by clicking the link.

THIS post is for a recipe with one of the most fun food names I’ve heard in a long time – Meatball Bubble Biscuits. Say that five times fast. Meatball Bubble Biscuits… Meatball Bubble Biscuits… Meatbub Bubba Biscuits… (I bet you’ve got a grin on!)

I love to laugh. Ages ago, when my girls were little, I did home childcare. Kids come up with some of the funniest things without trying. I have 15 years worth of funny daycare stories about nearly a hundred children I loved as my own. One of my little 5-year old guys was sitting at the kitchen counter after morning kindergarten.  The other kids were down for naps already and were talking while he was having lunch. He told me something that I can’t remember, but my response was, “are you serious?” He replied, with a perfectly straight face, “yes, I’m very serious”. I said, “Oh, well I’m serious, too”, with an equally straight face. With a perfect poker face he said, “we are very serious”. This “serious” banter went on back and forth for several minutes before we looked into each others eyes and started laughing and laughing.

So other than the recipe having a funny name, what does that have to do with the story? Not a blessed thing. But I think the kids would have liked a food called Meatball Bubble Biscuits. So glad that I saw this pin from Kathie, of the blog Kathie Cooks.

http://kathiecooks.blogspot.com/2010/08/meatball-bubble-biscuits.html

Let the Pin Test begin! There aren’t a lot of ingredients, and all are easy to find. The only flaky-style biscuits I could find were the Grands variety, so that’s what I went with.

Meatball Biscuit Ingredients

I cut the meatballs and string cheese, and split the biscuits in half.

Ready to assemble

Each biscuit got one half meatball and a piece of mozzarella,

Layer ingredients

then was wrapped up in the biscuit dough. I pinched to seal the dough, then rolled each one to make a bit more round.

Wrap them up

Put them all in a round cake pan. No need to grease the pan.

In the pan

Sprinkle the lot with the seasonings and Parmesan. I went light with the Parmesan after what happened to the Parmesan Baked Tomatoes, and decided to sprinkle more as they came out of the oven.

Seasoned and in the oven

Kathie says to bake for 18-20 minutes, so I went with the lowest time.

Bake

And this is what you get. You can see the extra Parmesan that got sprinkled as soon as these beauties came out of the oven.

Baked golden

I served them with spaghetti and meatballs, extra spaghetti sauce for dipping, and the Baked Parmesan Tomatoes. Yes, everything is sprinkled with Parmesan – I mean, it’s cheese! Doesn’t cheese make almost everything better?

Dinner Served

Overall Rating: 5 Pins

5 Pins Overall - LARGE

Accuracy: The recipe was simple and the results were just like Kathie’s picture. The garlic and Italian seasoning gave a nice flavor to what would have been plain dough. I might try brushing the tops with some melted butter next time – just to see what happens. The meatballs were thoroughly cooked and the mozzarella was melted. 5 pins

Rated 5 Pins - SMALL

Difficulty: This was easy – perfect to let the kids help assemble. 5 pins

Rated 5 Pins - SMALL

Time: It took about 5-10 minutes to assemble these, and roughly 20 baking time (or less). At just over half an hour, 5 pins.

Rated 5 Pins - SMALL

Cost: The meatballs were on sale for $3.95, which was the most expensive ingredient. I had the seasonings on hand, but those can be gotten very inexpensively. 5 pins.

Rated 5 Pins - SMALL

Practicality: This recipe would be nice as an appetizer or as part of the main meal. It’s kid friendly, but also delicious to adults. My husband thought they were the best part of the meal. 5 pins

Rated 5 Pins - SMALL


PF Chang’s Mongolian Beef Copy Cat Recipe

Feb 19, 2013 by Anne Hernandez

I love Chinese food! From the time I was a very little girl, my parents would make my brother and me use chopsticks to eat at the Chinese restaurants. They said the food didn’t taste as good if you used a fork. To this day, I believe it. When I saw this pin from Six Sister’s Stuff, I knew I had to add it to the Pin Test list.

Six Sister’s Stuff is a great blog. Just read their “about us” page and you can feel their family love. Now, my mother was one of 5 sisters and they had some fantastic stories to tell. I used to love listening to them. They loved to joke and laugh. I can only imagine what that would be like since I only have the one brother. Don’t get me wrong – I love my brother… well, like a brother. (Oh, so cliché) He likes Chinese food, too. Actually, he likes any kind of food but let’s not go there. Which brings us back to the Pin Testing.

http://www.sixsistersstuff.com/2012/03/pf-changs-mongolian-beef-copycat-recipe.html

The Pintesting:

After reviewing the recipe a few times, I started the rice before starting anything else. It looked like it wouldn’t take very long, as most Chinese food cooks quickly. It was a wise decision. Then I got the rest of the ingredients together.

's Mongolian Beef Copycat Recipe

Heat the oil in a medium pan and saute the garlic and ginger for a minute or so.

's Mongolian Beef Copycat Recipe

Add the soy sauce, water, and brown sugar.

's Mongolian Beef Copycat Recipe

Whisk it together and bring it to a boil for a couple of minutes to thicken.

's Mongolian Beef Copycat Recipe

While that’s starting to boil, thinly slice the flank steak on an angle, as the instructions say.

's Mongolian Beef Copycat Recipe

Then dip the steak slices in cornstarch. That’s a new one for me. I’ve always dredged in flour. I love learning something new!

's Mongolian Beef Copycat Recipe

By now the sauce will have boiled for a bit, so remove it from the heat.

's Mongolian Beef Copycat Recipe

Once all the meat is dusted with cornstarch, let it set for about 10 minutes while the oil in the Wok gets hot.

's Mongolian Beef Copycat Recipe

Cook the meat in batches since it will not all fit into the wok at once.

's Mongolian Beef Copycat Recipe

Cook it just until it browned, then remove it with a slotted spoon and drain it on paper towels. Once it’s all done, add the meat into the saucepan with the green onions and heat through.

's Mongolian Beef Copycat Recipe

I served it over the hot rice and with stir fried veggies.

's Mongolian Beef Copycat Recipe

The Pintesting Results:

Overall Rating: 4.15 Pins

Pintesting Seal 4 Pins


Accuracy: The recipe execution was as the directions instructed, but most of the Mongolian Beef I’ve had at PF Chang’s and other Chinese restaurants had substantially more onions, both green and/or yellow. It tasted good, but it needed more onions to balance the sweetness of the sauce. 4 Pins

Rated 4 Pins - SMALL

Difficulty: This recipe requires some knife skills in order to thinly slice the flank steak. Also, flash frying the meat in oil raises the level of danger to novice cooks. 3 Pins

Rated 3 Pins - SMALL

Time: It took a little longer than I expected to get all of the steak slices dusted with the cornstarch, but start to finish it took about the same or less time than to send someone out to get Chinese take out – roughly 40 minutes. 5 Pins

Rated 5 Pins - SMALL

Cost: The flank steak is about $10-$15 unless you can find it on sale. I debated including the cost of a wok since it’s not common to most kitchens (I have 2, but I don’t have a common kitchen). Since the recipe said you can use a skillet, I let that go. 4 Pins

Rated 4 Pins - SMALL

Practicality: This is a good homemade alternative to Chinese take-out, and you don’t have to leave a tip. Although, the next time I make this, I’ll add the extra onions. 5 pins

Rated 5 Pins - SMALL