Category: Entrée

Puerto Rican Style Corned Beef

I’m an American with a melting pot in my personal gene pool; some of which is Puerto Rican thanks to my mom. My dad gave me a cool anglo mix of English, Irish, and German. This means I can cook and dance in all kinds of languages – just don’t ask me to speak them all. This year there have been a lot of hurricanes; two of which hit the Caribbean really hard, specifically Puerto Rico. I’m thankful that my family there is okay, so I wanted to do a post of one of my most favorite Puerto Rican comfort foods, Puerto Rican Style Corned Beef. It’s not anything like the Irish corned beef that is served with cabbage (which really isn’t all that Irish, but that’s for another Pintesting). This is more like a stew that is best served over rice. I always go to this pin for the recipe by Tammy of The Self Taught Cook.

Pintesting Puerto Rican Corned Beef

I will tell you up front that there is one addition that I make to the Puerto Rican Style Corned Beef which is how my family has always made it. We add olives. If you are familiar with Hispanic cooking then you could add alcaparrado; a mixture of pimento stuffed green olives and capers. I didn’t have any on hand, so olives it is.

NOTE: If you’re going to serve this with rice – as you should, start that first. That way everything will be ready to eat at the same time. I love it when a meal comes together perfectly.

The Pintesting:

The Ingredients are easy enough to find in most grocery stores. Look in the ethnic aisle for Adobo (all-purpose seasoning salt) and Sazon (get the one with coriander & annatto). Any good chicken bouillon will do if you can’t find the one pictured below and don’t let the canned corned beef throw you. Stick with me on this.


Pintesting Puerto Rican Corned Beef

Heat the oil and fry the potato. Be careful to not splash the oil and burn yourself.

Pintesting Puerto Rican Corned Beef

Remove the potato to drain on paper towels and set aside.

Pintesting Puerto Rican Corned Beef

Add the white onion, red pepper, and garlic to the pan and saute until tender but not browned.

Pintesting Puerto Rican Corned Beef

Add tomato sauce, seasonings, and broth.

Once it’s all simmering, add the canned corned beef. Break it up with your spoon as your stirring everything.

Pintesting Puerto Rican Corned Beef

This is when I add in the olives or alcaparrado.

Pintesting Puerto Rican Corned Beef

Let this simmer for about 15 minutes then add in the potato and green onions.

Pintesting Puerto Rican Corned Beef

Cook this for another 5 minutes or so to heat everything through.

Your rice should be done now so dinner is ready to eat!

Pintesting Puerto Rican Corned Beef

This is the kind of comfort food that warms you on a cold day; the kind that can help soothe your heart when you’re worried about your loved ones after a hurricane. Comfort comes in many forms and mine comes from the kitchen – like soup when you’re sick.

Please continue to pray for all those who were affected by the 2017 hurricane season and help as you are able.

The Pintesting Results:

Overall Results: 4.85

Pintesting Seal 5 Pins

Accuracy:  This recipe is just like how I remember eating this as a child (if you add the olives). The taste and texture are perfect and it always comes out right. 5 Pins

Pintesting Rating - 5 Pins

Difficulty:  There is a bit of peeling and chopping in the prep work and the frying (and removal) of the potatoes could cause splattering if you’re not careful. 4 Pins

Pintesting Rating - 4 Pins

Time:  The prep work took about 7 minutes and the cook time was roughly 20 minutes. The total time – including the rice – was about half an hour. That’s a lot of flavor and comfort for a quick meal. 5 Pins

Pintesting Rating - 5 Pins

Cost:  Most of the ingredients are staples in my home. If you had to buy everything except the oil (which is in most kitchens), it would cost roughly $20 – less at a Hispanic store. Served with rice, this will feed 4-6 servings. . . unless your husband goes back for thirds. 5 Pins

Pintesting Rating - 5 Pins

Practicality:  This recipe comes together very easily and quickly. It’s perfect for a quick weeknight meal or you can add a salad and some tostones with garlic sauce to make a heartier Sunday supper. The leftovers, if you have any, are delicious the next day, too. 5 Pins

Pintesting Rating - 5 Pins

Creamy Herbed Ricotta and Asparagus Puff Pastry Tart

Jul 22, 2017 by Anne Hernandez

Pies, Tarts, and Crostatas – usually, when I think of pies and tarts they’re filled with something sweet and fruity, chocolate, or other lusciously sweet concoction. That’s part of why I was so excited to be a judge at the American Pie Council National Championships this year. I mean, who wouldn’t want to sit and eat pie for two days? I learned very quickly that you should NOT pick your favorite kind of pie to judge. Why? Because after more than 30 cherry pies (including gluten-free and no sugar added) I think it’s going to be a very long time before I’ll want another cherry pie again. It was really inspirational to see all of those beautiful pies – some were works of art. I don’t usually make pies so I was searching pies and tarts when I came across this pin for Creamy Herbed Ricotta and Asparagus Puff Pastry Tart by Michelle of The Brooklyn Cook. Ooh, a SAVORY option!

Pintesting Creamy Herbed Ricotta and Asparagus Puff Pastry Tart

I hadn’t really thought of savory for pies except for pot pies. There was something very fresh and light looking about this one so I knew I wanted to try it.

The Pintesting:

The ingredients were pretty simple and using puff pastry made the crust a breeze. The only down side is that I couldn’t find fresh for all of the herbs so I decided to use the 1:3 ration and substitute dried herbs. More about that later.
Pintesting Creamy Herbed Ricotta and Asparagus Puff Pastry Tart
First, mix the ricotta mixture.
Pintesting Creamy Herbed Ricotta and Asparagus Puff Pastry Tart
 Then score the puff pastry around all of the sides. This will help give the crust its edges when it bakes.
Pintesting Creamy Herbed Ricotta and Asparagus Puff Pastry Tart
 Spread the ricotta mixture inside the scored part of the crust.
Pintesting Creamy Herbed Ricotta and Asparagus Puff Pastry Tart
 Lay the asparagus on top of the ricotta. The recipe called for 1/2 pound of asparagus, trimmed, which is what I used. I suggest using thinner asparagus and perhaps a bit more.
Pintesting Creamy Herbed Ricotta and Asparagus Puff Pastry Tart
 Brush the edges with an egg wash.
Pintesting Creamy Herbed Ricotta and Asparagus Puff Pastry Tart
Bake it until the crust is a beautiful golden brown and the ricotta mixture is cooked through.
Pintesting Creamy Herbed Ricotta and Asparagus Puff Pastry TartThis is listed as an appetizer, but it would also make a nice vegetarian lunch or dinner dish with a salad.
Pintesting Creamy Herbed Ricotta and Asparagus Puff Pastry Tart
 The HH and I both thought it was a bit too herby for our taste. This could be because I used dry herbs rather than fresh, so the next time I’ll definitely use fresh and maybe add just a touch of lemon juice or zest into the ricotta mixture. Lemon and asparagus play so nicely together. I will also use more asparagus and alternate every other one so that there will be tips on both sides, and I’ll also try to measure the cut by the width of the pastry if possible.
Pintesting Creamy Herbed Ricotta and Asparagus Puff Pastry Tart
>/div>
After you’ve had your appetizer or dinner, go ahead and have some pie for dessert! Here are a few pie pictures from the competition. If you’re not up for entering a pie, the American Pie Council is always looking for judges. Like I said, it’s a tough job but somebody’s got to do it.
2017 Pro Cream Pie Category Pies

The Pintesting Results:

Overall Results: 4.3 Pins
Pintesting Seal 4 Pins
Accuracy: The recipe looked just like the original post. Usually you can use the 3 (fresh) to 1 (dried) ratio for herbs, but in this case the “herbiness” was overwhelming when using dried. I wasn’t able to get the fresh herbs but looking at the quantity of fresh herbs in the photos of the original post leaves me to believe that fresh would still be very herby. 4 Pins
 Pintesting Rating - 4 Pins
Difficulty: This doesn’t take a lot of cullinary skill. You do have to trim the ends of the asparagus so there is a bit of knife work. However, it’s rather minimal so I’m giving this 4 Pins.
 Pintesting Rating - 4 Pins
Time:  Start to finish this took just under half an hour and is a great weeknight meal or a quick appetizer. 5 Pins
 Pintesting Rating - 5 Pins
Cost:  Puff pastry and asparagus are the two most expensive ingredients in this recipe. Even so, the total cost was roughly $16. There were 4 entrée-sized portions or $4/serving. You can cut that in half for 8 appetizers. This cost could be higher if you bought fresh herbs at the grocery store (or free if you have an herb garden). 4 Pins
 Pintesting Rating - 4 Pins
Practicality:  This is a lovely idea for an appetizer, side dish, or even as a vegetarian entrée. You can adjust the amount and kinds of herbs used to suit your taste. (I’m definitly going to try some lemon, too) You can even switch up the veggies used if you don’t care for asparagus. The options are pretty open on this one so I’m giving this 5 Pins.
 Pintesting Rating - 5 Pins

Pan-Fried Chicken Tenders

Jul 10, 2017 by Anne Hernandez

This week we celebrated that most esteemed of days, National Fried Chicken Day. Not wanting to miss out on the festivities, I searched my Pinterest pins for a Fried Chicken recipe. I realized that most of my fried chicken pins are healthier versions that oven-bake rather than fry in oil. Normally this is a good thing for our diet. However, for National Fried Chicken Day I went with this Pin for Pan-Fried Chicken Tenders by Mandy of South Your Mouth. You won’t get any drumsticks or wings, but it’s frying AND the chicken tenders will cook more quickly than whole chicken pieces.
Pintesting Pan-Fried Chicken Tenders - ORIGINAL PIN

Chicken tenders, no matter how good, need a dipping sauce. Since Mandy recommended a mixture that tastes like Chick-Fil-A sauce, I am doing a second Pintesting on this pin for a Copycat Chick-Fil-A Sauce recipe by Serene Herrera of House of Yumm.

The Pintesting:

The ingredients include chicken tenders, seasoning mixture, milk mixture, and a flour mixture. My grocery didn’t have chicken tenders so I got chicken breasts and sliced them into tenders. This seemed a lot easier than running from store to store in search of the same thing.

Pintesting Pan-Fried Chicken Tenders

Start by making a seasoning blend that Mandy calls “Chicken Scratch” and says is good for seasoning “anything with feathers.”

Pintesting Pan-Fried Chicken Tenders

Season the chicken tenders with part of the Chicken Scratch.

Pintesting Pan-Fried Chicken Tenders

Then blend the milk mixture. It calls for a fair amount of hot sauce. The recommended amount will give a bit of heat; adjust this to your own taste preference.

Pintesting Pan-Fried Chicken Tenders

Mix the coating with flour, seasonings, and more Chicken Scratch.

Pintesting Pan-Fried Chicken Tenders

Dip the seasoned chicken tenders in the milk mixture.

Pintesting Pan-Fried Chicken Tenders

Then coat it in the flour mixture.

Pintesting Pan-Fried Chicken Tenders

Pan fry them in about an inch of hot oil.

Pintesting Pan-Fried Chicken Tenders

Turn the chicken to cook evenly; about 5-6 minutes total.

Pintesting Pan-Fried Chicken Tenders

Drain the cooked tenders on paper towels or on a cooling rack. I put a cooling rack over paper towels – just to be safe.

Pintesting Pan-Fried Chicken Tenders

These fried up to a nice golden brown without losing their coating. As I said, they do have a kick of heat to them – a bit more than is my personal preference but not more than what I would call medium hot. The chicken was fully cooked without drying out. These Pan-Fried Chicken Tenders were a great way to celebrate National Fried Chicken Day.

Pintesting National Fried Chicken Day

I made the Copycat Chick-Fil-A Sauce recipe to serve on the side and paired it with a salad.

Click Here to go to the Copycat-Chick-Fil-A Sauce Pintesting.

The Pintesting Results:

Overall Results: 4.45 Pins

Pintesting Seal 4 Pins

Accuracy:  The Pan-Fried Chicken Tenders turned out just like the recipe and post said except for one thing – the heat. I understand that heat levels can be subjective and what one person considers flavor might be fire to another. In this case, however, it wasn’t the opinion of just my HH and me. I had a few people at work try them and they all mentioned that they “have a kick” or “have some heat on the back end.” Other than that, the chicken tenders were moist, crispy, and had all the yum of fried chicken. 4 Pins

Pintesting Rating - 4 Pins

Difficulty:  There is a level of danger that accompanies frying in oil. Anyone who’s been splattered can attest to the pain. All the prep work of mixing the dry rub, milk wash, etc. is easy. I went back and forth between giving this a 3 or a 4, but since this is pan-frying instead of deep-frying I’m giving this 4 Pins.

Pintesting Rating - 4 Pins

Time:  The whole recipe took less than 30 minutes from start to finish; even with the dipping, coating, resting, and frying. This is a great recipe for busy weeknights. 5 Pins

Pintesting Rating - 5 Pins

Cost:  All of the ingredients are normally in my kitchen. The chicken was $3.99/lb and my package was $4.45. The Chicken Scratch rub makes a lot and can be used for “anthing that has feathers.” I estimate the total cost at $5.75. Since this served supper and leftovers for lunch that’s less than $2/serving. 5 Pins

Pintesting Rating - 5 Pins

Practicality:  You just can’t go wrong with homemade chicken tenders. They beat frozen every time – plus you know what’s in these. I prefer no mystery ingredients in my food. I like that you can adjust the level of heat to your preference by adjusting the amount of hot sauce in the milk mixture AND if you prefer a “Southwest vibe” you can adjust the Chicken Scratch per her instructions. My lunch leftovers heated well in the work toaster oven so I’m guessing that you could make these ahead and bake in the oven, but since they take less than 30 minutes it’s just as easy to make them fresh. 5 Pins

Pintesting Rating - 5 Pins

Slow Cooker Balsamic Glazed Roast Beef

Pintesting Slow Cooker Balsamic Galzed Roast Beef

The other day I was looking at summer travel ideas and came across. . . crock pot cooking. What??? Apparently, it’s a thing for those who travel in RV’s and I think it’s quite brilliant. After a day of camping, sightseeing or generally vacationing, you come back to your home-away-from-home and dinner is ready and waiting for you.  See – BRILLIANT! Slow cookers are also perfect for home cooking all summer because they don’t heat up the house like your oven does. It’s already in the 90’s every day here so let’s test the last crock pot recipe that I saw on Pinterest; Slow Cooker Balsamic Glazed Roast Beef by Kevin of Closet Cooking.

Since it had only been a few months since my first roast (remember the Chuck Roast with Balsamic and Dijon post?) and we were so happy with the end result, I wanted to stay with similar flavors so Kevin’s recipe sounded like just the thing.


Pintesting Slow Cooker Balsamic Galzed Roast Beef

The Pintesting:

The main ingredients are pretty similar to those in the Chuck Roast with Balsamic and Dijon recipe with a few exceptions.Pintesting Slow Cooker Balsamic Galzed Roast Beef

First, sear the roast. . .

Pintesting Slow Cooker Balsamic Galzed Roast Beef

. . .on both sides.

Pintesting Slow Cooker Balsamic Galzed Roast Beef

Remove the roast (I put it right in the slow cooker), then saute the onions and garlic.

Pintesting Slow Cooker Balsamic Galzed Roast Beef

Add the onions, sauce ingredients, and beef broth to the crock pot.

Pintesting Slow Cooker Balsamic Galzed Roast Beef

Then add the potatoes and carrots. Cook for 8 hours on low.

Pintesting Slow Cooker Balsamic Galzed Roast Beef

On the Chuck Roast with Balsamic and Dijon, I added the peas as a side dish. Even though they were not in the recipe, this time I added the peas to cook with the rest during the last 1/2 hour of cooking time.

Pintesting Slow Cooker Balsamic Galzed Roast Beef

Remove the meat and veggies then make the gravy.

Pintesting Slow Cooker Balsamic Galzed Roast Beef

Strain the liquid into a pot and bring it to a simmer. Make a slurry with cornstarch and water (I used some of the beef broth) and add it to the simmering liquid.

Pintesting Slow Cooker Balsamic Galzed Roast Beef

Voilà, dinner is done!

Pintesting Slow Cooker Balsamic Galzed Roast Beef

I think if you’re on vacation and eating like this the right term is “Glamping” not camping. Brilliant.

The Pintesting Results:

Overall Results: 4.4 Pins

Accuracy: This Slow Cooker Balsamic Glazed Roast Beef recipe delivered. The roast was flavorful and so tender it was falling apart. The veggies were perfect. The gravy was an extra step but a delicious bonus. 5 Pins

Pintesting Rating - 5 Pins

Difficulty:  There wasn’t anything hard about the recipe as far as cooking techniques, but since the juices were poured from the crock pot and strained into a sauce pan I’m giving this 4 Pins.

Pintesting Rating - 4 Pins

Time: The preparation time for this was fairly quick but there are 8 1/2 hours of cook time. 3 Pins

Rated 3 Pins

Cost: The roast was the most expensive ingredient at about $15. On the other hand, the potatoes were buy-one-get-one-free and the organic carrots were on sale. We had Sunday dinner and 2 meals of leftovers for a total of 6 servings. Since most of the ingredients were kitchen staples, the cost per serving was less than $5. 4 Pins

Pintesting Rating - 4 Pins

Practicality: Whether you’re camping or cooking at home, on vacation, busy weeknight, or for a weekend dinner, this recipe won’t disappoint. I’ll be making this again! 5 Pins

Pintesting Rating - 5 Pins

Paprika Chicken Sheet Pan Dinner

There have been a LOT of pins for one pan or sheet pan dinners on Pinterest lately and I absolutely get why they’re so popular. Life is busy (just in case you didn’t get that memo). After a day of work, family, and other activities I don’t always get excited about fussing over supper, nor do I plan well enough for slow cooker meals. I know that I’m not alone on this. That’s why these meals are awesome. One pan + one cutting board + 1 knife = supper done with minimal fuss and even fewer dishes. I knew I wanted to try this pin for Paprika Chicken Sheet Pan Dinner by Chrissie of The Busy Baker as soon as I saw it.

Pintesting Paprika Chicken Sheet Pan Dinner

You might remember the Honey Balsamic Chicken Sheet Pan Dinner post that I did not too long ago; this is very similar but with a different flavor profile.

The Pintesting:

One of the things that I thought was interesting about this recipe was that the veggies included beets. I’ve recently been using beets in my juicing and I’ve had pickled beets so I was excited to try them in a new way.

Pintesting Paprika Chicken Sheet Pan Dinner

Start by cutting your veggies and putting them on the sheet pan. Do you see that big one in the center with a bit of green? That’s one clove of elephant garlic. It was HUGE; almost the size of a potato! I threw him in just for fun.

Pintesting Paprika Chicken Sheet Pan Dinner

Season the veggies, drizzle with extra virgin olive oil and toss them.

Pintesting Paprika Chicken Sheet Pan Dinner

Add chicken, season it, drizzle with extra virgin olive oil and rub it in.

Pintesting Paprika Chicken Sheet Pan Dinner

Then put it in the oven to roast. In half an hour your house smells amazing and dinner is done!

Pintesting Paprika Chicken Sheet Pan Dinner

The chicken was juicy and flavorful even when the leftovers were reheated for lunch. The combination of vegetables was delicious and so pretty. HH gave his 100% approval so this is definitely going to be put in the regular dinner rotation.

Pintesting Paprika Chicken Sheet Pan Dinner

The Pintesting Results:

Overall Results: 4.7 Pins

Pintesting Seal 5 Pins

Accuracy: This was an easy and delicious supper made on one sheet pan and it turned out exactly like the original post said it would. The smokey paprika gave warmth and lots of flavor without being too spicy and the roasted veggies were tender on the inside and just a bit crispy on the outside. 5 Pins

Pintesting Rating - 5 Pins

Difficulty: There is a bit of prep work to getting all of the vegetables peeled and chopped, but that’s the hardest part. Due to the number of veggies that needed peeling prior to chopping (potatoes, carrots, beets, and sweet potatoes) I’m giving this 4 Pins.

Pintesting Rating - 4 Pins

Time: The prep work took about 10 minutes; twice as long as the 5 minutes that Chrissie had in her recipe. In all fairness, I could have chopped baby carrots and used the smaller potatoes and left the skins on to cut the time. The cook time was 30 minutes, so 35-40 minutes is not a long time to wait for supper. 4 Pins

Pintesting Rating - 4 Pins

Cost: Most of the ingredients are kitchen staples and all are easy to find at most grocers. The chicken thighs were the most expensive ingredients but at $4.85 for four that puts the total cost per serving at less than $5.00. 5 Pins

Pintesting Rating - 5 Pins

Practicality: These sheet pan recipes are so easy, quick, and delicious. And let me say again, 1 pan + one cutting board + 1 knife. Just three kitchen tools to wash! 5 Pins

Pintesting Rating - 5 Pins

Chuck Roast with Balsamic and Dijon

Feb 26, 2017 by Anne Hernandez

Pintesting Chuck Roast with Balsamic and Dijon

There are some things that I’ve never or have almost never cooked; one of them is a roast. I know, it’s shocking! I’ve made soufflés, Beef Wellington, risottos, and many other dishes that are supposed to be complicated or “expert level” long before I made my first roast. Why? Because all my life my mother, the in-laws, or my HH have made it. Recently the grocery store had chuck roasts on sale, and I decided it was finally time to make my first roast. A search of my Pinterest pins for roasts brought up lots of recipes, but most of them were slow cooker recipes and I wanted a traditional oven-roasted version. Thankfully I had pinned this pin for Chuck Roast with Balsamic and Dijon by Kristy of The Wicked Noodle. It was just what I was looking for; oven-roasted with carrots, potatoes, and a self-made gravy.

Pintesting Chuck Roast with Balsamic and Dijon

The Pintesting:

I don’t know why, but I thought that roasts required magical ingredients to make them turn out delicious. I was so wrong. These basic ingredients are all that’s needed. The peas are my own addition, but I’ll get to that later.

Pintesting Chuck Roast with Balsamic and Dijon

First season the roast with salt and pepper.

Pintesting Chuck Roast with Balsamic and Dijon

Next, heat the pan and oil to sear the roast on one side.

Pintesting Chuck Roast with Balsamic and Dijon

Then sear the other side.

Pintesting Chuck Roast with Balsamic and Dijon

Remove the roast and add onions.

Pintesting Chuck Roast with Balsamic and Dijon

Cook the onions until they are soft.

Pintesting Chuck Roast with Balsamic and Dijon

Next, add the balsamic vinegar and cook until it’s reduced and syrupy, then add the Dijon mustard.

Pintesting Chuck Roast with Balsamic and Dijon

Put the meat back in, add the broth and thyme, then roast in the oven.

Pintesting Chuck Roast with Balsamic and Dijon

The meat should be tender and fall apart.

Pintesting Chuck Roast with Balsamic and Dijon

Add the potatoes and carrots and cook longer.

Pintesting Chuck Roast with Balsamic and Dijon

When the potatoes are thoroughly cooked, you’re all done.

Pintesting Chuck Roast with Balsamic and Dijon

Plate your dinner and show off your masterpiece.

Pintesting Chuck Roast with Balsamic and Dijon

Now for the peas. This is one thing that my HH prefers to NOT be cooked with the roast. I’ve always liked them with the roasted veggies. Since one of the keys to a great marriage is knowing when and how to compromise, I cooked the peas separately and served them smothered in the gravy. We both agreed that this was a delicious recipe and as the resident roast maker, he declared my first roast a complete success. High praise, indeed.

The Pintesting Results:

Overall Results: 4.4 Pins

Pintesting Seal 4 Pins

Accuracy:  This recipe turned out exactly like Kristy’s pictures. The roast was very tender and juicy. The balsamic and dijon gave a nice twist to the traditional chuck roast. The potatoes and carrots were perfectly tender without being mushy. 5 Pins

Pintesting Rating - 5 Pins

Difficulty:  There are no difficult techniques to this dish. However, I am giving this 4 Pins because you transfer a hot dutch oven from the stovetop to the oven.

Pintesting Rating - 4 Pins

Time:  Preparing the roast took very little time; about 15 minutes. Since this takes several hours to cook, however, I’m giving this 3 Pins.

Rated 3 Pins

Cost:  I happened to get my chuck roast on sale, but even so it was more than $16 just for the meat. The dish made 6 servings and the total cost was about $25 which is $4 per serving. That’s not bad for a full dinner. 4 Pins

Pintesting Rating - 4 Pins

Practicality: This is a great dinner and worth the time it takes to make. The next time I try this I’ll make it in the slow cooker since they cook themselves all day on low. The flavor and texture were perfect – just like Sunday Supper. 5 Pins

Pintesting Rating - 5 Pins

Baked Ratatouille

Jan 22, 2017 by Anne Hernandez

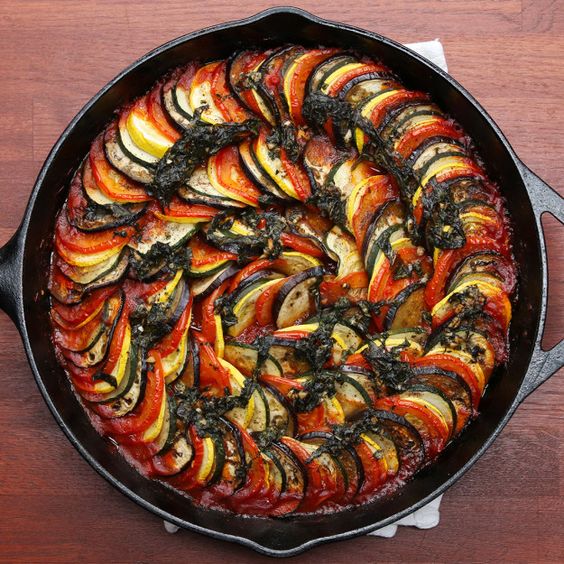
I have a confession to make – I love Disney movies. I remember going to the Disney summer film festivals each summer as a child. Every week there was a couple of shorts and then a feature-length movie. It was one of my favorite summer memories.My kids loved Disney when they were old enough to watch their first movie, Beauty and the Beast. It’s our all-time favorite, but there have been others that are near the top of the list; like Ratatouille. I think I fell in love with this one because of my love of cooking and my dream to visit France. So when I saw this pin for the BuzzFeed Goodful recipe of Baked Ratatouille, inspired by Marie at Feeling Foodish, it made me think of the way that the rat-chef, Remy, took the traditional vegetable stew and transformed it into haute cuisine.

Pintesting Baked Ratatouille

If you haven’t seen the movie yet, I don’t want to spoil it for you, but this little clip will let you see the dish that I’m referring to – and go watch the movie!

https://youtu.be/EddEYsOeG5A

So in an attempt to recreate the dish that piqued my curiosity since it became a movie icon, here is the Pintesting of Baked Ratatouille.

The Pintesting:

There are three main steps to making this dish; the sauce, the veggies, and the herb seasoning.

1. The Sauce:

The sauce starts with fresh aromatics. I found it cheaper to get a potted basil plant at the grocery store than to buy a small packet of basil leaves in the herb section. Not only does the basil stay fresh longer, but it lasts longer and looks so pretty on my kitchen counter.

Pintesting Baked Ratatouille

Sautee the onions and peppers in extra virgin olive oil.

Pintesting Baked Ratatouille

When they start to soften add the garlic and season with salt and pepper. Minced garlic burns rather quickly, so I wait a bit before adding it.

Pintesting Baked Ratatouille

Add the crushed tomatoes. By the way, this would be great over pasta.

Pintesting Baked Ratatouille

Add the basil and take it off the heat.

Pintesting Baked Ratatouille

2. The Vegetables:

Now for the veggies. Try to find similarly sized vegetables. This is one of the first times I’ve ever cooked eggplant, and I should have chosen more wisely. You’ll find out why in a moment.

Pintesting Baked Ratatouille

Slice the vegetables thinly. I used a mandoline (seen above) for the yellow squash and zucchini, but the eggplant was too wide and the tomatoes didn’t slice well so I used a knife on them.

Pintesting Baked Ratatouille - Veggies

As you can see, the eggplant was MUCH larger than the rest of the veggies. Not one to give up, I knew there had to be a way to make this work.

Pintesting Baked Ratatouille

I used double everything other than the eggplant, and it seemed to fit well. Voilà!

Pintesting Baked Ratatouille

Layer the veggies in a pattern.

Pintesting Baked Ratatouille

Continue this all the way around the pan making concentric rings. I ended up cutting the eggplant in order to make it fit in the center ring.

Pintesting Baked Ratatouille

3. The Herb Seasoning:

This calls for fresh herbs; thyme, basil, and parsley. The store didn’t have fresh parsley so I used dried.

NOTE:  When substituting dried herbs for fresh, remember that they are more potent when they’re dried. You usually need about 3 times the amount of fresh herbs as you would dried herbs. In this case, 2 Tablespoons of fresh parsley would be about 2 teaspoons of dried parsley.

Pintesting Baked Ratatouille

Mix the herb seasoning. It smells incredible!

Pintesting Baked Ratatouille

Brush it on the arranged vegetables.

Pintesting Baked Ratatouille

See how pretty that looks!

Pintesting Baked Ratatouille

Bake it covered for 40 minutes in a 375-degree pre-heated oven. Remove the cover and bake another 20 minutes.

Pintesting Baked Ratatouille

Give it just a minute to cool and then dig in. We had eaten lunch not too long beforehand, so this was a separate vegetable course. It smelled and tasted so good that I had two small “just-to-taste” servings while my HH had three.

Pintesting Baked Ratatouille

We ate the leftovers the next day with some oven-baked fish – so delicious! The flavors have longer to get to know each other and play more nicely together; similarly to how lasagna or chili tastes better the next day.

Pintesting Baked Ratatouille

Fin (The End):

The number of vegetables called for in the recipe was nearly double of what would fit into the pan. We didn’t complain since most of the prep work was done and I just made another batch. If eating veggies the same way too many days in a row sounds boring, I found some ways to do a ratatouille makeover. Check here and here for inspiration.

A French foodie friend told me that the ratatouille on the movie is not really ratatouille, which is a simple vegetable stew. So I searched for the Ratatouille version of ratatouille and found that it’s actually called Confit Byaldi. In the image below, the Disney Pixar version of the dish is shown at the top with a real version shown beneath (one being mine).

Pintesting Baked Ratatouille

I want to leave you with some inspiration; a quote from the illustrious Chef Gusteau, “Anyone can cook but only the fearless can be great.” Be fearless. Be Great. Try this recipe.

Anyone Can Cook

The Pintesting Results:

Overall Results:  4.0 Pins

Pintesting Seal 4 Pins

Accuracy:  The dish turned out looking like the recipe picture and tasted delicious, but the number of vegetables was nearly double of what the pan could hold and that’s a lot of extra veggies. Also, the recipe didn’t specify the kind of eggplant to use in order to get similar-sized slices for uniformity. For these reasons, I’m giving this 4 Pins.

Pintesting Rating - 4 Pins

Difficulty:  This recipe requires a lot of prep work for all three parts. If you don’t have a mandoline and need to slice all of the vegetables with a knife, it will take a bit of time, too. You will use the chop, slice, and chiffonade knife techniques; not hard, but not easy enough for kids. 4 Pins

Pintesting Rating - 4 Pins

Time:  There are about 15 minutes of prep work to get all the veggies done, plus about 15 minutes to cook the sauce and an hour of baking time. That’s an hour and a half. Don’t get me wrong – it’s absolutely worth the time and you can make extra to freeze or you can get it layered early in the day and cook it for supper, but it’s not going to be a 30-minute meal.  3 Pins

Rated 3 Pins

Cost:  If you have a garden and need to use up a bumper crop of vegetables, then this is a cheap dish to make. However, if you need to hit the grocery store for everything it could get costly depending on what’s in season and on sale. Since produce prices fluctuate substantially by regions and seasons, I’m not going to give a specific price, but I will give this 4 Pins.

Pintesting Rating - 4 Pins

Practicality:  If you have or know kids (little or big ones) who don’t care for vegetables, this might be one way to get them to eat them. First, it’s delicious. Second, it’s from a movie. Let the Disney magic work in your favor here. That the flavor is even better if you have leftovers is a big plus. I also love that leftovers can be transformed into everything from quiche, omelets, sauces, quesadillas, soups, and so much more. 5 Pins

Pintesting Rating - 5 Pins

Honey Balsamic Chicken

Jan 14, 2017 by Anne Hernandez

It’s the new year and I have resolved to eat healthy – again – for about the 100th year in a row. Anyone else with me on this? Granted, I don’t eat terribly but I’m not as consistent as I’d like to be. But some meals make eating a healthy diet much easier. For example, I saw a video for Honey Balsamic Chicken on Facebook and a couple of days later this pin for the recipe by TipHero (inspired by Chungah of Damn Delicious) popped up on my Pinterest feed, too. They do seem to copy her recipes quite a bit, so if you’re not following Damn Delicious yet you just might want to.

Pintesting Honey Balsamic Chicken

I really like the idea of a whole meal made on one sheet pan in the oven. (Hooray for fewer dishes!) I also like that the recipes used a variety of vegetables.

It’s worth noting that there were a few slight differences in the two recipes.

  1. The TipHero recipe uses green beans while the Damn Delicious recipe uses asparagus. We love asparagus in our home, so that’s what we went with.
  2. The honey balsamic marinade recipes had a few differences. TipHero’s used thyme, rosemary, and chili flakes while the Damn Delicious recipe used Dijon mustard, oregano, and basil.
  3. Chungah’s recipe also took less time to make – a big plus in my book.
  4. The TipHero recipe pours the marinade over the chicken and veggies prior to roasting; Damn Delicious didn’t. I went with TipHero on this step. More flavor is more better. (I beg forgiveness from the grammar police for that.)

The Pintesting:

I didn’t get a photo of all of the ingredients this time. What can I say? I was hungry. Fortunately, there aren’t a lot of ingredients.

The first thing that I did was to make the marinade. I used a short-cut here and just dumped all of the marinade ingredients into the bag that the chicken came in and squished it until it was mixed, tossing the chicken in the marinade at the same time. Since my chicken breasts were still somewhat frozen I thought I’d let it defrost and soak up the flavor all at once. Also, since it’s just my HH and me I only used one whole chicken breast (two halves). This worked for us since the chicken breasts are very large and we like lots of veggies.

Pintesting Honey Balsamic Chicken

While the chicken defrosted, I lined the pan with parchment and prepped the vegetables.

Quarter the potatoes then add the tomatoes. Drizzle with extra virgin olive oil (EVOO) and season with salt and pepper.

Pintesting Honey Balsamic Chicken

Put the chicken on the pan and drizzle the remaining marinade on the veggies.

Pintesting Honey Balsamic Chicken

Roast for about 20 minutes then add the asparagus (I drizzled the asparagus with a little more extra virgin olive oil), then roast it for another 10 minutes. This was my timing compromise between the two recipes.

You don’t want to eat undercooked chicken! When in doubt check the internal temperature with an instant-read thermometer. For chicken, this should be 165 degrees Fahrenheit.

Pintesting Honey Balsamic Chicken

Done! Your dinner is done and the only dirty dishes are one pan, one cutting board, and one knife. Join me in the happy dance?

Pintesting Honey Balsamic Chicken

The chicken was juicy and flavorful. The tangy-sweet acidity of the tomatoes, starchy creaminess of the potatoes, and the bright crispy asparagus complimented each other, and the marinade brought it all home. YUM!

Pintesting Honey Balsamic Chicken

And now I have to say this. WINNER! WINNER! CHICKEN DINNER!

The Pintesting Results:

Overall Results:  4.85 Pins

Pintesting - 5 Pins Overall Rating

Accuracy:  This recipe was as simple as the TipHero video showed it to be even though I followed Chungah’s recipe. 5 Pins

Pintesting Rating - 5 Pins

Difficulty:  This recipe was very simple – perfect for novice cooks. The prep work was minimal and the marinade made everything taste wonderful. 5 Pins

Pintesting Rating - 5 Pins

Time:  The active time to prep and cook the recipe was 40 minutes. The chicken requires time to marinade (30 minutes to overnight). I did this ahead of time and let it marinade all afternoon. While it isn’t active cooking time, it’s still necessary to make the recipe turn out so I’m giving this 4 Pins.

Pintesting Rating - 4 Pins

Cost:  The cute little potatoes and grape tomatoes were both buy-one-get-one-free at the store when I got them. (I love shopping sales!) The total cost of all the main ingredients (not deducting for the sales) was $12.00. Even though we used only 2 chicken breast halves, we had 4 meals making this $3.00/serving. 5 Pins

Pintesting Rating - 5 Pins

Practicality:  This is the kind of home cooking I could eat every week. It was simple, delicious, and planning ahead with the marinade made quick work of the cooking. Perfect for busy weeknights! You could experiment with using different kinds of vegetables such as green beans, carrots, Brussels sprouts, or whatever your family likes. You can also switch up the marinades – try the TipHero version for a more traditional herbed chicken flavor. This will be a regular in our menu rotation. 5 Pins

Pintesting Rating - 5 Pins

True Bangers and Mash with Onion Gravy

Oct 17, 2016 by Anne Hernandez

The simple recipe of True Bangers and Mash with Onion Gravy is pretty standard fare in Ireland and the U.K; it’s classic comfort food. My local Fresh Market had a variety of sausages on sale recently; including Irish Bangers. My HH had never heard of them and asked what they were like, so we picked up a couple and decided to try the famous dish.

Pintesting True Bangers and Mash with Onion Gravy

After searching several recipes on Pinterest and pinning a few, I saw this pin that claimed to be the True Bangers and Mash with Onion Gravy recipe which was submitted by wsf” on All Recipes. Since I’ve never tried Bangers & Mash before, I wanted to try the “True” real deal recipe. Bia Maith is Irish for Good Food; let’s get on with the Pintesting.

The Pintesting:

Pintesting True Bangers and Mash with Onion Gravy

The ingredients list wasn’t too long and most of it was already in my kitchen.

Pintesting True Bangers and Mash with Onion Gravy

This all started because I saw the bangers sausage on sale at The Fresh Market. If you’re lucky enough to find Irish bangers then use them. If you can’t, you can substitute any milder pork sausage.

Pintesting True Bangers and Mash with Onion Gravy

Cook the bangers, turning them until they’re browned on all sides.

Pintesting True Bangers and Mash with Onion Gravy

Boil potatoes for the mash.

Pintesting True Bangers and Mash with Onion Gravy

Make the mash (mashed potatoes). A unique ingredient was dry mustard for the mashed potatoes. I’ve never used it that way before, but the mash was delicious.

Pintesting True Bangers and Mash with Onion Gravy

The recipe called for two large onions. I don’t know about you, but that’s a LOT of onions in my book. They filled up the whole skillet pan. The next time I make this I’ll use one large or two medium onions.

Pintesting True Bangers and Mash with Onion Gravy

Once the onions are sweated and just browned add the beef broth…

Pintesting True Bangers and Mash with Onion Gravy

…and the wine. Let it reduce for a while.

Pintesting True Bangers and Mash with Onion Gravy

According to the recipe submitter, wsf, “Please note that this is a very thin gravy, as is traditional. It will still be very liquidy.” He was right.

Pintesting True Bangers and Mash with Onion Gravy

After simmering for 12 minutes the gravy smelled great but was much thinner than my usual gravy. Pintesting True Bangers and Mash with Onion Gravy

If “wsf” wouldn’t have mentioned how thin the gravy was, I’d have thought that I’d done something wrong. The flavor was wonderful, though. I thought the banger sausages were mild but flavorful and were complimented by the flavors of the onions, beef broth, and wine. The mashed potatoes were fluffy, creamy, and just what I needed to soak up the gravy.

Pintesting Variation #2:

My HH and I decided to get our Irish on before the sale was over and made a second variation just to test a different gravy. I searched several other recipes and found  “Onion Gravy for British Bangers and Mash,” also from All Recipes (Lupin Pooter).  This recipe called for chicken broth rather than beef broth, dijon mustard instead of dry mustard, added Worcestershire sauce, and used a roux as a thickener. Not wanting to risk another thin gravy, I skipped the wine and added 3 cubes of beef bouillon to the chicken broth to add richness instead. THIS is the gravy we were looking for. When we make this again, and we absolutely will, we’ll use the “True Bangers and Mash” recipe with the “Onion Gravy for British Bangers and Mash” (plus the beef bullion) for the gravy.

Sláinte!

The Pintesting Results:

Overall Results: 4.3 Pins

4 Pins Overall

Accuracy:  The recipe gave the warning that the gravy would be thin (aka runny), but the gravy in the photo looked a bit thicker than mine turned out. I checked with some Irish friends who’ve had real and proper Irish Bangers. They said that the gravy should be thicker rather than thinner. “It should flow like lava as you pour it over the food.”  I omitted the red wine to make the recipe thicker but, I was told, it’s traditional to the gravy. The next time I try this I’ll add the red wine and use a cornstarch slurry to thicken up the gravy. Due to the questionable thinness of the gravy, this gets 4 Pins.

Pintesting Rating - 4 Pins

Difficulty:  There’s a reason Bangers and Mash is common fare in the U.K. Brown the sausage, make the gravy, and serve with mashed potatoes. It reminds me of  Salisbury Steak, but with Irish sausage – simpler since you don’t have to make the patties. There is a bit of chopping with the potatoes and onions, and the boiling, browning, and reducing takes a wee bit of cooking. Therefore this gets 4 Pins.

Pintesting Rating - 4 Pins

Time:  Dinner took roughly an hour from start to finish with either recipe. The second gravy took a little less time because of the roux. An hour for dinner isn’t bad, but I’m giving this 4 Pins.

Pintesting Rating - 4 Pins

Cost:  The Irish banger sausages were the most expensive part of the meal(s), and you can see that 2 sausages were $2.81. The wine was the second most costly ingredient, but you don’t have to use an expensive wine. This transforms simple ingredients into a hearty and tasty meal with leftovers at a cost of ~$3.00 per serving. 5 Pins

Pintesting Rating - 5 Pins

Practicality:  This was a simple yet flavorful meal that would go well with peas or other veggies. If you have kids you can either omit the wine from the sauce or let it simmer long enough to cook the alcohol off. It’s the kind of hearty home-style cooking that makes me think of pubs, pints, fireplaces, and family. 5 Pins

Pintesting Rating - 5 Pins

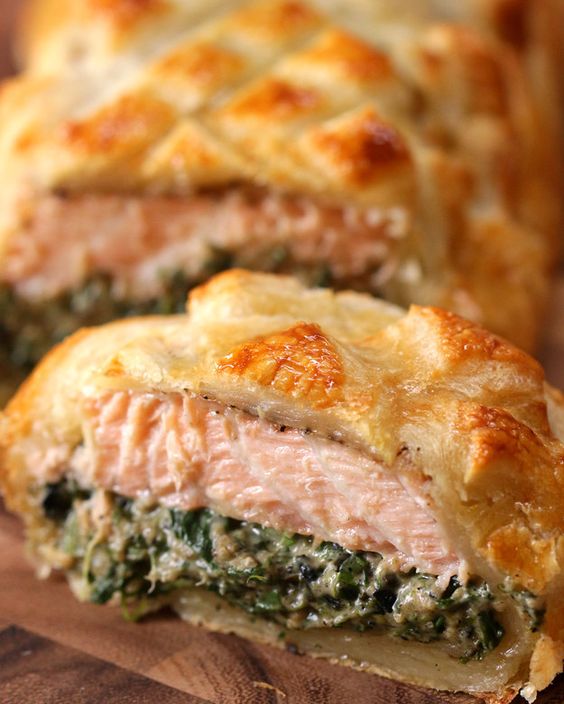
Pintesting Salmon Wellington

Aug 31, 2016 by Anne Hernandez

Pintesting Salmon Wellington

If you’re a foodie or have watched TV in the last decade, then you’ve likely heard Gordon Ramsay yelling at the contestants on his reality show, Hell’s Kitchen.  After watching for many years and seasons, one thing that I learned is that you can’t be considered a serious cook unless you can make an excellent Risotto and Beef Wellington. Eating at 5-star restaurants is a bit out of my normal budget, so the opportunity to try Beef Wellington in a restaurant is rather slim. Fortunately, the ingredients aren’t overly expensive, nor are the techniques difficult. (Thank you, YouTube!) So in order to up my culinary game and finally try some fine dining, a few years ago I decided to conquer both of these dishes; risotto for my birthday and the wellington for Valentine’s Day. But that was the OLD Beef Wellington – the NEW dish is Salmon Wellington.

In an effort to eat healthier, we are trying to have fish and seafood a couple of times a week. Not only is it healthy, but also delicious with so many varieties from which to choose: grilled shrimp on a salad, oven roasted Italian herbed white fish, pan seared scallops, fried catfish, parmesan crusted tilapia with lemon and caper sauce (post to come), and now… *drumroll, please* …Salmon Wellington.

Yes, it deserves a drumroll.

This pin by BuzzFeed Tasty has been all over Pinterest and I’ve seen the video on Facebook and Twitter. With this much notoriety, and because it just looks delicious, and because we love salmon, and because I had almost all of the ingredients on hand, I had to try this. Plus doesn’t puff pastry make everyday food look elegant? Let’s begin the fancy food Pintesting!

Pintesting Salmon Wellington

The Pintesting:

The ingredients list was surprisingly small and simple compared to beef wellington. There is no Foie Gras or duxelles in this recipe.

Pintesting Salmon Wellington

Saute the aromatics and then wilt the spinach.

Pintesting Salmon Wellington

Add the breadcrumbs, seasonings, and cheeses.

Pintesting Salmon Wellington

Stir to mix well. Set the spinach mixture to the side.

NOTE: It’s a lot easier if you add the cream cheese first to let it get a bit melty before adding the rest. You can see that mine is a bit clumpy. This didn’t seem to affect the taste, but it will look a lot nicer.

Pintesting Salmon Wellington

The recipe doesn’t specify whether to get the salmon with or without the skin. Mine had skin so I trimmed it since I don’t want to eat it hiding under puff pastry. I recommend asking your butcher/fishmonger for salmon without the skin if you want to avoid this step.

Season with salt and pepper, then lay the salmon in the center of the puff pastry.

Pintesting Salmon Wellington

Top the salmon with the spinach mixture. I went back and forth between spooning it on and shaping it on top with my hands. Once it’s all on, fold the puff pastry over in thirds to cover and seal everything.

Pintesting Salmon Wellington

Place the filled pastry onto a parchment lined baking sheet seam  side down, tucking in the seams, and then give it a good egg wash.

Pintesting Salmon Wellington

Use a sharp knife to make a crosshatch pattern on the top of the pastry, then give it a final egg wash.

Pintesting Salmon Wellington

Bake it in a preheated oven until your house smells incredible and you’re drooling.

Pintesting Salmon Wellington

DON’T cut right into this immediately. You’ll want to give it at least 5 minutes to rest in order to keep the pastry from smooshing under the knife and the filling from oozing all over the cutting board or plate.

Pintesting Salmon Wellington

Slice it in half to make two impressive and generous servings. (See? No smooshing or oozing.)

Pintesting Salmon Wellington

Plate it. Serve it. Become a superhero – or a supper-hero. There is a serious amount of wow factor with this dish, so enjoy. You deserve it.

Pintesting Salmon Wellington

“This is the best thing you’ve ever made!” said my HH as he quickly tucked in for the next bite. “I could eat this every day!”

Wow! I was expecting a positive response, but the best thing ever?! There you have it. Please excuse me. I’m going to go straighten my cape, gloat in my glory, and see if Gordon Ramsey wants to work in my kitchen.

Pintesting Salmon Wellington

The Pintesting Results:

OVERALL RATING:  4.7 Pins

Pintesting - 5 Pins Overall Rating

Accuracy:  The end result was precisely what the recipe, pictures, and video promised. The puff pastry crust was light and flakey. The salmon was cooked to perfection; juicy but done. The spinach mixture gave a nice brightness to balance the whole dish. I also want to point out that 2 servings are extremely generous – neither of us could finish our portion, which just meant that we got to enjoy the leftovers for lunch the next day. 5 Pins

Pintesting Rating - 5 Pins

Difficulty: The recipe was easy to follow, and the video made it even easier. Although not mentioned, you would definitely want to remove the skin from the salmon. And while none of the steps are difficult, it does take a few steps to put this together. Due to these factors, I’m giving this 4 Pins.

Pintesting Rating - 4 Pins

Time: Although there are a few steps to this recipe, it took 40 minutes from start to finish. This included the 20 minutes of baking time and all of my picture taking. Since 30 minutes is considered a standard for a quick meal and this was only 10 minutes longer for such elegance, I’m giving this 5 Pins.

Pintesting Rating - 5 Pins

Cost: I was surprised at how low-cost this dish is! The salmon is the most expensive component, but it’s usually on sale at one of our local grocers. My fillet was too large for the puff pastry, so I had to cut it in half which made it an even better deal. The puff pastry can be found in the freezer section of most grocery stores, and you get 2 sheets for less than $4. The rest of the ingredients are common to most kitchens and I had them all on hand. The final cost per serving comes to $2.50 if you make 4 servings (like we did) or $5.00 if you make 2 servings. Either way, that’s a fantastic price for a high-end restaurant quality dish. But since the salmon and puff pastry aren’t common to most kitchens, I’m giving this 4 Pins.

Pintesting Rating - 4 Pins

Practicality:  The best thing about this dish (aside from the great flavor, the loving accolades, and the surprising ease of preparation) is that it works just as well for a quick weeknight supper as it does for an impressive special meal. After all, who doesn’t want to be a supper-hero?  5 Pins

Pintesting Rating - 5 Pins