Category: Beverage

Homemade Pumpkin Spice Coffee Syrup

Sep 19, 2016 by Anne Hernandez

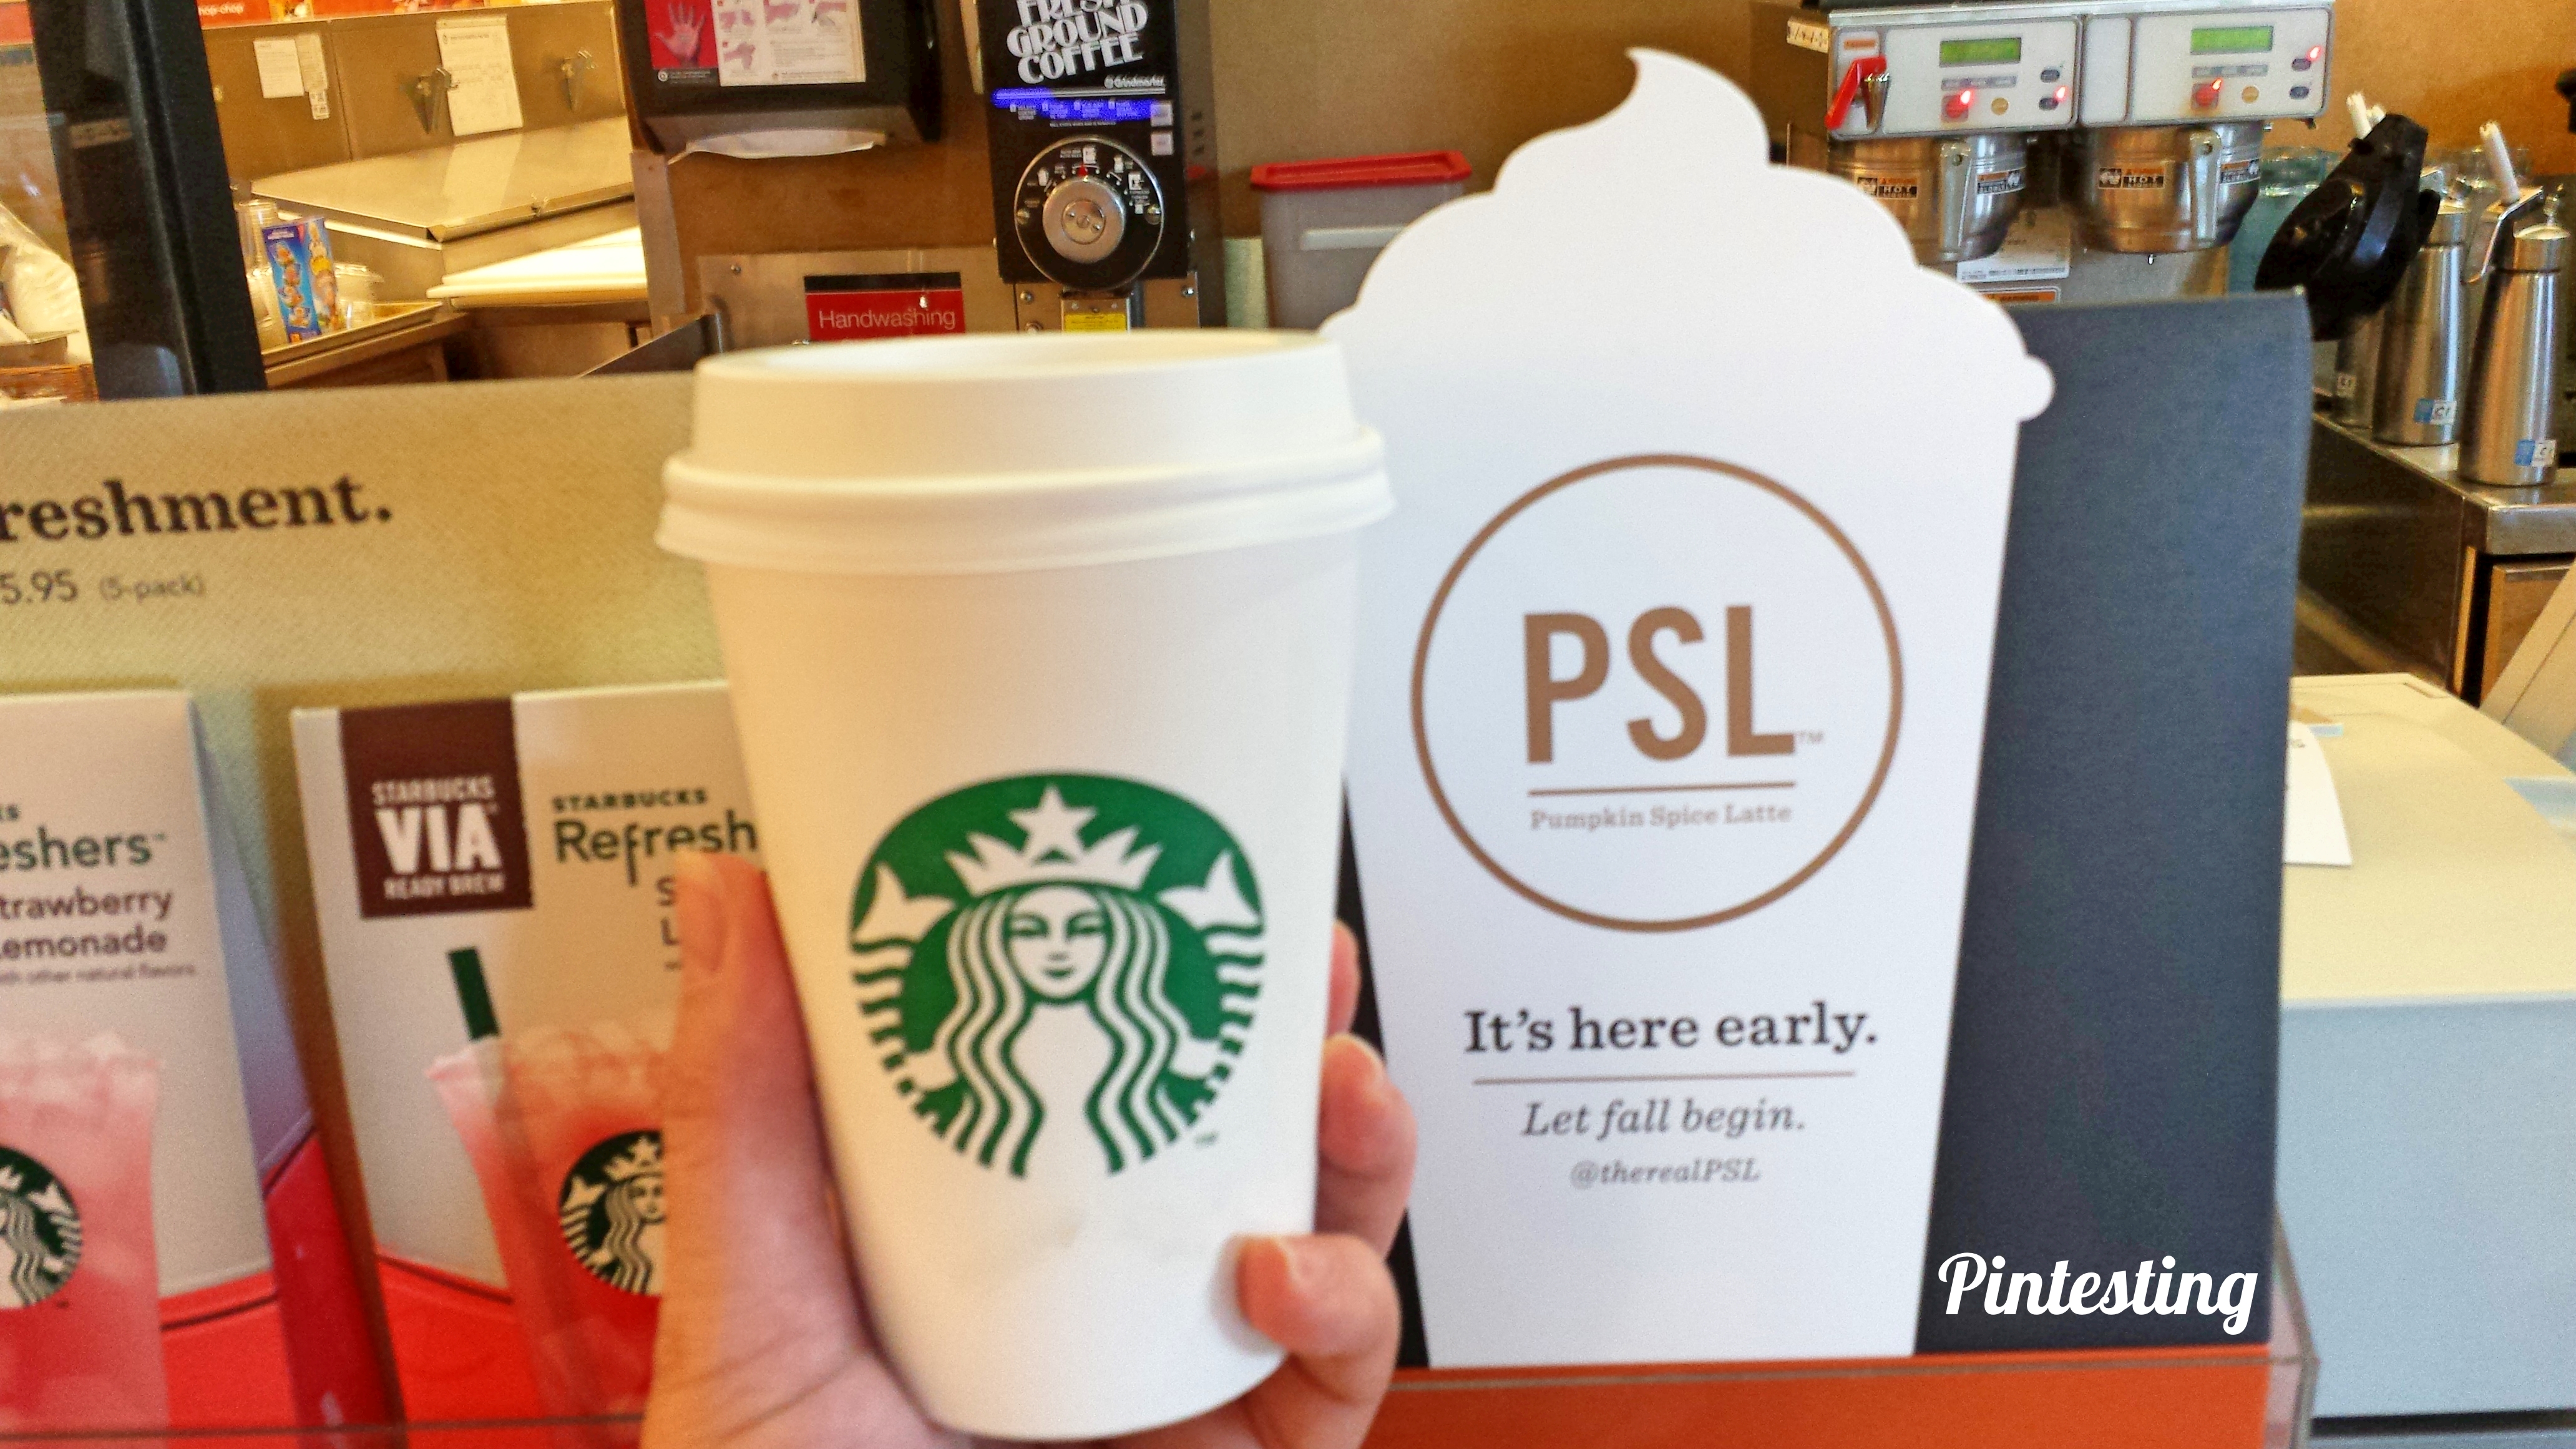
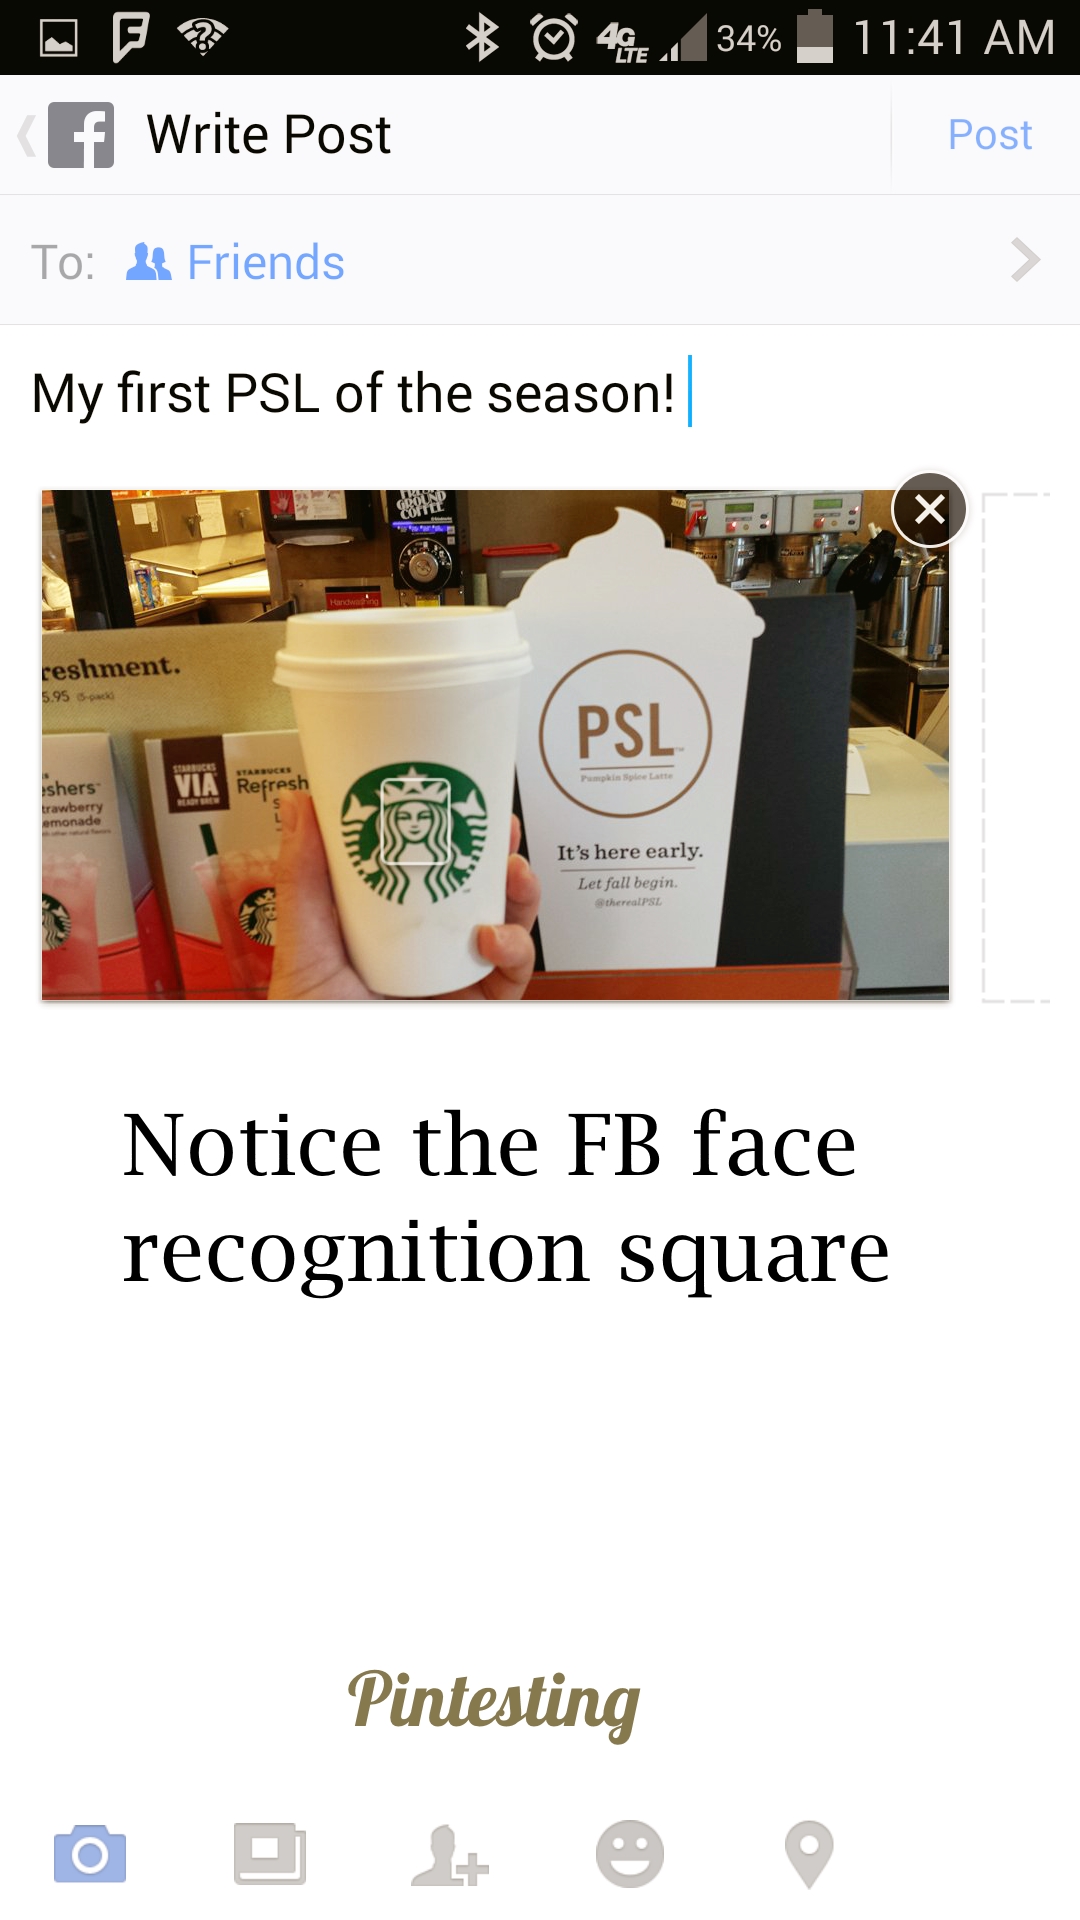
I’m one of those who can’t wait for the first PSL (that’s Pumpkin Spice Latte) of the season and I make a point to get it on the first day available. Even though it still feels like 100 degrees in Florida, there’s something about that taste that officially makes it feel like autumn. Pintesting Homemade Pumpkin Spice Coffee SyrupGoing to Starbucks or any other coffee venue for a PSL on a daily basis is not good for my budget or waistline. Thankfully, my Pinterest feed has been flooded in Pumpkin Spice EVERYTHING; including this pin by Katrina of Katrina’s Kitchen. Sometimes I REALLY love trying out Pinterest pins, and Pintesting Homemade Pumpkin Spice Coffee Syrup is one that I’m really looking forward to.

Pintesting Homemade Pumpkin Spice Coffee Syrup

One of my best friends was coming over, so it was the perfect time to do this Pintesting. Let’s get started!

The Pintesting:

Pintesting Homemade Pumpkin Spice Coffee Syrup

There are only four ingredients. That’s right – just 4 and one of them is water.

Pintesting Homemade Pumpkin Spice Coffee Syrup

Mix the brown sugar and water in a microwavable bowl and heat until the sugar is dissolved.

Pintesting Homemade Pumpkin Spice Coffee Syrup

Add the pumpkin and pumpkin pie spice.

Pintesting Homemade Pumpkin Spice Coffee Syrup

Strain the mixture through a sieve. This is important or your syrup will be gritty.

Pintesting Homemade Pumpkin Spice Coffee Syrup

See all those particles? That’s why it needs to be strained.

Pintesting Homemade Pumpkin Spice Coffee Syrup

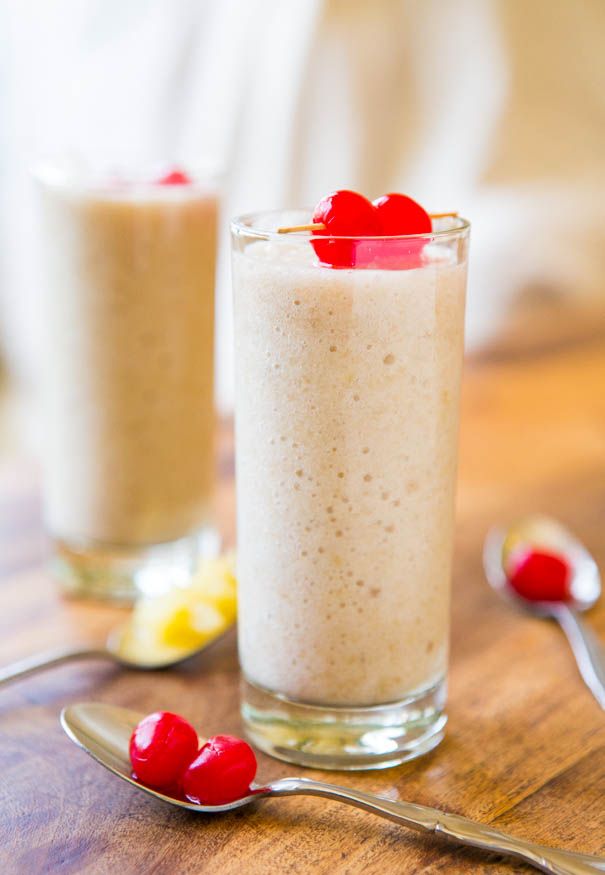
Make your coffee and enjoy the taste of a PSL at home. Aren’t the pumpkin mugs perfect?

We tried the Homemade Pumpkin Spice Coffee Syrup in coffee rather than a latte. I thought the flavor perfectly captured the PSL taste that I’ve come to love, but I would cook this on the stovetop rather than microwave it to let the pumpkin and spice better dissolve and allow the flavor to develop further. I’m also going to double the recipe because it ran out too fast.

The Pintesting Results:

Overall Results: 4.85 Pins

Pintesting Seal 5 Pins

Accuracy:  This syrup tastes every bit as good as a PSL, and it turned out exactly as the recipe said it would. There were no problems or unexpected issues. 5 Pins

Pintesting Rating - 5 Pins

Difficulty:  The ONLY reason I’m giving this 4 rather than 5 Pins is that there’s hot sugar water involved. It’s incredibly simple and easy, but children would need proper supervision. So for the sake of safety, I’m giving this 4 Pins.

Pintesting Rating - 4 Pins

Time:  The whole process took just a little longer than it took to brew the coffee; just under 10 minutes with the photography. That’s a LOT faster than driving to the coffee shop. 5 Pins

Pintesting Rating - 5 Pins

Cost:  One 15-oz. can of pumpkin is enough to make 30 recipes. As Katrina said, it’s pennies to make. Compare that to over $4.00 for a 16-oz. Grande PSL. 5 Pins

Pintesting Rating - 5 Pins

Practicality:  This Homemade Pumpkin Spice Coffee Syrup is great in coffee, but is also delicious in tea. It’s going to save me the time and cost of running to get a PSL when the cravings hit. I also love that 4 simple ingredients (with no unwanted chemicals) are all that’s in this. Not only will I make this a lot this fall, but it will make a great gift idea in cute little bottles. 5 Pins

Pintesting Rating - 5 Pins

Infused/Detox Water Bar

Aug 25, 2015 by Anne Hernandez

It’s the end of August and school has begun again. (WHERE has the summer gone?) I’ve seen a lot memes on the interwebs about looking forward to hoodies, football, leaves, pumpkin spice everything, and cooler weather.

Well as you can see, cooler weather is nowhere in sight in my world. Yes, that’s Fahrenheit – at 5:10 pm after I’d been driving a few miles.

Pintesting Infused Water Bar

Now don’t get me wrong, I’m not really complaining because in a matter of weeks the temps will drop. In a few months I’ll be enjoying perfect weather while the cold starts to descend on the north, so I can put up with needing a fan and air conditioner. What I’ve been having trouble with is staying hydrated; meeting the minimum 64 oz. per day. I can usually get over half way there without problem, it’s just that after that plain water gets boring. (Sorry, but I’m just being honest.)

I have lots of friends who use water flavorings in order to give their water a boost of flavor, but they often have artificial sweeteners, fake flavorings, and chemicals that you need a PhD to pronounce.

I’ve seen lots of pins for infused water; like this, this, and this. Not only does infused water keep the boredom away, but it’s also very healthy and can help your body to naturally detoxify. This is more of a general review of several pins and a great concept.

Pintesting - Infused Water Bar

So we decided to get a variety of ingredients together, and have some friends over to see what we could come up with for a nearly calorie-free, fun, and healthy entertainment idea.

Pintesting - Infused Water Bar

The first one was cucumber, lime, mint. This was very cool, crisp, and bright.

Pintesting - Infused Water Bar

I’ve already done a Pintesting on Lemon Strawberry Detox Water, but since it was so delicious we made a pitcher for our friends. This one is a nice combination of sweet and tart.

Pintesting - Infused Water Bar

The apple and cinnamon surprised me the most, and was my personal favorite. It was sweet, cinnamony, and so refreshing.

Pintesting - Infused Water Bar

We were going to see how long they lasted before they went bad, but thee pitchers only lasted a couple of days. Not only were they a GREAT way to get excited about drinking water, but the flavorings made the garbage disposal smell wonderful once the water was gone.

Go drink to your health. Salude!

Overall Results: 5  Pins

Pintesting - 5 Pins Overall Rating

Accuracy: This was a fun and nearly calorie-free way to entertain some friends and get creative ideas for better hydration. You can use the combinations online or find what you like best. 5 Pins

Pintesting Rating - 5 Pins

Difficulty: The hardest part about this is deciding which combination you want to make that day. I liked making a pitcher-full for the convenience of having fancy frou-frou water all day. 5 Pins

Pintesting Rating - 5 Pins

Time: To make the fancy bar with all of the options took about 15 minutes including the time to soak the fruit in vinegar water to clean them. It too longer to get everything placed just right. 5 Pins

Pintesting Rating - 5 Pins

Cost: Since I was setting up for company and decided to play around with different waters, as well. Also, I wanted to have a LOT of options with the flavors, so I spent much more than if I was just making a specific “recipe” of water. On the other hand, we had a LOT of fun and I know that I spend a lot more than $20.00 when we entertain, so I guess I got off cheap. 4 Pins

Pintesting Rating - 5 Pins

Practicality: This is a great way to stay hydrated, add health and detox benefits, and take the boring out of plain water. The options are unlimited, so you never get bored. 5 Pins

Pintesting Rating - 5 Pins

Monday Reflections – Coffee Fun!

I. Love. Coffee.

For the love of coffee

Anyone who has known me for 10 minutes (or maybe less) is aware of this.

Pooh Coffee

I even worked at Starbucks for a couple of years to support my habit. BTW, it’s a great company and part of my retirement plan.

Starbucks to go

Fellow coffee lovers, check out my COFFEE board. It’s full of delicious, hot (or iced), caffeinated fun.

COFFEE - Hug in a Mug

A few years ago I heard about the Clover brewing system and wanted to try it, but there weren’t any Starbucks around that offered it. I thought it would take a trip to Seattle to give the Clover a try. All that changed Saturday. My HH and I went to Downtown Disney (one of the perks of living in central Florida), and the new Starbucks has not one, but TWO Clover machines. It’s a beautiful location, too.

Downtown D Sbux

And the partners are perfect for the happiest place on earth.

Happy Partners

I met Lenny, the friendliness ambassador and partner extraordinaire.

Lenny - Friendliness Ambassador

He gave us our first Clover coffee experience.

Clover Machine

First you choose your coffee and specify hot or iced and size. It’s not that different from ordering a normal cup of coffee. The beans get weighed,

1 Weigh the beans

then precision ground,

2 Grind2 Grind

then the weight is double checked for accuracy.

3 Precision

The Clover is then programmed with the kind of coffee, the type of brew (hot or iced), and the beverage size.

4 Exact Brew


To best show the rest of the brewing process I made a couple of videos.

What a GREAT cup of coffee! When we smelled the coffee when it was freshly brewed, the herbal notes of the Sumatra were prominent. And it was so smooth! Even iced it had to be one of the best coffees I’ve ever had.

I don’t know that a real Pintesting results would count for this, but if I had to give it a score it would be 5 Pins across the board. If you love good coffee and are near a Starbucks location with a Clover brewer, then give this a try.

*Disclaimer: I was not compensated in any way for this post. The opinions are my own (and my handsome husband).

UPDATE:

I associate Pumpkin Spice Lattes with the end of summer and the “official” start of autumn. Even though they came out last week, I held off until today to get my first. It’s a big deal, so of course I took a picture and posted it to Facebook.

First PSL of the Season

The best part was that Facebook face recognition saw the Starbucks Siren as a friend’s face.

Facebook Friend Face  Recognition


Then I was asked if I wanted to tag her.

To Tag a Siren

It took Facebook to recognize the friendship that I have with Starbucks.


Lemon and Strawberry Detox Water

Jun 20, 2014 by Anne Hernandez

I’m just starting the second week of a 30-day Complete Transformation Challenge to get healthier and lose some weight. I’ve seen a lot of these challenges lately for a variety of products and different number of days (24-day challenge, 30-day challenge, 90-day challenge, etc.) so it seems to be a big thing going on right now. A big part is eating right and drinking lots of water, and also getting appropriate rest, reducing stress, exercising, etc.

To go along with the healthy living, I’m trying to find healthier pins to test. If you’re looking for the most amazing cake for your summer potluck, please visit my cake board – there are LOTS of amazing cakes to try. Eventually I’m going to make one to celebrate something or other, but not during this challenge.

So when I saw this pin for Lemon Strawberry Detox Water, I was super excited to try it! I’ve seen a lot of these waters that are infused with all kinds of fruits, veggies, and herbs. Many sources sing the praises of lemon water first thing in the morning. It sounded good until my mouth decided it didn’t like sour as the first thing I tasted. Lemon with strawberries, however, might be just naturally sweet enough to do the trick.

Lemon Strawberry Detox Water - Original Pin - Pintesting The ingredients are simple and self explanatory. Lemon. Strawberry. Water. I bought two bottles of the Voss brand water because they have a wider mouth, making it easier to put in the fruit, and because that’s what they used in the picture. (The vague “they” is being used since the pin linked to the picture. I searched for an original source, but found none.)

Lemon Strawberry Detox Water Ingredients - Pintesting


I prepped the fruit by washing in a vinegar-water solution from this pin (yes, two for one!) by Jo-Anna from A Pretty Life. Rather than wash them in the sink, I halved the amount and used a very large bowl. I soaked the strawberries and the meyer lemon since the rind was going into the water.

Vinegar wash - Pintesting

After soaking for 7-10 minutes, and stirring occasionally, I rinsed. Wow, did they turn out pretty! The picture of the dirty water didn’t turn out, but the difference was incredible  – and the amount of “stuff” that came off was surprising.

Lemon Strawberry Detox Water - Washed - Pintesting

Slice the fruit, put in the bottles, top with water, and refrigerate overnight.

Lemon Strawberry Detox Water Prepared - Pintesting

The next day, the water looked like this – you can see the fruit leached some of their color.

Lemon Strawberry Detox Water - Pintesting

I have to admit that the first sip was still tart for first thing in the morning. I’m usually a coffee person. However a few sips in, and the strawberry flavor really came out. It was a nice blend. I drank this while working out at the gym. It was tasty, and made me feel like I had upgraded my hydration thereby making me the coolest person at the gym.

Coolest person at the gym aside, here are the Pintesting results for both tests.

Lemon and Strawberry Detox Water Overall results: 4.55 Pins

5 Pins Overall

Accuracy: The infused water was flavorful, and the strawberries helped balance the lemon. I cannot accurately verify the claims to be beneficial to digestion, and clear and healthy skin. I was hydrated afterwards, and my digestion worked just fine (enough said). 5 PinsRated 5 Pins

Difficulty: The process is super simple. Slice the fruit, put in the bottles, cover with water. Getting the fruit into the bottle was much easier than getting it out of the bottle. A wide-mouthed bottle is necessary to make this work; nothing smaller than the Voss if you’re using slices rather than wedges (think lime in a Corona bottle). 5 PinsRated 5 Pins

Time: If including the wash time, which we should, the prep work took about 15 minutes. Waiting overnight took all night long. 3 Pins

Rated 3 Pins

Cost: Because the fruit was going to be infusing the water with the skins on, I chose to go organic so as not to drink a bunch of pesticides. This is highly recommended and worth the added cost. Even so, the total cost of the bottled water and all fruit was $7.00. That’s $3.50 per bottle and the bottles are being re-used. Buying a brand name electrolyte beverage would be cheaper, but who knows what’s in those? For the value of knowing what’s in your water, I’m giving this 4 Pins.

Rated 4 Pins

Practicality: This took very little time to prep, was tasty and natural, made me look beyond cool at the gym, and when I dumped the fruit it made the garbage disposal smell great. 5 Pins

Rated 5 Pins

DIY Fruit & Veggie Wash Overall Results: 5.0 Pins

5 Pins Overall


Accuracy: What a great way to get your fruits and veggies clean! This worked really well, and there was no vinegary smell – even before I rinsed them. 5 PinsRated 5 Pins

Difficulty: There was nothing to this. I preferred to use a large bowl rather than my sink, so I halved the vinegar. Still – float your fruits and veggies, stirring occasionally, for roughly 10 minutes. Done. Easy Peasy! 5 Pins

Rated 5 Pins

Time: 10 minutes… with very little work. 5 Pins

Rated 5 Pins

Cost: One-half (1/2) cup of white vinegar and tap water comes to roughly 25 cents. That’s WAY cheaper than the fancy washes that you can buy in the store. 5 Pins

Rated 5 Pins

Practicality: I’m going to use this when I get my grocery shopping done. Dump everything in and clean it at once. Not only will that get everything clean right off the bat, but it should give me more incentive to get a lot of prepping done ahead of time. (Should being the key word…) 5 Pins

Rated 5 Pins

Sunset Sangria

Summer… Sunsets… Wine… Sangria… That about sums up what happened in my brain when I saw this pin from Lisa’s blog Wine and Glue.

Sunset Sangria - Original Pin

I love wine, and I love Sangria. Sangria seems to be a wonderful opportunity for wine to go on a fun and fruity vacation from it’s serious side. Summer seems like the perfect opportunity for me to help wine to accomplish such a vacation. It all seems to go together so well.

Sunset Sangria Word Cloud


So this was a Pintesting test that was to bring on Summer (and help me celebrate Mother’s Day). Here are the Ingredients. The only “work” involved was washing and prepping the fruit. I needed some special tools for this.

Sunset Sangria - Ingredients

I washed the strawberries and hulled them using a special tool that Lisa mentioned in the post – a straw. I didn’t have any paper drinking straws, so I used the permanent plastic one for my Starbucks Venti cold cup.

Sunset Sangria - Straw

Insert into the bottom of the strawberry

Sunset Sangria - Strawberry

Pop off the top


Strawberry Sangria - Hulled

You can see that there is still a little bit that needs trimming, but overall this does a great job.

Sunset Sangria - Topless

Once hulled and trimmed, the strawberries need to be sliced. Lisa recommended another special tool – an egg slicer, which I happened to have on hand.

Sunset Sangria - Egg Slicer

Just drop in the strawberry, close the lid,

Sunset Sangria - Strawberry Slicer

And you’re done!

Strawberry Sangria - Strawberry Sliced

Slice the oranges, mix the beverages and fruit in a pretty pitcher, and wait overnight.

Pintesting Sunset Sangria

I made this the day before Mother’s Day so that I could enjoy it on my day. If you saw my last post, Chicken Gnocchi Soup (Olive Garden Copycat), then you’ll remember the full dinner picture that included the glass of Sunset Sangria. If not, go there next. Your family, friends, and tummy will thank you. Salude!

Chicken Gnocchi Soup - Supper Served

Here are the Pintesting Results.

Overall Results: 5 Pins

5 Pins Overall

Accuracy: This was a fruity yet balanced sangria. The rum and orange liquor give it zip, the soda gives it fizz, and the moscato and fruit keep it sweet. I liked all the tips that Lisa gave for the strawberries. The nice even strawberry slices made for a lovely presentation. I didn’t drink the whole pitcher (I was the only one drinking), and the strawberries bled their color over the second night turning the Sangria a beautiful rose color that gave it a stronger sunset appearance. 5 Pins

Rated 5 Pins

Difficulty: If you don’t have a straw or egg slicer, you will have to hull and slice the strawberries by hand. Not difficult but a little time consuming. The hard part is waiting overnight for the flavors to meld happily together. 4 Pins

Rated 4 Pins

Time: The prep work took me between 15-20 minutes, just like Lisa said. Because you need to let this set overnight I’m giving this 3 Pins.

Rated 3 Pins

Cost: The moscato was on sale for less than $6, the orange liquor was $2 for the little bottle,the soda was $1 on sale, the rum was a gift that I had hiding in the back of the wine cooler ($0), the strawberries are in season and were $2 for the container, and the oranges were about $4 for a total cost of $15 for the pitcher. That’s $3-$4 per serving – 5 Pins

Rated 5 Pins

Practicality: With summer starting, I can see this as a quick make ahead beverage for party planning. (If you have little ones, you could skip the alcohol and use white grape juice. Just don’t mix up the pitchers!) The next time I’m going to make two pitcher as Lisa suggests. 5 Pins

Rated 5 Pins

Skinny Pina Colada Smoothie

May 18, 2014 by Anne Hernandez

Do you like Pina Coladas? Gettin’ caught in the rain? I love the song Escape. I always smile when I hear it. It makes me think of a wonderful vacation on a secluded, white sand beach. Of course there would be a delicious beverage with some fruit and a little umbrella as I’m walking on the beach, soaking up the sun with my handsome hubby.

It’s always the skinny version of me in these dreams. According to this Forbes article, a Pina Colada has 644 calories – YIKES! Pina Colada Smoothies come in at 600 calories for a 20-oz Smoothie King beverage (that’s 360 calories for 12 ounces). You can get a “skinny” version for 400 calories for a 20-oz Smoothie King beverages (that’s 240 calories for 12 ounces).

Skinny Pina Colada - Original Pin

I saw this pin for a Skinny Pina Colada Smoothie by Averie from her blog Averie Cooks. Her recipe came in at just under 200 calories for 12-oz. The song started playing in my head, and I needed to make one of these. Thankfully I had most of the ingredients on hand So after a quick trip to the store, I pulled out the blender that would render a delicious frozen concoction…wait, that’s the wrong song and drink. I want a Pina Colada… so let’s get on with the Pintesting!

I decided to go with coconut milk to get as authentic as possible. The banana was about a day away from being banana bread fodder, so the day before this test I peeled and froze it. I think that was helpful in keeping the smoothie texture. Maybe.

Skinny Pina Colada - Ingredients - Pintesting

Combine everything except the maraschino cherries in a blender.

Skinny Pina Colada - In the Blender - Pintesting


Blend until smooth.

Skinny Pina Colada - Blending - Pintesting


Pour into a glass and garnish with the cherries.

Skinny Pina Colada - Done - Pintesting


The only thing missing from this recipe was the beach, steel drum music playing in the background, and a paper umbrella in my drink. I didn’t have any toothpicks or little umbrellas on hand , so my cherry sunk to the bottom floated prettily on top (when balancing on the sinking cherry).

So here’s the Pintesting Results:

Overall Results: 5 Pins

5 Pins Overall

Accuracy: The smoothie had the nice consistency of a smoothie; thick but not too thick so that it could still pass through a straw. The pineapple and banana blended smoothly. I used flaked coconut so there was still a bit of the texture there; it’s what I would have expected. The smoothie was sweet enough without being not too sweet. It had the tropical pina colada flavor with the pineapple and coconut without the mega calories that usually accompany the beverage… and it was yummy without guilt. 5 Pins

Rated 5 Pins

Difficulty: By using the canned pineapple, this recipe was a matter of dumping everything into the blender and run until smooth. It doesn’t get much easier than that. 5 Pins

Rated 5 Pins

Time: From start to finish (including running some soapy water through the blender to make clean-up easy) was 8 minutes. 5 Pins

Rated 5 Pins

Cost: I had most of the ingredients on hand, but went to pick up some coconut milk for this ($3.85). I figured I might as well get the whole effect and bought the maraschino cherries, too. The total cost (using canned pineapple, since fresh is more expensive) was ~$3.00 on the outside (including the splash of rum that I added). The local Smoothie King Skinny Pina Colada Smoothie was $4.87 with tax for a 20-oz. – $2.92 adjusted for 12-oz. – and they didn’t offer rum. The cost is pretty spot on, but because coconut milk and agave aren’t found in the average household, 4 Pins.

Rated 4 Pins

Practicality: This would be a yummy breakfast (sans the rum), or a healthy twist on a cocktail (with the rum). It took only minutes to make, and I didn’t have to drive anywhere to pick one up. 5 Pins

Rated 5 Pins

Pink Summertime Sangria

May 12, 2013 by Anne Hernandez

Mmmm, Sangria! A fruity party in a pitcher. May is a month of celebrations; Star Wars Day (May the fourth be with you), Cinco de Mayo, Mother’s Day, and Memorial Day. Cinco de Mayo is a favorite of the foodie in me. I asked my handsome husband what foods would he like to celebrate the day. Being half Mexican I expected him to respond with some really awesome meal ideas like Chilies Rellenos or something on those lines. He tipped his head in thought for a moment, then said, “I think corned beef and cabbage sounds good. Doesn’t that sound good to you?”

WHAT?!?!?!? Okay, maybe he enjoyed St. Patty’s Day so much that he wanted a re-do. Maybe the Irish part in him was speaking up very loudly. Or maybe he was holiday confused. I just don’t know.

There was a brief moment where I considered just going with it, but it was very very brief. I LOVE Mexican and Tex-Mex food and just couldn’t let the day go by without so much as a taco. At the same time, I find it extremely difficult to not give my wonderful hard-working husband whatever he wants (within reason).  So after considering several options, we decided to go with food from the greater Hispanic cuisine that would still give my sweetie some of his wish – Puerto Rican Corned Beef and Rice served with Sangria. Call it Spanish fusion and go with it.

I have seen and posted several Sangria recipes on Pinterest, but for this day I wanted to try the Pink Summertime Sangria by Jacki of Crafting Mom. It seemed very fruity, which I think is a huge plus in Sangria, and fairly simple, which I think is a huge plus in life.

http://craftingmom.com/pink-summertime-sangria/

I gathered the ingredients, chilled the wine, washed and cut the fruit, and added them to a pitcher.

Sangria - Ingredients Pintesting

There was not enough room in the pitcher to add the mango, so I went with half of each of the citrus fruits and a half-dozen strawberries and then chilled the lot for half an hour. I think it would have tasted even better with longer chilling time but once dinner was ready we weren’t waiting any longer. We were not disappointed. This Sangria was perfect.

Sangria - Finished Pintesting

Here is our celebratory meal. Not fancy or Mexican or Irish, but D-E-L-I-C-I-O-U-S! Ole!

Sangria - Cinco de Mayo Supper Pintesting

Now I really need to put in a little warning or disclaimer or some words of caution. This Sangria goes down very smooth and yummy which makes it easy to drink more than you realize if you’re not paying attention. This recipe calls for a bottle of wine AND some pineapple rum. It has a delayed kick which will make you very sleepy if you have too much – at least that’s what I was told when hubby decided to take a nap following the third glass.

Now for the Pintesting results.

Overall Rating: 5 Pins

5 Pins Overall

Accuracy:  This Sangria was fruity and sweet, but the lemon, lime and orange gave it a nice citrusy tang to keep it balanced. It went down smooth and easy. I used a 2-quart pitcher, but could have used a larger one in order to have enough room for all of the desired fruit and ice (which I omitted completely from the pitcher for the lack of room). Too much sangria? No such thing. 5 Pins

Rated 5 Pins

Difficulty:  Measure, pour, stir, chill. The hardest part of the recipe was slicing the strawberries. Actually, I used a tip that I learned so long ago that I don’t even know the source. To easily and evenly slice strawberries, use an egg slicer. So simple!  5 Pins

Rated 5 Pins

Time:  The chill time should be at least a couple of hours in order to let the flavors blend together – overnight would be even better. 4 Pins

Rated 4 Pins

Cost:  We used a really inexpensive bottle of White Zinfandel wine since it was basically a mixer base. The rum was a door prize, so we didn’t have to purchase it. However, the extra costs of the rum, mixers, and fruit bring up the total enough that this gets 4 Pins.

Rated 4 Pins

Practicality: As I said in my opening sentences, Sangria is a party in a pitcher, and this party was a great one. The mixers will make a LOT of pitchers of Sangria, and that means a lot of parties. With summer around the corner, that means 5 Pins.

Rated 5 Pins

The Best Ever Copycat Shamrock Shake

Mar 18, 2013 by Anne Hernandez

Pintesting Best Ever Copycat Shamrock Shake

I love St. Patrick’s Day! My dad always said I was a wee bit Irish – about half of my pinkie fingernail – but that’s enough for me to claim it with a smile. I think it all went to my toes and that’s why I love Celtic dancing. One of the things I love about St. Patty’s Day is that a certain hamburger chain with an Irish sounding name (or is it Scottish?) brings out the Shamrock Shakes.

mcdonalds-Shamrock-McCafe-Shake-12-fl-oz-cup

Those smooth, green, minty shakes are one of my favorite traditions. Rather, they used to be. Between all of the chemicals in them (there are 54 ingredients according to this Huffington Post article!) and trying to lose some weight (820 calories in one 22-oz shake – YIKES! – also from the same article), I had pretty much given up these Spring delights. *sigh*

http://www.theslowroasteditalian.com/2013/03/best-ever-shamrock-shake-revisited.html

That is until I found this Pin for the Best Ever Copycat Shamrock Shake recipe from The Slow Roasted Italian. I was feeling lucky, so I grabbed my blender, some basic ingredients, and set off to make something magically delicious. (No, there is not any cereal with marshmallows in the ingredients list.)

The Pintesting:

Pintesting Best Ever Copycat Shamrock Shake

It was going to be simple. Just put the shake ingredients into the blender, and blend. I put in the ice cream, milk, green food coloring, and went to put in the peppermint extract – but the bottle was empty. Don’t you just love it when someone puts an empty container back into the pantry or fridge? (GRRRR!!!) Now what was I going to do?

Pintesting Best Ever Copycat Shamrock Shake

Thankfully I had another mint extract. Whew! On with the Pin Test.

Pintesting Best Ever Copycat Shamrock Shake

I blended the shake ingredients together. The color looks good – very much like the Shamrock Shake.

Pintesting Best Ever Copycat Shamrock Shake

Heavy cream + powdered sugar + whip = the best whipped cream. I usually add a few drops of vanilla, but since it wasn’t listed, it wasn’t added.

Pintesting Best Ever Copycat Shamrock Shake

And here is the finished product – complete with cute Leprechaun-moustached straws and festive sprinkles.

*A note about this Pin Test* Since there are just two of us (the cat is a fussy eater and snubbed the idea of festive milk shakes), I halved the recipe for 2 servings since the full amount makes 4 servings.

The Pintesting Results:

Overall Rating – 5 Pins

Pintesting Seal 5 Pins

Accuracy:  The shake was smooth, minty and creamy – just like the Shamrock Shakes. The color was very similar to the original version, too. The texture was perfect – not so thick that it got stuck in the straws and not so thin that it was runny and melty. It was just right. 5 Pins

Rated 5 Pins

Difficulty:  Put four ingredients in a blender and blend until smooth. Easy Peasy – 5 Pins

Rated 5 Pins

Time:  The shake, whipped cream, and festive presentation took about 10-15 minutes. That included the extra time to hunt for an alternative extract. It would take longer to drive down to the nearest McRestaurant and order drive through. 5 Pins

Rated 5 Pins

Cost: The ice cream was all that I had to purchase, and that was on sale for roughly $3.00 which is less than the cost of a large shake. Obviously you’d get more than one serving from a container, so I’m giving this 5 Pins

Rated 5 Pins

Practicality: This is very quick, simple and cost-effective way to get the taste of a Shamrock Shake at home – without tons of extra chemicals and “fake” ingredients. Yes, I know green food coloring has fake ingredients, so since it doesn’t affect the taste, those who are further along into the eating clean journey can leave it out. Either way – 5 Pins.

Rated 5 Pins

Butterbeer Frappuccino

Mar 11, 2013 by Anne Hernandez

Many years ago, when my youngest daughter was in middle school, she was given a very controversial book as required reading in school. As a loving mother who was very involved in my kids education, I was very concerned due to conflicting things I had heard about this book. However, I was also open-minded enough to not rely on the rumors, so I asked for the book and told my daughter that if I read it and thought it was appropriate, then I’d let her read it. If not, then I’d ask the teacher for an appropriate substitute.

It is our CHOICES

It took less than a day to read Harry Potter and the Sorcerer’s Stone. I couldn’t put it down, and I was hooked! Ever since then I’ve stood in line for every book and movie release. I was so excited to go to the Wizarding World of Harry Potter at Universal Studios Orlando and to see the shops of Hogsmead, ride the rides, buy a wand and other Hogwarts apparel, and to try the Butterbeer. Oh. My. Goodness! It was love at first sip! The taste was exactly as I had imagined from every description in the books.

BUTTERBEER


Imagine my surprise and delight when I saw this pin for Butterbeer Frappuccino from the Starbucks Secret Menu. I thought this was a perfect opportunity to see if Starbucks could do some real magic.


http://starbuckssecretmenu.net/starbucks-secret-menu-pick-23-butterbeer-frappuccino/

I ordered the drink and even showed the barista the website so there would be no mistakes.

Pin Test

This is the results minus a few test sips. While it wasn’t exactly like the Butterbeer that I had at Universal or my imagination, it was pretty close and very good.

So the Pin Test results are:

Overall Rating: 5 Pins

5 Pins Overall - LARGE

Accuracy: While it lacked a bit of the buttery-ness that was in the WW of HP version, the caramel and toffeenut mixture was very close. The cream base of the Frappuccino was perfect without adding the extra flavor of vanilla. I’ve seen recipes for home made Butterbeer that call for cream soda and butterscotch with melted butter that might be a bit closer – maybe – but it would be a lot of work for a bit of uncertainty. Going to Starbucks is much quicker and easier. 5 Pins

Rated 5 Pins - SMALL

Difficulty: Go to Starbucks (or other coffee shop) and order the beverage. 5 Pins

Rated 5 Pins - SMALL

Time: There were several people in front of me in line, so it took several minutes to place and get my order. But since there was no work on my part, and I did get my drink in about 5 minutes – 5 Pins.

Rated 5 Pins - SMALL

Cost: One grande custom Frappuccino was less than 5 dollars, which is quite a bit less expensive than the one at Universal (NOT counting the price of admission). 5 Pins

Rated 5 Pins - SMALL

Practicality: Order drink, pay with the money you got from Gringots. Accio Butterbeer! 5 Pins

Rated 5 Pins - SMALL

Hot Chocolate Sticks

It was really Cold in Florida this past weekend. I don’t mean cold for Florida or cold for this time of year. It was 36 degrees when I woke up this morning. That’s COLD! Our cat, who insisted on going out last night, couldn’t wait to come in as soon as we opened the door. I know that up north it’s colder by quite a lot, but this is Florida. We would like our warmth back.  In the meantime, these Hot Chocolate Sticks from Kristi’s blog, 30 Pounds of Apples, seemed like just the thing to make on a cold day. I saw this pin around the holidays and liked the idea and the gift-ability of them. But it took freezing temps to motivate the Pin Test, so let’s get going.

http://www.30poundsofapples.com/2011/12/hot-chocolate-sticks/

The Pintesting:

A funny thing happened on the way to this Pin Test… I was gathering all of the ingredients to get started and thought I’d put all of the dry ingredients into one bowl. I had just added the salt when I knocked the bowl off of the counter. (EEK!) My lightning fast ninja reflexes caught the bowl and saved my kitchen, my floor and what was left of my sanity. However, the nicely separated dry ingredients were no longer separated. Oh well, they’re going to get mixed together, and my floor is clean. It’s a good trade.

Pintesting Hot Chocolate Sticks

Here are the rest of the ingredients. I like that the recipe calls for milk and dark chocolates as well as the cocoa. This should give a greater depth of chocolatey-ness.

Pintesting Hot Chocolate Sticks

The recipe says to sift them together but I find that whisking works well for cakes and other pastries, so I whisked. More about that later.

Pintesting Hot Chocolate Sticks

Next, chop up the chocolate into small pieces for better melting.

Pintesting Hot Chocolate Sticks

Put the chocolate in a clean and dry microwave-safe bowl. Heat at 30-second intervals on medium power until two-thirds of the way melted. Stir until smooth.

Pintesting Hot Chocolate Sticks

NOTE: Be patient while melting the chocolate! If you heat the chocolate too high it will seize up and you’ll have to throw it out and start over.

Pintesting Hot Chocolate Sticks

Now pour the melted chocolate into dry ingredients.

Pintesting Hot Chocolate Sticks

Stir to combine.

Do you see those little, unsifted balls of powdered sugar and cocoa? That’s why I was supposed to sift the dry ingredients. If you make this recipe, please don’t try to take a shortcut. Listen to Kristi and sift. It took a lot longer to work out all of the little clumps.

Pintesting Hot Chocolate Sticks

Mix until the chocolate is smooth like a soft tootsie roll.

Pintesting Hot Chocolate Sticks

Fill a piping bag. The mixture is thick so you don’t need to use a coupler or tip.

Pintesting Hot Chocolate Sticks

Then fill the molds.

Pintesting Hot Chocolate Sticks

Finish by topping each one with 4 mini marshmallows and a stick. The next time I’ll use wooden stirrers or bamboo sticks. The paper sticks were cute but began to unravel while stirring in the hot milk.

Pintesting Hot Chocolate Sticks

Now leave them to dry, like I did, or you can refrigerate if you’re in a hurry.

Pintesting Hot Chocolate Sticks

Once they’re dry, pop them out and stir one into 8-oz of hot milk. . .

Pintesting Hot Chocolate Sticks

. . .until dissolved and yummy.

Pintesting Hot Chocolate Sticks

This was a welcome warm treat on a very cold day. One note about possible user error. I had set some of these out at work with instructions on how to use them to make a cup of hot chocolate. Unfortunately, people don’t always read instructions; just ask any guy who’s built anything from a kit. I had about half of the testers tell me how hard it was to eat the chocolate. I recommend putting instructions on each and every hot chocolate stick. That could be really cute with little flags!

The Pintesting Results:

Overall Rating: 4.7 Pins

Pintesting Seal 5 Pins


Accuracy: The recipe was simple enough to follow and I really liked the tip for melting chocolate. The chocolate set up nicely in the molds, and when stirred into the hot milk, gave a nice frothy foamy cup of hot chocolate. The hot chocolate was creamy, rich and chocolaty. I will add a teaspoon of vanilla the next time I make this to see how it affects the flavor. One of my testers noticed that as the milk cooled, the chocolate started to separate and clump a bit. However, that left chocolate surprises at the bottom of the cup, so it wasn’t really a complaint. Just drink it quickly. 5 Pins.

Rated 5 Pins - SMALL

Difficulty: The recipe was simple. I had issues with how thick the chocolate mixture became. Even without a coupler or tip in the piping bag, it was very difficult to squeeze it into the molds. Someone with arthritis or dexterity issues might have to come up with an alternative way to make these 4 Pins.

Rated 4 Pins - SMALL

Time: It took about 2-3 minutes to melt the chocolate and 30 seconds to whisk the dry ingredients. Add about 2-3 minutes to sift the dry ingredients properly (like the recipe instructs). I was going to check on the drying after half an hour and then every 15 minutes after that, but they were set in 30 minutes. 35 minutes – 5 Pins

Rated 5 Pins - SMALL

Cost: The chocolates were the most expensive ingredient, but I used the large Hershey bars. You can usually find them on sale for 2/$5 or less. 5 Pins

Rated 5 Pins - SMALL

Practicality: This was cute and fun to make, and perfect for holiday gifting. However, if you just want a quick cup of cocoa it’s faster to use a packet or add some Hershey’s syrup to a cup of milk and microwave. It does take some extra time to stir until everything is melted. 4 pins

Rated 4 Pins - SMALL