Category: DIY & Crafts

Orange Vinegar (a “green” cleaner)

I know a guy who is a GREAT cleaner. I mean he has a gift that makes Mr. Clean look like an amateur. Lucky for me, he’s also my handsome husband. (Yeah!) Now, that doesn’t mean that I don’t have to clean the house. He has a commercial cleaning company, and usually comes home tired and doesn’t really want to clean at the end of a long day, so I still do most of the house cleaning during the week. But on the weekends, we are able to knock out the housework together in just a couple of hours. Happy Wife!

The other day we watched the The Lorax movie. Not only was it well done and entertaining, it made us think about “the trees” and such. We’ve been trying to live more environmentally responsible on a more consistent basis at home. We’re recycling, cutting out plastics, using reusable grocery bags, turning off the water when we brush our teeth… all kinds of little things we’re trying to do to leave less of a carbon footprint. So when I saw this pin for an orange scented vinegar household cleaner, I couldn’t wait to try it. Ann from The Fountain Avenue Kitchen gave a simple way to get rid of the strong vinegar smell – soak it in orange peels.

http://fountainavenuekitchen.com/orange-vinegar-a-green-cleaner/

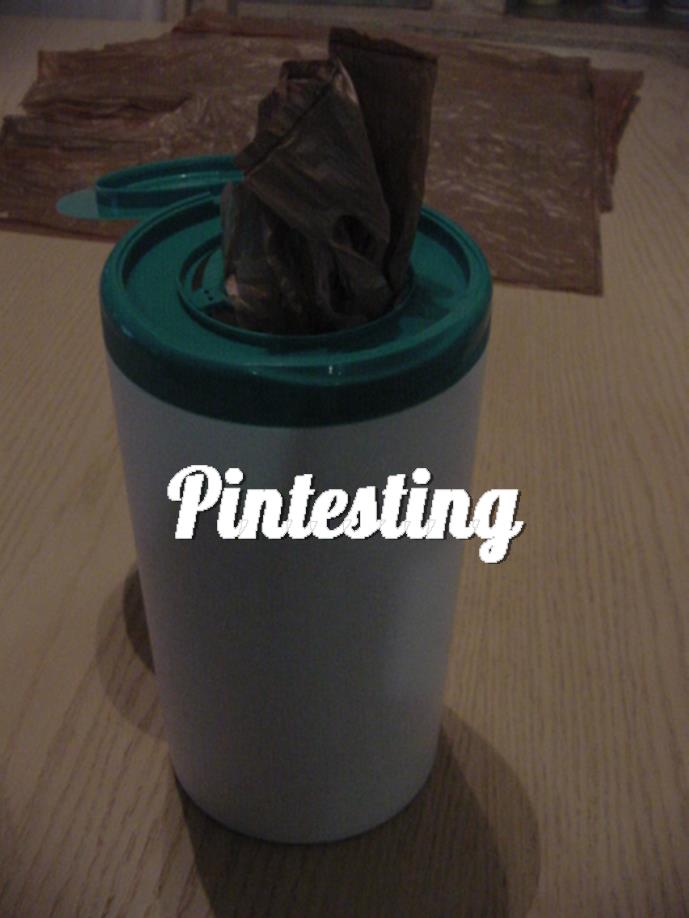
I peeled a large orange (and shared it with my hard working husband), and put the peels in the jar, then filled it with white vinegar and put it on the counter.

Orange Peels in Vinegar

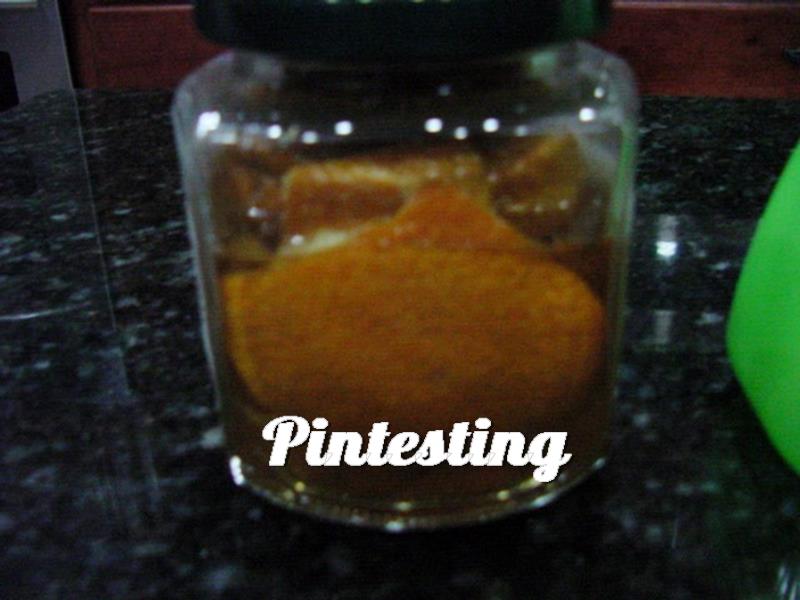
Two weeks later I poured the contents through a strainer and into a spray bottle. The first thing I noticed was the scent. It smelled of orange, but also smelled of vinegar. It wasn’t the overwhelming scent of vinegar, but it was still there. Like Ann, I don’t mind the scent of vinegar, but some people don’t care for the smell of a pickle factory.

Ingredients

On to the cleaning tests. First I tried it on the granite kitchen counter. It left a film on the smooth surface. I asked my husband for his professional opinion, and he thought that the oils in the orange peel was the cause. Since oil cleaners are used on wood, we tried it on the wooden cabinets next. It did a good a good job on the wooden surface.

So here are the Pintesting results:

Overall Rating: 3 Pins

3 Pins Overall

Accuracy:  Because of the film from the oil, it didn’t make as good of an all-purpose cleaner as straight vinegar, which doesn’t leave a film. I tried to take pictures to compare the two, but the photos didn’t capture the difference. The film could also be felt when we ran a finger over it. The oil did make it a good wood cleaner, and even though the vinegar smell didn’t completely disappear, it was much more subtle with the orange scent. 3 Pins

Rated 3 Pins

Difficulty:  Put orange peels in a jar, cover with vinegar, put on the lid and walk away for a couple of weeks. No stirring. No cooking. Not a thing to do but wait. 5 Pins

Rated 5 Pins

Time:  It took less than 5 minutes to peel the orange, put it in  jar, and cover with vinegar. However, two weeks of waiting is a pretty long time. 2 Pins

Rated 2 Pins

Cost:  This is really inexpensive. Oranges are not expensive (at least they’re not in Florida), and the peels are usually considered rubbish. We get a box of two gallon jugs of white vinegar at Sam’s Club for under $4.00. 5 Pins

Rated 5 Pins

Practicality:  If someone was very sensitive to chemicals, or was trying to use all natural cleaners, this would be a good wood cleaner. Due to the smearing of the film, I don’t care for it as an all-purpose cleaner. Also, because of the time involved, it’s much easier to purchase environmentally friendly cleaning products at the store. They’re about the same price as the “regular” cleaners and are easy to find in most supermarkets. 3 Pins

Rated 3 Pins

Tip Tuesday – Make an Embellished Grocery Bag Container

Mar 26, 2013 by Anne Hernandez

Plastic bags are not a very environmentally friendly way to transport groceries or anything else. However many of the reusable bags I get, it seems like I either leave them at the house, in the car, or have given them away, full of something for a friend. So no matter how many reusable bags I get, I still seem to accumulate a ton of the plastic disposable bags. They have their uses – when you can find one that isn’t crumpled beyond recognition and doesn’t have any holes.

My personal pet peeve is that there isn’t a good home for them – that is until I saw this pin. Jen from Tater Tots & Jello shows how to roll the bags so they pop out of a wipes container one at a time, and the container holds about a dozen bags.

http://tatertotsandjello.com/2011/07/summer-social-guest-project-make_21.html

Perfect! I had to test this.

Grocery Bag Container - Bags

I pulled out the pile-o-bags and started to flatten and fold them as Jen instructs.

Grocery Bag Container - Flatten the Bag

Make sure to get the air out as you flatten them.

Grocery Bag Container - Fold in Half

Fold the flattened bags in half the long way. Make sure you have a dozen bags for a standard wipe container.

Grocery Bag Container - Overlap the Bags

Overlap the bags slightly.

Grocery Bag Container - Fold the Handle Up

Fold the handle of the first bag up at a right angle to the rest of the bags.

Grocery Bag Container - Roll up the bags

Start rolling the bags pretty tightly and evenly starting with the end that has the handle pointing up. This will be the part that sticks out of the wipes container.

Grocery Bag Container - Put in the container

Drop the roll into the bag.

Grocery Bag Container - Put on the Top

Put the top on, making sure to pull the first handle out. And there you have it – organized grocery bags! This is perfect for the car, boat, camper, office desk drawer… the possibilities are endless. And just think of all the money you could save on Christmas gifts!

Jen’s blog gave further instructions for making the container pretty, but I didn’t have all of the materials for that step. I’m more of a cook than a crafter. However, I think I’ll look for some contact paper in a color scheme and design to match the container. I can handle that.

Now for the results.

Overall Score: 5 Pins

5 Pins Overall

Accuracy:  The instructions in the blog were precise and easy to follow. The container held exactly 12 bags without having to roll them up overly tightly. They pop out perfectly, too. 5 Pins

Rated 5 PinsDifficulty:  This was a simple idea that was simply perfect. Flatten, fold, roll, done. 5 pins

Rated 5 PinsTime:  The entire project took abut 10 minutes. That includes the time removing the label from the container. 5 Pins

Rated 5 Pins

Cost:  FREE! It doesn’t get any cheaper than used grocery bags and a used, empty wipe container. 5 Pins

Rated 5 PinsPracticality:  This is  EXTREMELY practical! The organizing of plastic bags is great, but don’t forget the added value of having these organized bags conveniently where you want/need them. 5 Pins

Rated 5 Pins


Hot Chocolate Sticks

It was really Cold in Florida this past weekend. I don’t mean cold for Florida or cold for this time of year. It was 36 degrees when I woke up this morning. That’s COLD! Our cat, who insisted on going out last night, couldn’t wait to come in as soon as we opened the door. I know that up north it’s colder by quite a lot, but this is Florida. We would like our warmth back.  In the meantime, these Hot Chocolate Sticks from Kristi’s blog, 30 Pounds of Apples, seemed like just the thing to make on a cold day. I saw this pin around the holidays and liked the idea and the gift-ability of them. But it took freezing temps to motivate the Pin Test, so let’s get going.

http://www.30poundsofapples.com/2011/12/hot-chocolate-sticks/

The Pintesting:

A funny thing happened on the way to this Pin Test… I was gathering all of the ingredients to get started and thought I’d put all of the dry ingredients into one bowl. I had just added the salt when I knocked the bowl off of the counter. (EEK!) My lightning fast ninja reflexes caught the bowl and saved my kitchen, my floor and what was left of my sanity. However, the nicely separated dry ingredients were no longer separated. Oh well, they’re going to get mixed together, and my floor is clean. It’s a good trade.

Pintesting Hot Chocolate Sticks

Here are the rest of the ingredients. I like that the recipe calls for milk and dark chocolates as well as the cocoa. This should give a greater depth of chocolatey-ness.

Pintesting Hot Chocolate Sticks

The recipe says to sift them together but I find that whisking works well for cakes and other pastries, so I whisked. More about that later.

Pintesting Hot Chocolate Sticks

Next, chop up the chocolate into small pieces for better melting.

Pintesting Hot Chocolate Sticks

Put the chocolate in a clean and dry microwave-safe bowl. Heat at 30-second intervals on medium power until two-thirds of the way melted. Stir until smooth.

Pintesting Hot Chocolate Sticks

NOTE: Be patient while melting the chocolate! If you heat the chocolate too high it will seize up and you’ll have to throw it out and start over.

Pintesting Hot Chocolate Sticks

Now pour the melted chocolate into dry ingredients.

Pintesting Hot Chocolate Sticks

Stir to combine.

Do you see those little, unsifted balls of powdered sugar and cocoa? That’s why I was supposed to sift the dry ingredients. If you make this recipe, please don’t try to take a shortcut. Listen to Kristi and sift. It took a lot longer to work out all of the little clumps.

Pintesting Hot Chocolate Sticks

Mix until the chocolate is smooth like a soft tootsie roll.

Pintesting Hot Chocolate Sticks

Fill a piping bag. The mixture is thick so you don’t need to use a coupler or tip.

Pintesting Hot Chocolate Sticks

Then fill the molds.

Pintesting Hot Chocolate Sticks

Finish by topping each one with 4 mini marshmallows and a stick. The next time I’ll use wooden stirrers or bamboo sticks. The paper sticks were cute but began to unravel while stirring in the hot milk.

Pintesting Hot Chocolate Sticks

Now leave them to dry, like I did, or you can refrigerate if you’re in a hurry.

Pintesting Hot Chocolate Sticks

Once they’re dry, pop them out and stir one into 8-oz of hot milk. . .

Pintesting Hot Chocolate Sticks

. . .until dissolved and yummy.

Pintesting Hot Chocolate Sticks

This was a welcome warm treat on a very cold day. One note about possible user error. I had set some of these out at work with instructions on how to use them to make a cup of hot chocolate. Unfortunately, people don’t always read instructions; just ask any guy who’s built anything from a kit. I had about half of the testers tell me how hard it was to eat the chocolate. I recommend putting instructions on each and every hot chocolate stick. That could be really cute with little flags!

The Pintesting Results:

Overall Rating: 4.7 Pins

Pintesting Seal 5 Pins


Accuracy: The recipe was simple enough to follow and I really liked the tip for melting chocolate. The chocolate set up nicely in the molds, and when stirred into the hot milk, gave a nice frothy foamy cup of hot chocolate. The hot chocolate was creamy, rich and chocolaty. I will add a teaspoon of vanilla the next time I make this to see how it affects the flavor. One of my testers noticed that as the milk cooled, the chocolate started to separate and clump a bit. However, that left chocolate surprises at the bottom of the cup, so it wasn’t really a complaint. Just drink it quickly. 5 Pins.

Rated 5 Pins - SMALL

Difficulty: The recipe was simple. I had issues with how thick the chocolate mixture became. Even without a coupler or tip in the piping bag, it was very difficult to squeeze it into the molds. Someone with arthritis or dexterity issues might have to come up with an alternative way to make these 4 Pins.

Rated 4 Pins - SMALL

Time: It took about 2-3 minutes to melt the chocolate and 30 seconds to whisk the dry ingredients. Add about 2-3 minutes to sift the dry ingredients properly (like the recipe instructs). I was going to check on the drying after half an hour and then every 15 minutes after that, but they were set in 30 minutes. 35 minutes – 5 Pins

Rated 5 Pins - SMALL

Cost: The chocolates were the most expensive ingredient, but I used the large Hershey bars. You can usually find them on sale for 2/$5 or less. 5 Pins

Rated 5 Pins - SMALL

Practicality: This was cute and fun to make, and perfect for holiday gifting. However, if you just want a quick cup of cocoa it’s faster to use a packet or add some Hershey’s syrup to a cup of milk and microwave. It does take some extra time to stir until everything is melted. 4 pins

Rated 4 Pins - SMALL