Author: Anne Hernandez

Chicken Gnocchi Soup (Olive Garden Copycat)

May 25, 2014 by Anne Hernandez

Chicken Gnocchi Soup

Some of the best things in life can come from the most random and unexpected places. For example, a couple of weeks ago some colleagues and I were talking about Pinterest while sitting around the lunch table. I had mentioned the Olive Garden Copycat Minestrone Soup recipe that you make in a crockpot. Two of them piped up and mentioned the Olive Garden Chicken Gnocchi Soup – how it was the best thing EVER. Did I like it?

*Cricket. Cricket. Cricket.*

How had I missed this? I’ve eaten at the Olive Garden more times than I can count, but can’t remember seeing this on the menu, much less having had this soup. “Well, can’t you find a recipe on Pinterest?” And of course, I did in about 2 seconds. This Pin by Reeni of Cinnamon Spice & Everything Nice came to the top of the search list.

Chicken Gnocchi Soup - Original Pin

Fast forward to Mother’s Day. My girls are on the other side of the country and the handsome hubby had to work. This year I was on my own, so I did what I wanted to do without any guilt. I thought about this soup and decided that it’s what I wanted for my Mother’s Day supper (along with a pitcher of Sunset Sangria – post to follow).

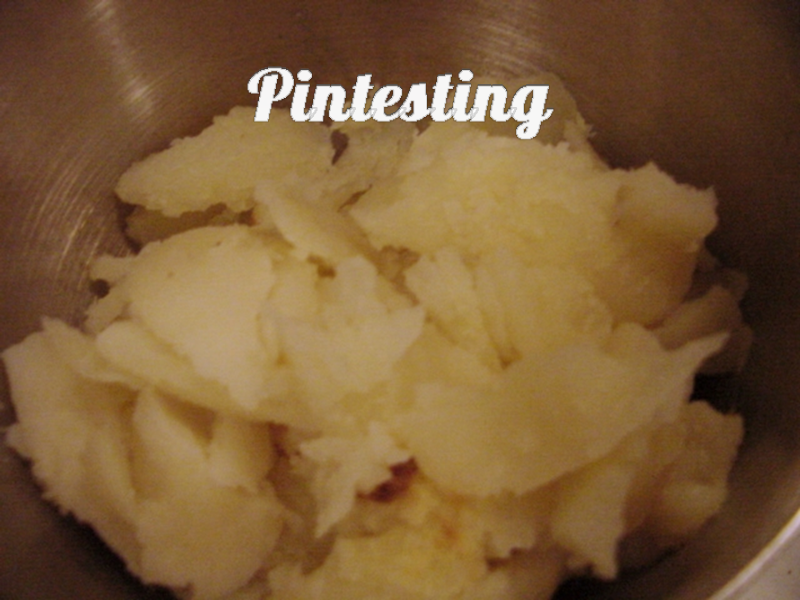
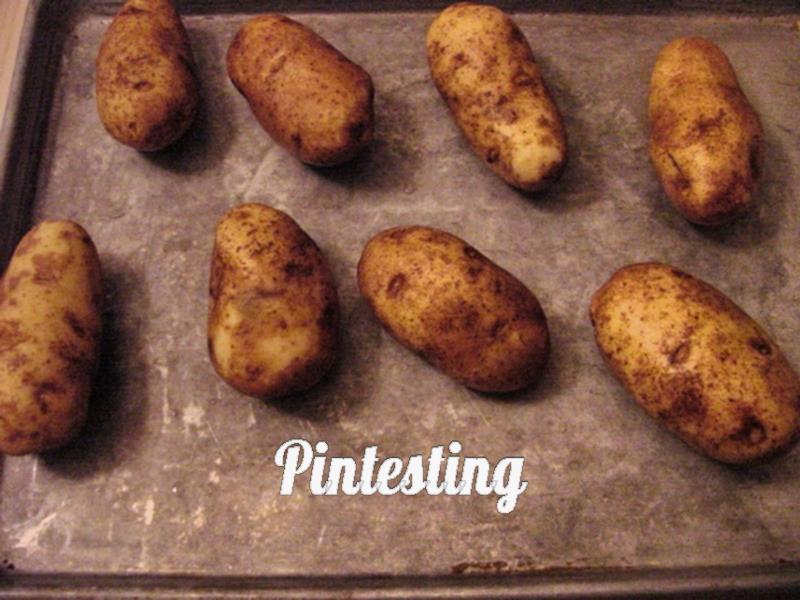
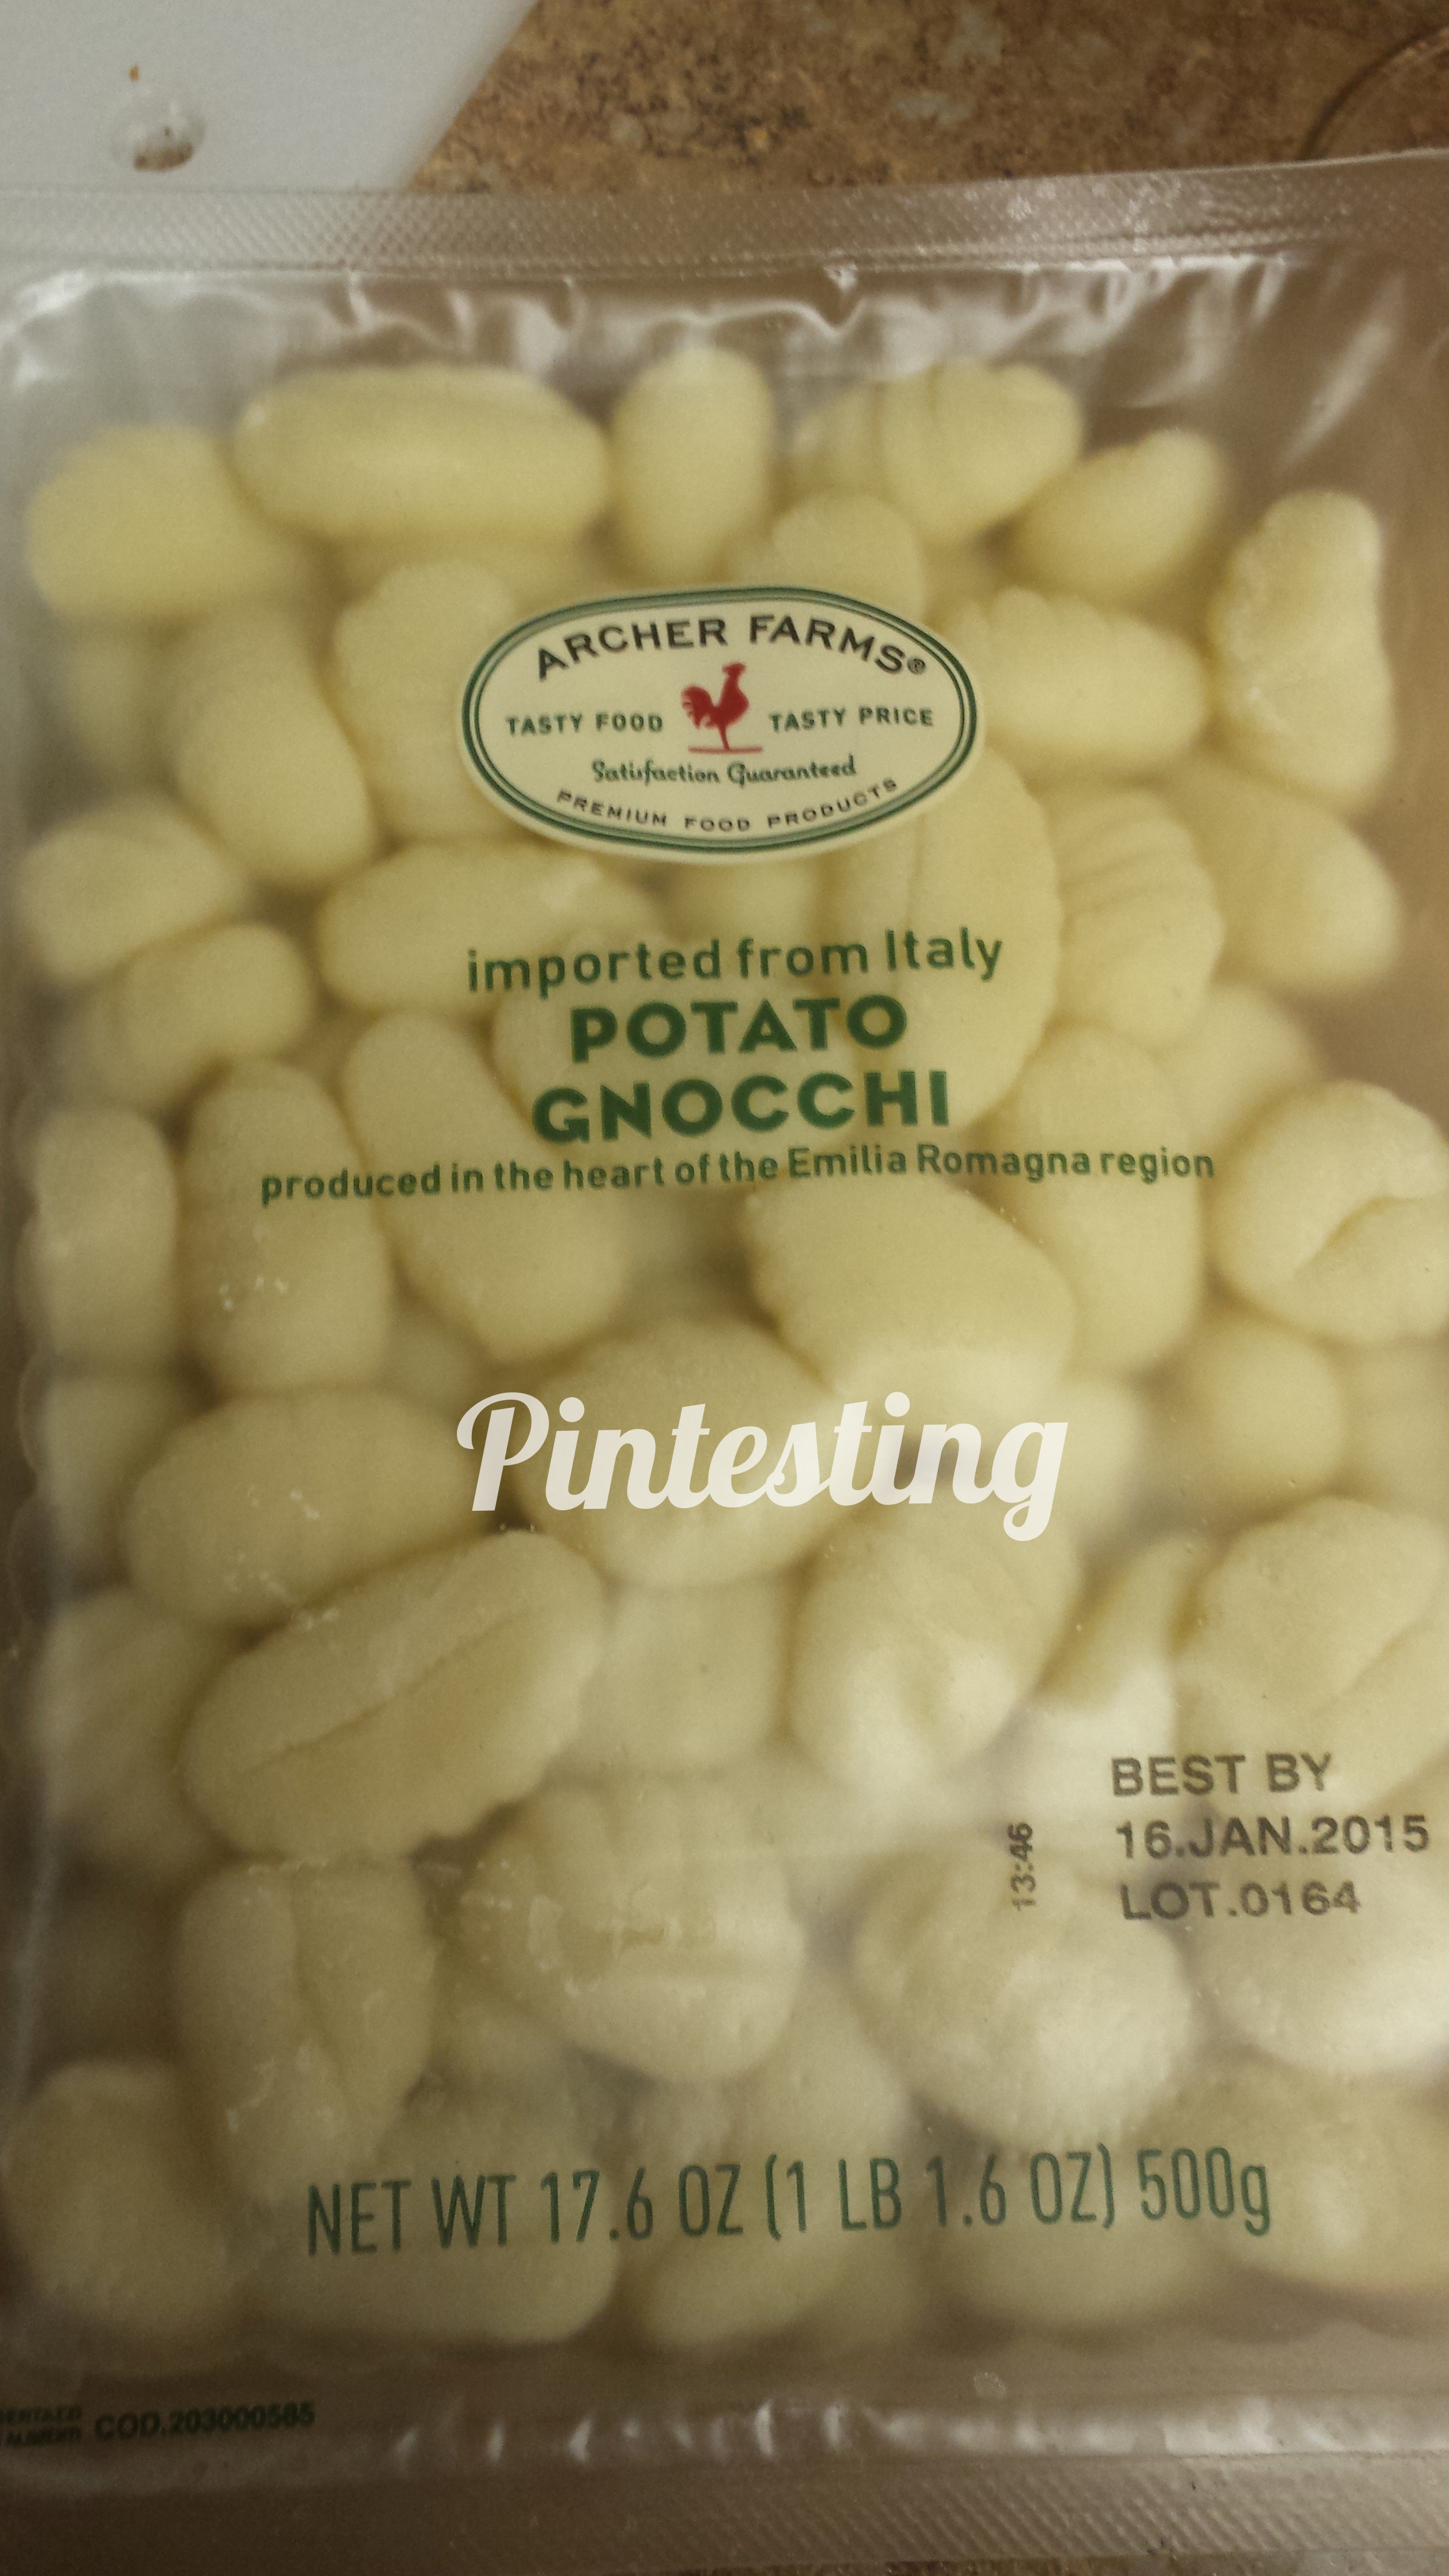
Wait, did someone ask, “what’s gnocchi”??? Gnocchi is this wonderful pasta made from potatoes that cooks into fluffy light clouds of pillowy pasta perfection. I went shopping and found this gnocchi at my Super Target. It was in the pasta aisle along with the rest of the Archer Farms brand pasta. I was lucky enough to hit the jackpot of savings that day; it was on sale, there was a Cartwheel discount, and I used my Red card. I love getting a good deal!

Chicken Gnocchi Soup - Gnocchi

The Pintesting:

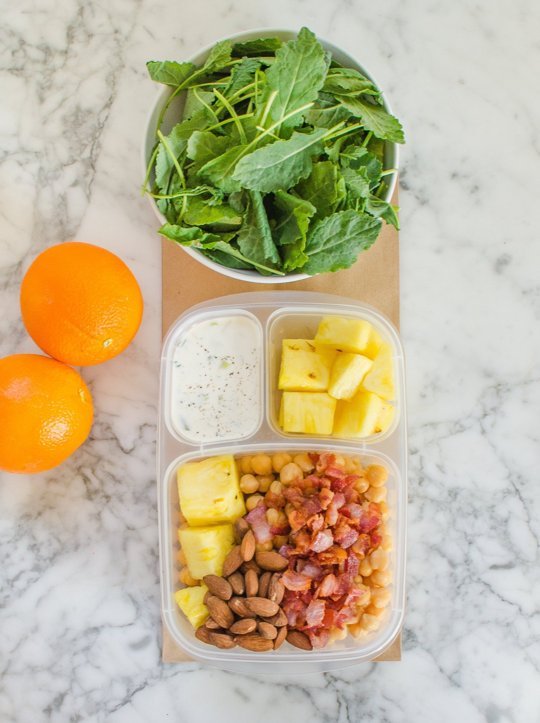
Here are the rest of the ingredients. Reeni suggested using a rotisserie chicken, so that’s what I did. I used the breast meat for the soup, and the rest went to other uses.

Chicken Gnocchi Soup - Ingredients

I regret to say that I made the soup and forgot to take the pictures. The good news is that it was such a basic soup recipe that I know you can do this. UPDATE: I have remade the soup and took step-by-step pictures – just for you.

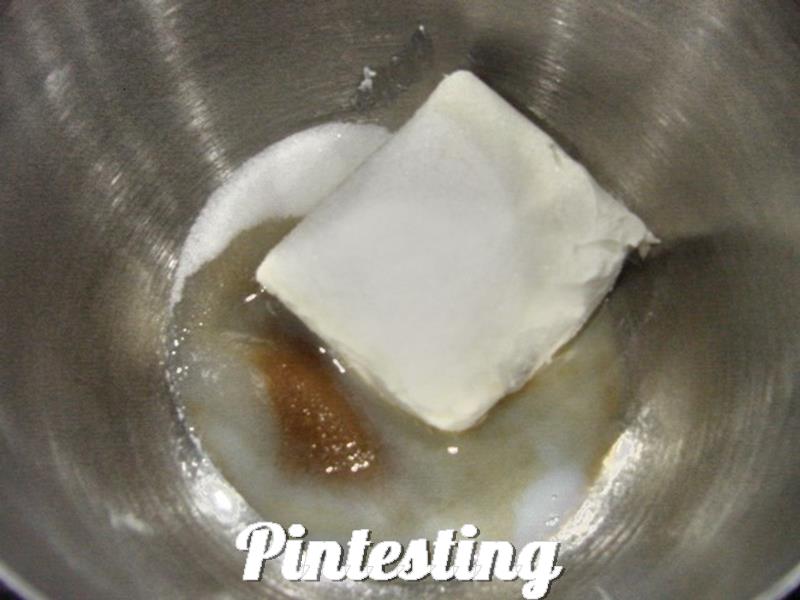
Heat the butter and olive oil.

Pintesting Chicken Gnocchi Soup - Heat EVOO & Butter

Add the aromatics.

Pintesting Chicken Gnocchi Soup - Add aromatics


Season and saute them until they’re softened.

Pintesting Chicken Gnocchi Soup - Sautee until softened

Add the flour to make a roux.

Pintesting Chicken Gnocchi Soup - Add flour for roux

Cook the flour for a minute.

Pintesting Chicken Gnocchi Soup - Cook flour

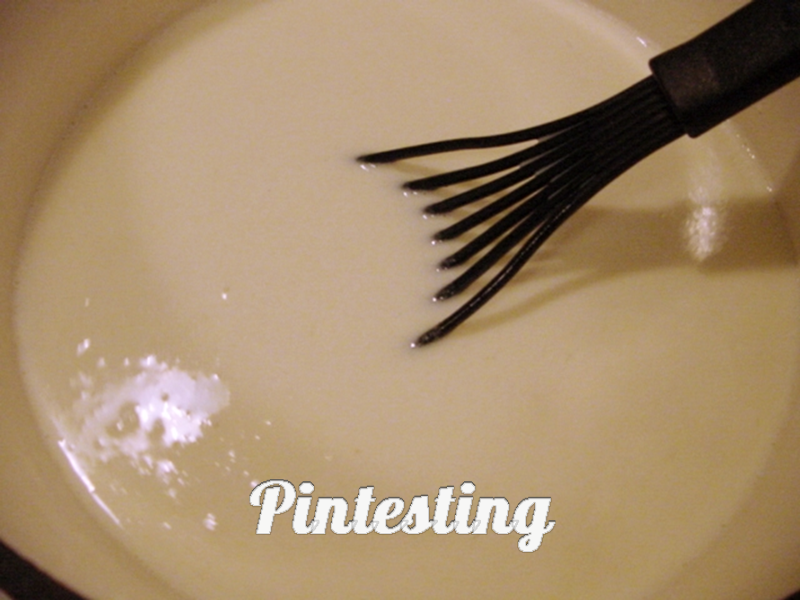
Add the chicken broth a cup at a time to incorporate, then add the cream.

Pintesting Chicken Gnocchi Soup - Add broth & heavy cream

And the chicken and simmer it for 20 minutes.

Pintesting Chicken Gnocchi Soup - Add Chicken

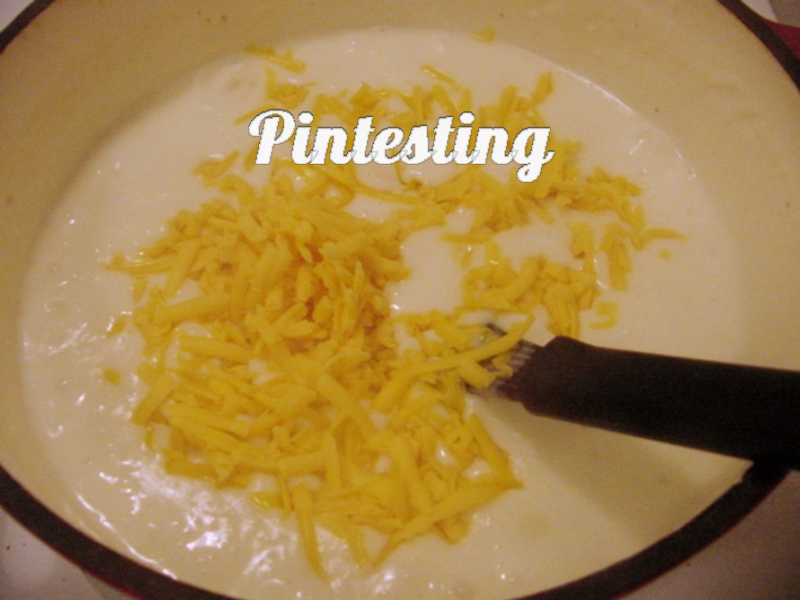
Then add the cooked gnocchi and spinach.

Pintesting Chicken Gnocchi Soup - Add spinach

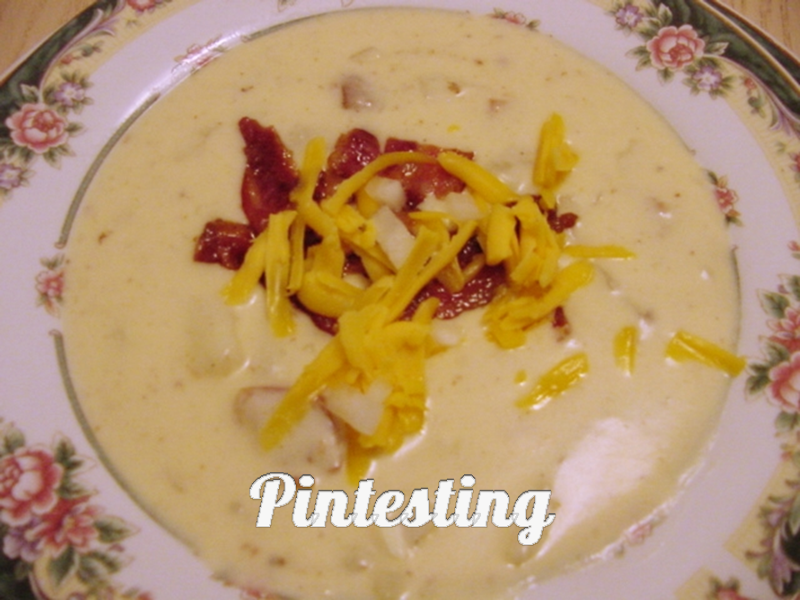
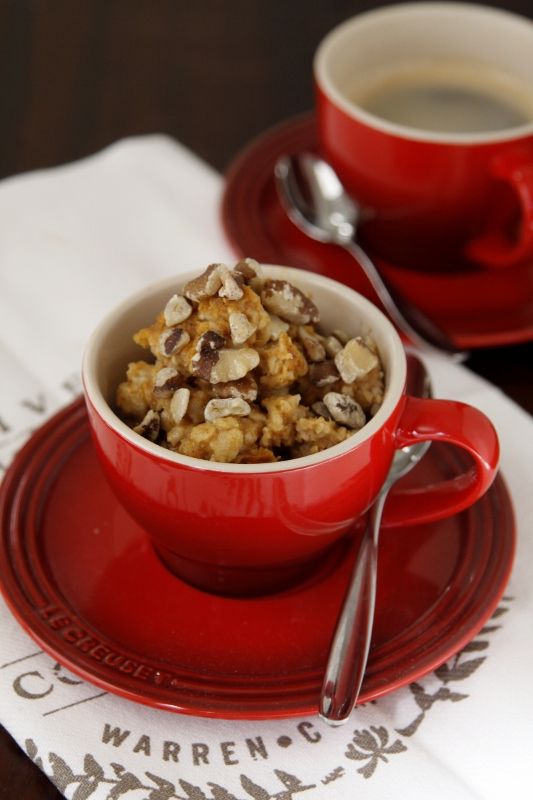
This is what it looked like in the bowl topped with fresh grated Parmigiano Reggiano.


Pintesting Chicken Gnocchi Soup - Plated

And THIS is what it looked like with the garlic bread, salad, and Sangria. Happy Mother’s Day to me!

Chicken Gnocchi Soup - Supper Served

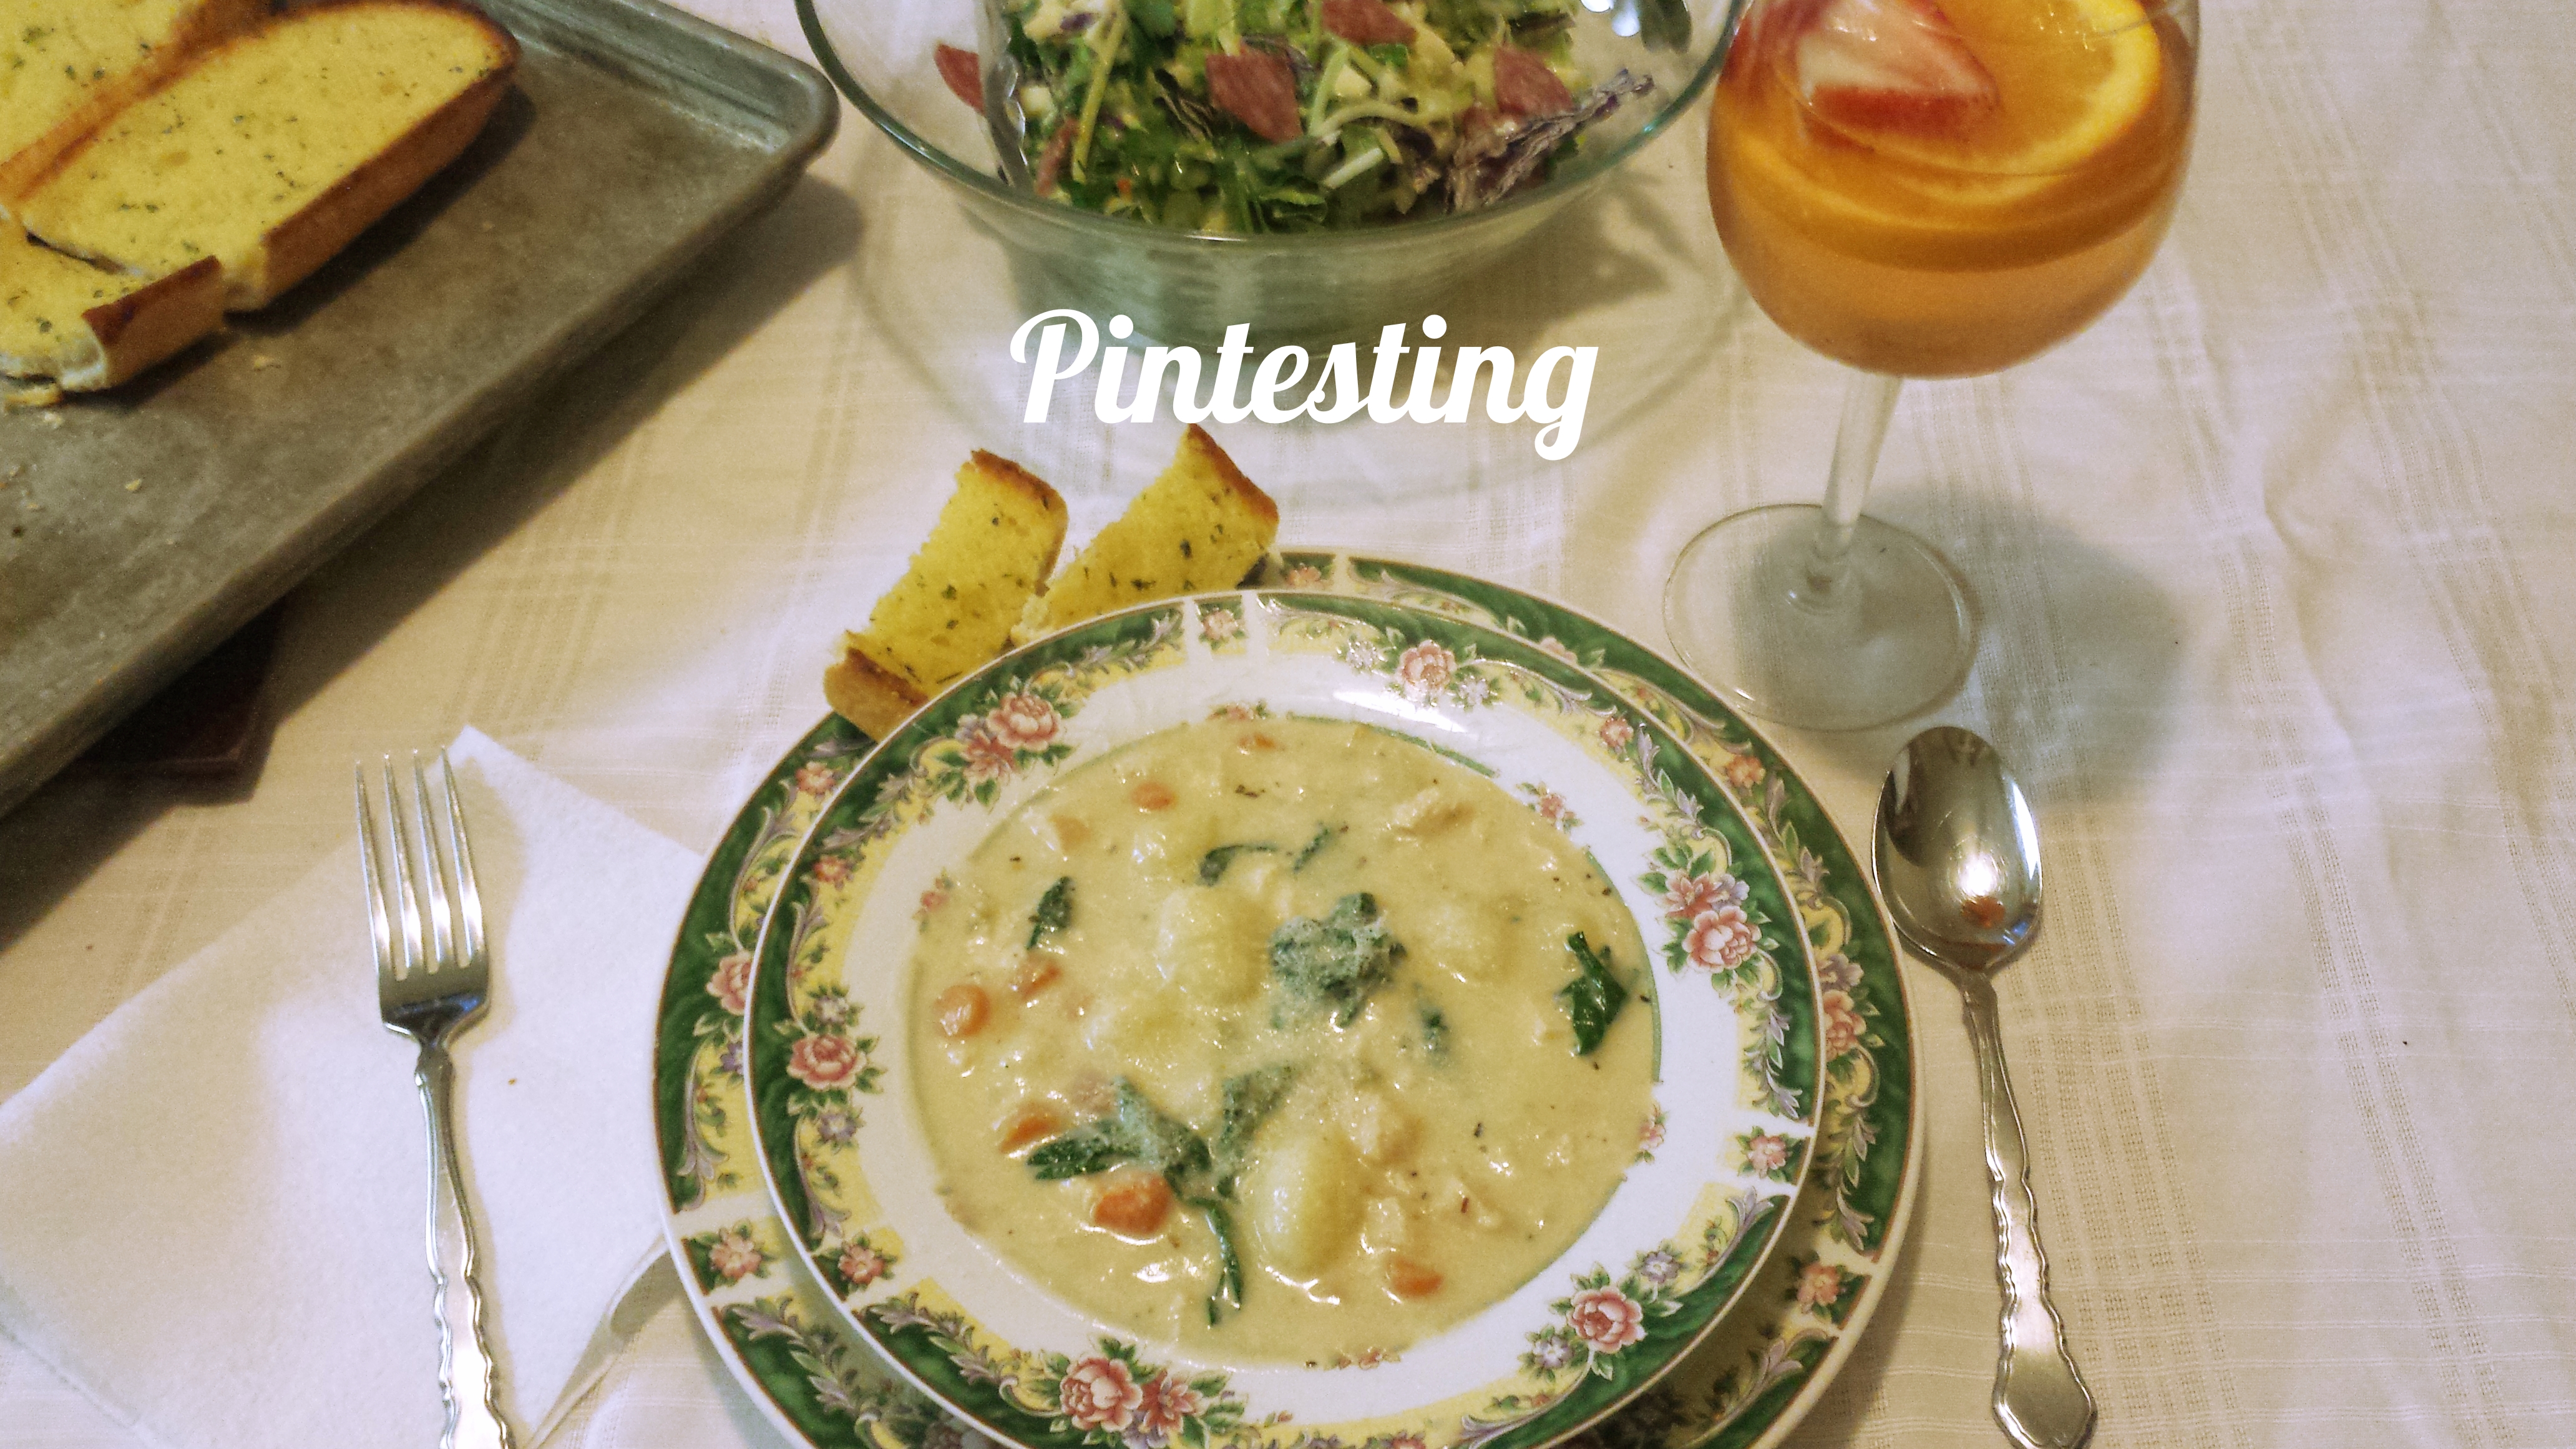
The taste was AMAZING! I completely agree with my work friends. The soup was creamy and rich, but not heavy. The gnocchi was light and almost creamy. It was so good that the handsome hubby had two and a half bowls.

The Pintesting Results:

Overall Results: 4.55 Pins

Pintesting Seal 5 Pins


Accuracy: Having never had the original soup, I’m basing this solely on Reenie’s recipe and her blog description. “It doesn’t matter if you’ve eaten this soup before or not. You’re bound to like it. It’s the kind of soup that hugs you from the inside out and the outside in.” The soup was restaurant quality, flavorful, and surprisingly easy to make. 5 Pins

Rated 5 Pins

Difficulty: This is a simple soup recipe, as stated above. The “worst” part, if you can call it that, was cooking the gnocchi in a separate pot. Many soup recipes have you to cook the pasta/noodles/rice/etc. in the soup. I have a feeling that due to the cream, it would have made the gnocchi heavy instead of fluffy. This would be a good recipe for a culinary novice. 4 PinsRated 4 Pins

Time: Reeni gave a prep time of 20 minutes and cook time of 45 minutes. My prep time was about 10 minutes, perhaps because I cooked the gnocchi while the rest was cooking, and I used a rotisserie chicken? Start to finish I made the soup in about 30-35 minutes. 4 Pins

Rated 4 Pins

Cost: The most expensive ingredient for this recipe was the rotisserie chicken, which I got in the cold deli section, at a cost of less than $6. I only used the breast meat, so figure about half of that. I already mentioned that I hit the savings jackpot on the gnocchi. The recipe made enough soup for supper plus a couple days of lunch leftovers. 4 Pins

Rated 4 Pins

Practicality: This is a delicious soup that’s hearty enough to serve for supper with a salad and bread (as I did), but light enough that it can be served as a soup course if you’re entertaining with a multi-course meal. It came together easily and didn’t require any special equipment or cooking skills, and you don’t have to run to the Olive Garden every time you get a craving. 5 Pins

Rated 5 Pins

***Just a note: I received no compensation from the Olive Garden or Target. All opinions are my own.***


Skinny Pina Colada Smoothie

May 18, 2014 by Anne Hernandez

Do you like Pina Coladas? Gettin’ caught in the rain? I love the song Escape. I always smile when I hear it. It makes me think of a wonderful vacation on a secluded, white sand beach. Of course there would be a delicious beverage with some fruit and a little umbrella as I’m walking on the beach, soaking up the sun with my handsome hubby.

It’s always the skinny version of me in these dreams. According to this Forbes article, a Pina Colada has 644 calories – YIKES! Pina Colada Smoothies come in at 600 calories for a 20-oz Smoothie King beverage (that’s 360 calories for 12 ounces). You can get a “skinny” version for 400 calories for a 20-oz Smoothie King beverages (that’s 240 calories for 12 ounces).

Skinny Pina Colada - Original Pin

I saw this pin for a Skinny Pina Colada Smoothie by Averie from her blog Averie Cooks. Her recipe came in at just under 200 calories for 12-oz. The song started playing in my head, and I needed to make one of these. Thankfully I had most of the ingredients on hand So after a quick trip to the store, I pulled out the blender that would render a delicious frozen concoction…wait, that’s the wrong song and drink. I want a Pina Colada… so let’s get on with the Pintesting!

I decided to go with coconut milk to get as authentic as possible. The banana was about a day away from being banana bread fodder, so the day before this test I peeled and froze it. I think that was helpful in keeping the smoothie texture. Maybe.

Skinny Pina Colada - Ingredients - Pintesting

Combine everything except the maraschino cherries in a blender.

Skinny Pina Colada - In the Blender - Pintesting


Blend until smooth.

Skinny Pina Colada - Blending - Pintesting


Pour into a glass and garnish with the cherries.

Skinny Pina Colada - Done - Pintesting


The only thing missing from this recipe was the beach, steel drum music playing in the background, and a paper umbrella in my drink. I didn’t have any toothpicks or little umbrellas on hand , so my cherry sunk to the bottom floated prettily on top (when balancing on the sinking cherry).

So here’s the Pintesting Results:

Overall Results: 5 Pins

5 Pins Overall

Accuracy: The smoothie had the nice consistency of a smoothie; thick but not too thick so that it could still pass through a straw. The pineapple and banana blended smoothly. I used flaked coconut so there was still a bit of the texture there; it’s what I would have expected. The smoothie was sweet enough without being not too sweet. It had the tropical pina colada flavor with the pineapple and coconut without the mega calories that usually accompany the beverage… and it was yummy without guilt. 5 Pins

Rated 5 Pins

Difficulty: By using the canned pineapple, this recipe was a matter of dumping everything into the blender and run until smooth. It doesn’t get much easier than that. 5 Pins

Rated 5 Pins

Time: From start to finish (including running some soapy water through the blender to make clean-up easy) was 8 minutes. 5 Pins

Rated 5 Pins

Cost: I had most of the ingredients on hand, but went to pick up some coconut milk for this ($3.85). I figured I might as well get the whole effect and bought the maraschino cherries, too. The total cost (using canned pineapple, since fresh is more expensive) was ~$3.00 on the outside (including the splash of rum that I added). The local Smoothie King Skinny Pina Colada Smoothie was $4.87 with tax for a 20-oz. – $2.92 adjusted for 12-oz. – and they didn’t offer rum. The cost is pretty spot on, but because coconut milk and agave aren’t found in the average household, 4 Pins.

Rated 4 Pins

Practicality: This would be a yummy breakfast (sans the rum), or a healthy twist on a cocktail (with the rum). It took only minutes to make, and I didn’t have to drive anywhere to pick one up. 5 Pins

Rated 5 Pins

Salad Swag: 3 Cures for the Common Salad

Apr 29, 2014 by Anne Hernandez

Bringing your lunch to work is a great way to save money and eat healthy. If the thought of taking your own lunch brings images of bologna sandwiches, bruised fruit, and pre-packaged “pastry” – think again! Bento lunches are all the rage. Sandwiches, wraps, and flatbreads have had healthy and delicious overhauls. Even packaging has improved, allowing for more and better options.

When I saw this pin for Salad Swag: 3 Cures for the Common Salad from the folks at The Kitchn, I knew this would be a great lunch test.

Salad Swag - Original Pin

The Pin linked via Kelly’s blog and site, It’s not Just Lunch. If you need some ideas for lunches and packaging, Kelly is a FANTASTIC resource. Her blog has lots of recipes and ideas, as does her cookbook, and she has links for not only her own lunch packaging system (can you say successful “momtrepreneur”?) but also other bento and lunch ideas.

BONUS TEST: Two of the salads call for chopped fresh fruit (pear and apple). Since I like my job, and they frown upon bringing a knife to work, I went with the tip given for keeping the fruit from turning brown; store it in a bit of water.

I chopped the fruit (pear pictured).

Salad Swag - Cut Pear - Pintesting

…Put it in a small container, and covered with water.

Salad Swag - Cover with Water - Pintesting

This was a good way to keep the fruit from turning brown, and it did not turn mushy.

Salad Swag - Keep from browning - Pintesting

The only down side is that it’s a bit awkward to drain if using a single-unit container like in The Frenchie Lentil. It was a lot easier draining the apples in the lunch system I used for The Bleu Apple. Read on to see the details.

Back to salads – three of them! Rather than post a pile of ingredients for all three salads, I’ll show each one individually.

NOTE: none of these recipes have measurements, so I eyeballed the pictures and went for a rough estimate.

* THE FRENCHIE LENTIL

This salad calls for cooked lentils, rough chopped hazelnuts, chopped fresh pear, crumbled feta, arugula, and balsamic vinaigrette.

Salad Swag - The Frenchie Lentil - Original

I took my pictures at the lunch table at work.

Salad Swag - The Frenchie Lentil - Pintesting

Although the photo isn’t as fancy, the plated product looked nice and tasted nicer. You can also see how draining the pears would be more difficult with a single-unit container. I also put the dressing in a separate container to make it easier to pour on the salad and make clean-up a bit easier.

Salad Swag - The Frenchie Lentil Served - Pintesting

I would not have thought of putting lentils in a salad, but I’m glad that The Kitchn did. They added a heartiness and meatless protein. The nuts gave a nice texture contrast and added to the protein, keeping me full all afternoon. The pears added a hint of sweet which played nicely against the saltiness of the feta. A filling and delicious salad that was perfect for lunch.

* THE BLEU APPLE

This salad calls for chopped apple, bleu cheese crumbles, cooked and cooled pearl barley, chicken breast, baby spinach, and lemon vinaigrette.

Salad Swag - The Bleu Apple - Original

I made a couple of changes – some accidental – with my lunch. I used leftover shake and bake chicken breast on my salad (rather than get another pan dirty at 0-dark-thirty in the morning). When I picked up the bleu cheese at the store, I accidently grabbed crumbled goat cheese and didn’t notice until I was packing the lunch. Goat cheese it is. Finally, when I went to make the vinaigrette, my lemons were bad. *sigh* Creamy balsamic vinaigrette.

Salad Swag - The Bleu Apple - Pintesting

On this day I used the Rubbermaid Lunch Blox Sandwich Kit. This lunch system comes with four containers and an ice-pack cooler that all snap together whichs keep things from falling all over my lunch bag and organized. Because the containers are all separate, it made draining the apples much easier and the dressing had it’s own container, too. The one “side” container that you don’t see held a small piece of leftover cake. Since it’s not part of the recipe I left it out of the picture.

Salad Swag - The Bleu Apple Served - Pintesting

The combination was still fantastic. The apple was crisp and sweet (but not too much so). The goat cheese was creamy and added a nice tanginess. The pearl barley was chewy and hearty – a nice addition to a salad. The chicken was, well, chickeny. The creamy balsamic dressing tied everything together very nicely. It was another great lunch.

* THE HAWAIIAN

This salad calls for pineapple, almonds, bacon, chickpeas, baby kale, and ranch dressing.

Salad Swag - The Hawaiian - Original


I used canned chickpeas, drained and rinsed, and substituted the rest of the bag of baby spinach. Waste not, want not.

Salad Swag - The Hawaiian - Pintesting

This was the hardest to get to lunch, because the bacon kept disappearing. I have no idea how it happened. Let’s just say I’m thankful my salad got some.

Salad Swag - The Hawaiian Served - Pintesting


Once again, this salad played a symphony of tastes. The sweet, juicy pineapple was a lovely contrast to the crispy, salty bacon. The chickpeas were creamy in contrast to the crunchy almonds. And the coolness of the ranch dressing brought it all home.

Each one of these salads was delicious, filling, and anything but boring. I had enough leftovers of ingredients to make The Frenchie Lentil again for lunch, and even made The Bleu Apple for a light late supper for two.

Now for the Pintesting Results:

Overall Rating: 5 Pins

5 Pins Overall

Accuracy: All three of the salads were extremely flavorful and filling. There were no measurements given, which nearly brought it down to 4 pins, but I like that you can modify the salad to your own tastes. Even though I had a few substitutions of my own, everything was delicious. 5 Pins

Rated 5 Pins

Difficulty: Some of the salads required a bit of prep work such as cooking and cooling lentils, pearl barley, or chicken, chopping fruit or nuts, etc. Not as easy as opening a salad kit, but definitely not hard. 4 Pins

Rated 4 Pins

Time: Each salad requires something with a cooking time of 20-30 minutes; lentils, pearl barley, or bacon. The chicken breast can be cooked on a George Foreman Grill in about 10 minutes. The rest is quick work. 4 Pins

Rated 4 Pins

Cost: These are restaurant quality salads that you would cost about $10 in most moderately priced chain restaurants. Each salad had a variety of ingredients, but most would make more than one salad. The Bleu Apple was the most expensive salad due to the chicken; roughly $4.50. The Frencie Lentil and Hawaiian both came in at $4.00 each. That’s what you’d pay for a Mc Fast Food lunch, only you’re getting a healthy, nutritious and delicious lunch that won’t make you feel guilty. 4 Pins

Rated 4 Pins

Practicality: These salads are easy to make ahead and have ready for the week. They’re a cost effective way to bring your lunch that’s anything but boring. 5 Pins

Rated 5 Pins


Slow Cooker Beef and Broccoli

Apr 25, 2014 by Anne Hernandez

I love our neighborhood Chinese take out place for a quick dinner that doesn’t make me feel completely guilty for not cooking. One of our family favorites is Beef and Broccoli. It’s got broccoli, therefore it must be healthy.

Sure, that’s my story and I’m sticking to it.

When I saw this pin by Damn Delicious for Beef and Broccoli in the slow cooker my first reaction was skeptical at best. Beef and Broccoli is a stir fry… but then I read Chung-Ah’s post and recipe in detail and it sounded extremely plausible. Why not? Definitely worth giving a test. To the wok crock pot!

Slow Cooker Beef and Broccoli - Original Pin

The Pintesting:

The ingredients were easy to find at my local grocer. (There’s also brown sugar that didn’t make it into the picture, but did make it into the dish.)

Pintesting Slow Cooker Beef and Broccoli

Trim and thinly slice the meat, and put in the crock pot.

NOTE: The recipe called for 2 lbs of chuck roast. By the time I trimmed it to my liking, I had 1 1/2 pounds left. There was still a LOT of meat.

Pintesting Slow Cooker Beef and Broccoli

Make the sauce together.

Pintesting Slow Cooker Beef and Broccoli

Toss the meat with sauce and cook for 90 minutes. Crock pot cooking usually takes a minimum of 4-6 hours and up to 10-12 hours, depending on the recipe. I was a little concerned that this wouldn’t be long enough, but…

Pintesting Slow Cooker Beef and Broccoli

This is what the meat looked like after cooking for 90 minutes. Oh, and I forgot to mention how amazing the sauce smelled.

Pintesting Slow Cooker Beef and Broccoli

Add the broccoli and cornstarch slurry (to thicken the sauce).

Pintesting Slow Cooker Beef and Broccoli

Cook for another 30 minutes.

Pintesting Slow Cooker Beef and Broccoli

Serve w/ rice – OMG!!!

My handsome husband said that this was better than the take-out place, and that’s saying a lot. The meat was unbelievably tender and flavorful and the sauce was perfect. The broccoli was fully cooked but not mushy. We both also like that we knew exactly what is in our food – no mystery ingredients.

The Pintesting Results:

Overall Rating: 4.55 Pins

Pintesting Seal 5 Pins

Accuracy: This recipe really captures the flavor of take-out Beef and Broccoli made at home. Using the slow cooker was a brilliant idea on Chung-Ah’s part. The beef was very tender, but not to the point of shredding, the sauce was fantastic, and the broccoli was completely done without being mush. (I don’t like mushy veggies.) 5 PinsRated 5 Pins

Difficulty: The hardest part of this recipe was trimming the roast. I have a tendency to go a bit overboard with that, and since the cooking time (2 hours total) isn’t the normal 6-8 hours in a slow cooker, I didn’t want to have hunks of fat or stringy meat. You don’t have to go to the same lengths of trimming – Chung-Ah didn’t mention it in her recipe. The rest was super simple; whisk together the sauce, toss in the broccoli and cornstarch slurry. Easy Peasy. 5 Pins

Rated 5 Pins

Time: Because this is a slow cooker recipe, I look at it with a bit of a curve. The prep time was roughly 10-15 minutes – mostly because of my obsessive trimming of the roast. Still, not bad. Since the crock pot did the rest without my assistance (just the add-ins after 90 minutes), this gets 4 Pins.

Rated 4 Pins

Cost: The Roast was the most expensive part of the meal, but I was fortunate to get it on sale for about $7. The broccoli was also on sale. I did have to purchase a lot of the sauce ingredients for the 1st time, but even so this will make a LOT of Beef and Broccoli before you run out. The total cost was less than two orders of take-out, it makes 4 servings, and you’ll be able to re-use lots of the ingredients. But because most kitchens might not have the sauce ingredients as a staple, I’m giving this 3 Pins.

Rated 3 Pins

Practicality: If you need a quick fix for Beef and Broccoli take-out, hit up your local restaurant. If you want amazing flavor and are willing to wait 2 hours with minimal work, then this is a great way to go. I like that I know what’s in it, how it makes the house smell amazing, and the “yum” noises of approval. It’s a great recipe to throw into the crock pot before soccer or piano or shopping. I also like that my kitchen isn’t covered in splattered grease from stir frying. 5 Pins

Rated 5 Pins

Grilled Cheese Cook-off/Grill-off/Throwdown

Apr 13, 2014 by Anne Hernandez

It’s National Grilled Cheese Day! My personal humble opinion is that a grilled cheese sandwich is comfort food at it’s finest – especially when accompanied with tomato soup. Grilled Cheese + Tomato Soup = Happy Anne!

So when my handsome hubby showed me this article this morning, I KNEW what I’d be having for lunch today. (The things I do for this blog.) Unfortunately the article wasn’t pinnable (is that a word now?), so I had to find a similar one to make things official. This is PINtesting, after all. Thankfully, the folks at the Kitchn had already obliged and I found this pin on the topic.

Grilled Cheese Cook-off - Original Pin

The articles said that using mayo rather than butter would give the sandwich a nice crust, one described as french toast like, and also a nice tangy flavor that butter didn’t provide. These are the qualities that I’m looking for in this grill-off.

So with no further ado, on to the Pin Test!

Grilled Cheese Cook-off - Ingredients - Pintesting

This had a total of 4 ingredients; the cheese (Sharp American), the bread (whole wheat), butter and mayo.

Grilled Cheese Cook-off - The Cheese - Pintesting

I used 2 1/2 slices of cheese per sandwich. This keeps an even amount of cheese on the whole sandwich for better cheesey distribution.

Grilled Cheese Cook-off - Mayo vs. Butter - Pintesting

The sandwich on the left was spread with mayo, and the sandwich on the right was spread with butter. (Outside only for both sandwiches.)

Grilled Cheese Cook-off - First Side - Pintesting

I preheated the pan to medium-high so that it would be warmed, then reduced the temperature to medium before dropping the sandwiches in to grill.

Grilled Cheese Cook-off - Second Side - Pintesting

Each sandwich was dropped into the pan within 5 seconds of each other.

Grilled Cheese Cook-off - Grilled Mayo - Pintesting
Grilled Cheese Cook-off – Grilled Mayo
Grilled Cheese Cook-off - Grilled Butter - Pintesting
Grilled Cheese Cook-off – Grilled Butter

Each sandwich was flipped in the order in which they went in to keep the cooking time even; about 2-3 minutes on each side.

Grilled Cheese Cook-off - Grilled Cheese Sandwiches - Pintesting

The bread was toasted nicely for both sandwiches. There wasn’t a noticeable distinction between the butter or mayo “greased” sandwiches. Neither gave a crust like french toast. The cheese was evenly melted on both sandwiches, as well.

Grilled Cheese Cook-off - Grilled Cheese Taste Tested - Pintesting

The only discernable difference that I could tell was the taste. The buttered sandwich had the traditional grilled cheese taste that I’ve known since childhood. The mayo-ed sandwich had a bit of a tang; not overpowering, but definitely there.

Honestly, I don’t think either one had a huge advantage over the other. But if you ever run out of butter and HAVE to have a grilled cheese sandwich at that very moment and don’t want to run out to the store, now you have options.

So here are the official Pintesting results.

Overall Rating: 4 Pins

4 Pins Overall


Accuracy: Both articles gave promises of an unbelievable crust that would come with using mayo rather than butter, described as french toast like in one article, and also a tangy flavor. While I definitely got a nice tang with the mayo, the crust was not any different than the buttered sandwich. Because the crust was not elevated to heights of glory, this gets 4 Pins.

Rated 4 Pins

Difficulty: The method for making a grilled cheese sandwich with either spread is exactly the same. Since neither is difficult, 4 Pins.

Rated 4 Pins

Time: The total time to make either version is about 5 minutes from start to finish. 5 Pins

Rated 5 Pins

Cost: I had to run to the store to pick up the cheese, because we don’t normally buy any kind of American sliced cheese. However, I think it’s the best to use for a grilled cheese sandwich because of the superb meltability. It was on sale for less than $3.00 for the 16-slice package. Add the cost of 2 slices of bread and a schmear of butter or mayo (all of which were on hand) and you’re looking at about $1 per sandwich. 5 Pins

Rated 5 Pins

Practicality: I don’t know that I would go out of my way to grab mayo vs. butter for a grilled cheese sandwich unless I was making something more gourmet that would be accentuated by the tang that came with the mayo. Adding tomato and bacon might make it a better choice, for example. If you were out of butter, this is a helpful trick. Since this is such a toss-up I’m going right down the middle and giving it 3 Pins.

Rated 3 Pins

How to Keep Leftover Guacamole Green

Mar 19, 2014 by Anne Hernandez

I was never a fan of guacamole until I met my husband. He makes the BEST guac (as we usually call it in our house). Even people who don’t like guacamole like my handsome hubby’s guac. His recipe is simple. It’s made with simple real ingredients. (I asked if he would let me share his recipe – maybe someday.) And it’s the very rare occasion when we have leftovers. That’s kind of like leftover wine or chocolate. Yes, you understand.

The thing about leftover guacamole is that it turns a really gross color brown and looks like something your dog might have hacked up on a really really bad day. Would you like some leftover guacamole? Oh yes – NOT!

And the sad thing is that it really doesn’t change the taste, just the way it looks. But since we eat with our eyes first… this problem needs to be solved.

So when I found this pin by Jane from This Week for Dinner, I was super excited!

http://www.pinterest.com/pin/207869339024809291/

My handsome husband made some of his almost famous guacamole. This is the leftovers.

Saving Guacamole - Pintesting

Which I put into a small container.

Saving Guacamole 2 - Pintesting

Then covered it with a layer of water roughly 1/4 to 1/2 inch.

Saving Guacamole 3 - Pintesting

I put on the lid, then put it in the fridge overnight.

Saving Guacamole 4 - Pintesting

After work the next day, I took it out of the fridge and this is what it looked like.

Saving Guacamole 5 - Pintesting

I drained off the water and lightly blotted it with paper towel.

Saving Guacamole 6 - Pintesting

You can see from the before and after pictures that the “after” looks a little washed out compared to the “before” shot. It tasted a little washed out, too. I added a little salt, but it still wasn’t quite the same. Although I think it looks a LOT better than the disgusting brown that I normally see in leftover guac.

Saving Guacamole - Before and After - Pintesting


So here are the Pintesting results:

Overall Results: 4.05 Pins

4 Pins Overall

Accuracy:  The guacamole didn’t turn brown, but it did appear (and taste) a bit washed out. Avocados have the good kind of heart-healthy unsaturated fat. I don’t know if that’s what was floating on the top of the water when I took the container out of the fridge the next day, but it had that kind of look. IF that’s what it was, then that would explain the washed out taste. (If anyone can clarify this point, I would be extremely glad for the information.) I’m giving this 3 Pins.

Rated 3 Pins

Difficulty:  Pouring a bit of water on top of the guacamole… So simple that I’m not going to waste words and time on it. 5 Pins

Rated 5 Pins

Time:  It took mere seconds to pour water over the guacamole. 5 Pins

Rated 5 Pins

Cost:  Since we used bottled drinking water (because we don’t have good tasting tap water), there actually was a cost. However, if you use tap water it’s free. 5 Pins

Rated 5 Pins

Practicality: The method was successful in keeping the guacamole from turning brown, is cheap and easy. You lose a bit of flavor, but adding a little salt and hot sauce helped a lot. When some of my friends and family heard I was doing this test, they recommended that I leave the pit in the guacamole to keep it from turning brown. Another test for another day. For this test – 4 Pins

Rated 4 Pins

Baked Potato Soup – a Fix It and Forget It recipe

This is the second in a series of posts based upon the baked potato. If you haven’t seen it yet, start with this post for Outback Style Baked Potatoes. You’ll need them for the Baked Potato Soup recipe in this post.

Well, baby, it’s still cold outside. In fact it’s even colder than it was when I started this series a couple of days ago. When I woke up this morning, the temperature was -9F with a windchill of -23F (that’s -23C and -31C respectively, for those who speak Celsius). Michigan is having a really cold winter to make up for the last couple of years.

Baked Potato Soup - Weather

This is definitely soup weather, and this recipe is one that my family has enjoyed for many years. It’s from the original Fix It and Forget It cookbook. In a way, today’s post is a little bit of a cheat for me. Instead of selecting a new recipe from Pinterest, I went online and searched until I found someone who had used the exact recipe.

Baked Potato Soup - Cook book - Pintesting

I was so thankful to see this post on the blog Three Picky Kids, and pinned it right away. Don’t judge me too harshly for cheating on this recipe. Once you try it, you’ll be very glad that I went through the extra effort to share it with you.

Baked Potato Soup - ORIGINAL PIN

Now you’re going to need baked potatoes to make baked potato soup. You can use the recipe from the Outback Style Baked Potatoes post or your favorite baked potato recipe, or microwave bake the potatoes (which is what I used to do).  Each way will give you properly cooked potatoes to use for the recipe, but having compared the taste of the oven baked vs. microwaved potatoes, I’d like to point out a couple of differences. The oven baked potatoes have a nicer flavor and texture, and you can use the potato skins for an appetizer or snack. The microwaved potatoes seem to release out of their skins a little easier. You can toss the skins in the garbage or compost bin.

Here are the baked potatoes. The recipe calls for 4 baked potatoes, but since mine were on the smaller side I used six. (Ignore the two on the top of the baking sheet for now. They’re for the third post in this series.)

Baked Potato Soup - Potatoes - Pintesting

This is the scooped out potato flesh that I set aside, per recipe instructions.

Baked Potato Soup - Potato Pulp - Pintesting

Next I made a roux of butter and flour, then added 2 of the 6 cups of milk.

Baked Potato Soup - Roux and Milk - Pintesting

Once blended, I added another 2 cups of milk.

Baked Potato Soup - Roux and more Milk - Pintesting

Now, since I’m already cheating on this post, I’m going to go hog wild and really give this a stretch. Instead of adding 2 more cups of milk, I’m going to add a secret ingredient.

Baked Potato Soup - The secret ingredient - Pintesting

Lots of potato soup recipes use chicken broth rather than milk. Since I was almost out of milk, I substituted 2 cups of chicken broth for the last 2 cups of milk. This is what it looked like.

Baked Potato Soup - Chicken Broth - Pintesting

Once this cooked until thickened and bubbly, I added the potato pulp,

Baked Potato Soup - Roux Milk Potatoes - Pintesting

salt and pepper,

Baked Potato Soup - S+P - Pintesting

the cheese,

Baked Potato Soup - Add Cheese - Pintesting

(stirring well with each addition to combine thoroughly)

Baked Potato Soup - Blend Cheese - Pintesting

the onions and bacon,

Baked Potato Soup - Add Bacon - Pintesting

and finally the sour cream. I turned off the heat at this point so the dairy wouldn’t scorch.

Baked Potato Soup - Add Sour Cream - Pintesting

The end result is a rich, thick, creamy, comforting soup that has all the goodness of a loaded baked potato.

Baked Potato Soup - Yum - Pintesting

It’s January, and many people have begun their New Year’s resolutions to lose weight. If that’s you and you’re looking for a weight loss recipe, then this might not be the best recipe choice to try. Potatoes, cheese, bacon, and sour cream are not normally considered diet friendly foods. (You can cut back on any of the above, but it loses the loaded-baked-potato-ness if you do.) However, if you’re looking for something that’s going to warm you up and be fantastically delicious, then this is the recipe for you. Serve this with some fresh baked bread and I guarantee you’ll be the most popular person of the year (so far).

And now for the Pintesting results.

Overall Results: 5 Pins

5 Pins Overall

Accuracy:  This creamy, hearty soup has been a family favorite for many years. The taste really captures a baked potato loaded with lots of my favorite toppings. The recipe posted on the Three Picky Kids blog was true to the Fix-It and Forget-It recipe with easy to follow directions. Substituting the 2 cups of chicken broth for 2 cups of milk did not take anything away from this recipe. It was just as flavorful, creamy, and hearty as it’s always been. 5-Pins

Rated 5 Pins

Difficulty:  The first time that I made this recipe was the first time that I had made a roux. I felt like I had taken a huge step toward becoming a real cook. It’s a wonderful recipe for a beginner cook, but I would recommend getting all of your ingredients prepped and on hand before you start; potatoes baked and cooled, bacon cooked and crumbled*, cheese shredded, green onions chopped*, etc. Although the recipe is not complicated, because of the extra step for baking the potatoes I’m giving this 4 Pins.

Rated 4 Pins

Time:  The prep time for the recipe is roughly 45 minutes if you bake the potatoes in the oven, and roughly 20 minutes if you microwave them. The cook time is an additional 20-30 minutes. That adds up to about an hour, give or take. 4 Pins

Rated 4 Pins


Cost:  While none of the ingredients are expensive, this recipe requires quite a few. The total comes to between $15-$20. You’ll have leftover ingredients to use if you want to make the potato skins, or anything else. 4 Pins

Rated 4 Pins

Practicality:  This is practically one of the most delicious soups I’ve ever tasted. It makes enough to feed a family of four with leftovers for lunch – maybe. If you do have leftovers, the soup will thicken a lot in the refrigerator, so you’ll need to add more milk or broth to loosen it to the desired soup consistency. I did use the extra ingredients to make the next two posts for breakfast and appetizer. 5 Pins

Rated 5 Pins


*Final Note* I don’t sell Pampered Chef products, but I do have quite a lot of them. When my Best friend became a Pampered Chef Consultant, I had to show my support. There was one product that really made the prep work go quickly in this recipe and I wanted to share it with you. The Salad Chopper was great for cutting up the green onions and bacon in no time flat. My hands didn’t get all greasy from crumbling the bacon, and everything was evenly cut to the same size – nice for presentation. It’s like two scissors connected with a scoop to catch everything, or to scoop salad ingredients for easy chopping in the salad bowl. I like that it’s dishwasher safe, and has a safety lock for protection for children and graceful people like me. Those blades are very sharp, which makes chopping up a salad very quick work.

Pampered Chef Salad Chopper

* Final Final Note*  I didn’t receive any compensation for this mini endorsement other than a “thank you” from my friend. This opinion is my own and not supported or paid for by Pampered Chef or any other company.

Outback Style Baked Potatoes

Baby it’s cold outside! It’s been years since I’ve seen truly cold weather – I mean single digit temperatures with below-zero wind chill. In order to help keep the heat bill down but stay warm, we’ve weather proofed our ground-floor apartment; plastic over the patio slider, towel rolled up as a stopper under the front door, using candles almost daily, and lots and lots of baking.

Soups are also very warm and comforting, and I’ve been making a lot of soups lately, too. One of our favorite soups is a loaded baked potato soup that’s easy, hearty, creamy, and delicious! It calls for baked potatoes, and in the past I’d just pop several in the microwave to get them done quickly.

This apartment doesn’t have a microwave. I need to bake potatoes. Bummer? No. Opportunity? YES!

I had seen this pin for Outback Style Backed Potatoes by Shawn from I Wash You Dry. There’s something wonderful about a perfectly baked potato with a nice crispy skin, fluffy interior, and slightly salty outside for flavor. Mmm!

And baked potatoes are so versatile! This one pin will bring four recipes – FOUR!  That’s a lot of bang for your baking buck. In addition to the baked potatoes, I’ll be making the baked potato soup, potato skins, and a breakfast post.

http://www.iwashyoudry.com/2012/05/02/how-to-wednesday-baking-a-potato/

http://www.iwashyoudry.com/2012/05/02/how-to-wednesday-baking-a-potato/

So here we go. I got a bag of Russet potatoes and used 8 for what I had in mind.

Outback Style Baked Potato - Potatoes - Pintesting

I scrubbed them all clean because I like to eat the skins, but not the dirt.

Outback Style Baked Potato - Washed - Pintesting

Pat dry – very important if you want crisp skins.

Outback Style Baked Potato - Dried - Pintesting

Pierce them several times on both sides with a fork. Please do this carefully. Do NOT look away for a second.

Outback Style Baked Potato - Pierced

Brush the potatoes with olive oil.

Outback Style Baked Potato - Oil Brushed - Pintesting

Sprinkle with course salt. The recipe called for sea salt, but I used kosher salt. It was still salty.

Outback Style Baked Potato - Salted - Pintesting

I put them on a sheet pan to transfer them to the oven more easily.

Outback Style Baked Potato - Ready for Oven - Pintesting

Bake in a pre-heated oven. Since they sit directly on the rack, and the bottoms as well as the tops had been pierced, it’s best to put the sheet pan under to catch the drips. Yes, they will drip.

Outback Style Baked Potato - Oven - Pintesting

***NOTE: Do you see the oven thermometer hanging from the oven rack just below the potatoes? If your baked goods don’t consistently come out right – GET ONE! It will be the best $5 you will spend. Once you know how true (or off, in my case) your oven is, you’ll be able to compensate and get accurate temps.  This will improve ALL baking immensely.

Back to the recipe…

The potatoes are done. The outer skins are crispy and salty, and the insides are soft and fluffy.

Outback Style Baked Potato - Baked - Pintesting

Yum!

Outback Style Baked Potato - YUM - Pintesting

Since I’m not using these to eat as baked potatoes, I’ve let them cool a bit then cut them in half for easy scooping. The insides will go into the soup and the outsides will be potato skins. The two uncut potatoes on top will be the breakfast recipe.

Baked Potato Soup - Potatoes - Pintesting

Watch for these upcoming pins and recipes!

And now for the Pintesting results!

Overall Results: 5 Pins

5 Pins Overall

Accuracy: This recipe is very simple and straight forward. Shawn did a wonderful job with her step-by-step photos, and the potatoes turned out perfect. 5 Pins

Rated 5 Pins

Difficulty: Wash, dry, pierce, oil, salt, bake. Grunted out monosyllabic instructions are about as easy as it gets. I wouldn’t let young children pierce the potatoes or use the oven, but they could do the rest of the steps very easily. 5 Pins

Rated 5 PinsTime: The prep time was about 5 minutes (not including the time to take the pictures). Due to the 45-60 minutes of baking time, this gets 4 Pins

Rated 4 Pins

Cost: The bag of potatoes was $3, and I had the salt and oil. 5 Pins

Rated 5 PinsPracticality: On their own, baked potatoes are delicious (salt and butter, no sour cream on mine). But considering how versatile they can be – I mean, 4 posts from one baked potato recipe – that’s about as practical as you can get. 5 Pins

Rated 5 Pins

Baked Pumpkin Pie Oatmeal

School has started and autumn is around the corner. It’s one of my favorite times of the year. We’ve just moved to Michigan, so this year we’ll be able to pick our own apples and pumpkins. That means we’ll be sampling cider, doughnuts, pies, muffins, apple butter and pumpkin butter, pancakes, cookies, cupcakes and cakes, dumplings, and… and… and…

Well, you get the idea. So when I saw this pin for Baked Pumpkin Pie Oatmeal by Paula of bell’ alimento, I thought this would be a great way to kick off autumn cooking.

http://pinterest.com/pin/207869339022108653/

And if I can interrupt myself and say how unbelievably happy I am that Starbucks has released the Pumpkin Spice Latte early this year? I know I’m not the only person who did a little happy dance when they walked into their Starbucks.

First PSL 2013

Now that I’ve had my coffee, let’s get back to the task at hand.  I’d been intrigued by the baked oatmeal recipes I had seen on Pinterest. Paula made this sound simply amazing, and being a vegetarian recipe seemed like a healthy bonus. I’m not a vegetarian, but it can be part of a very healthy lifestyle, and we’re trying to have a healthier diet and  lifestyle.

The dry ingredients are rolled oats (old fashioned), brown sugar, pumpkin pie spice, baking powder and salt.

Baked Pumpkin Pie Oatmeal Dry Ingredients - Pintesting

Mix to combine. I like using a whisk to break up the packed brown sugar.

Baked Pumpkin Pie Oatmeal Mix Dry - Pintesting

In a separate bowl, mix the milk, pumpkin, applesauce, egg and vanilla.

Baked Pumpkin Pie Oatmeal Wet Ingredients - Pintesting

The egg was supposed to be beaten, so I started whisking the egg, then incorporated the rest.

Baked Pumpkin Pie Oatmeal Mix Wet - Pintesting

Pour the wet ingredients into the dry ingredients.

Baked Pumpkin Pie Oatmeal Combine - Pintesting


Combine well.

Baked Pumpkin Pie Oatmeal Mix Thoroughly - Pintesting

Pour into a prepared pan.

Baked Pumpkin Pie Oatmeal pour into prepared pan - Pintesting

Bake at 350 for 30-35 minutes or until set. Mine was done at 32 minutes. (Sorry for the fuzzy picture, but this smelled so amazing and I could hardly wait to take the picture before digging in.)

Baked Pumpkin Pie Oatmeal Bake - Pintesting

Breakfast is served! I didn’t have the walnuts on hand to garnish, but this was absolutely incredible without them.

Baked Pumpkin Pie Oatmeal Done - Pintesting

This had a texture that was slightly crispy on the edges, but creamy in the middle. Dessert for breakfast! As a side benefit, the house smelled like Christmas the whole morning. And this is a healthy breakfast!

Baked Pumpkin Pie Oatmeal Serve - Pintesting

Now for the Pintesting results.

Overall Rating: 5 Pins

5 Pins Overall

Accuracy: The recipe was well written and easy to follow. It was delicious with a wonderful texture, and it made the house smell amazing. We didn’t have the chopped walnuts, but will make sure to add them the next time – and we will DEFINITELY be making this again. 5 Pins

Rated 5 Pins

Difficulty: This was very simple. Mix the dry ingredients. Mix the wet ingredients. Mix it all together, then bake. This would be a great recipe to get the kids involved. 5 Pins

Rated 5 Pins

Time: The preparation took about 10 minutes, and the bake time was about half an hour. Paula suggested making it the night before and baking in the morning. I’ll try this the next time, too. 4 Pins

Rated 4 Pins

Cost: We had everything we needed on hand. The most expensive ingredient would be the can of pumpkin at about $2-$3. The pan yields 6-8 servings, which means 3-4 breakfasts for my home. 5 Pins

Rated 5 Pins

Practicality: This is a healthy, delicious, and simple recipe that can be made ahead of time and makes enough for up to 8 servings. 5 Pins

Rated 5 Pins

Peach and Cherry Tarts

It’s time to Celebrate! Summer is a time of celebrations. There’s Independence Day (and Canada Day for my Canadian friends), Labor Day, and many birthdays of friends and family – including MINE (yes, I still get excited about my birthday, don’t you?). Summer is a great time to party it up! As much as I LOVE to make and eat cake, after a while I just need something different.  Too many cakes + bathing suit season = disaster.So when I found this Pin for a simple but delicious looking Peach and Cherry Tarts by Jo from Jo Cooks, I was all over it.

Pintesting Peach and Cherry Tarts - ORIGINAL PIN

Fresh peaches and cherries have been calling to me in my grocery store for a while now. I’ll walk past them, and the smell of those peaches calls me over, enticing me. “You know you want to buy us… We are your husband’s favorite…” It’s like the siren’s song. Then there are all of the wonderful health benefits to eating fresh fruit. Add the simplicity of the recipe… okay, let’s get started!

peach-and-cherry-tart3

The Pintesting:

The recipe called for puff pastry, fresh peaches, fresh cherries, mascarpone cheese, cream cheese and a little sugar. I couldn’t find the mascarpone cheese, so I went with all cream cheese and a little milk and vanilla to help sweeten and loosen up the mixture.
Peach and Cherry Tart - Ingredients - Pintesting

Puff pastry comes frozen, usually in two sheets folded in thirds, and requires thawing before using. The instructions say to thaw overnight in the refrigerator or 30 minutes on the counter. Since I was making this early in the morning, I chose to thaw it overnight so I’d have one less thing to worry about before coffee. Seriously, who does ANYTHING before coffee? Exactly.

Peach and Cherry Tart - Puff Pastry - Pintesting

The pastry should unfold once thawed. However, mine was stuck together in two solid rectangles of dough. What to do? I just dusted the counter with a little flour and rolled it out to its intended size.

Peach and Cherry Tart - Roll it out - Pintesting

Once the dough was the right size, I cut it into thirds and put the pastry onto a baking sheet lined with parchment.

Peach and Cherry Tart - Cut into thirds - Pintesting

Now for the sweetened cream cheese. As I said before, I couldn’t get mascarpone cheese so I went with all cream cheese. Mascarpone cheese is a bit softer than cream cheese, so I added a little milk (maybe a teaspoon) and a little vanilla (1/4-1/2 teaspoon) to loosen and lightly sweeten the mix.

Peach and Cherry Tart - Sweet cream cheese - Pintesting

Mix together until smooth.

Peach and Cherry Tart - Mixed - Pintesting

Divide onto the pastry sheets…

Peach and Cherry Tart - Divide - Pintesting

…and spread it evenly.

Peach and Cherry Tart - Spread evenly - Pintesting

Slice the peaches thinly and pit and half the cherries. I like that you don’t need to peel the peaches. A note about fresh peaches; look for fruit that is just ripe but isn’t too soft. Peaches bruise easily and turn into mush if they’re too ripe. They should be firm enough to handle without indenting with gentle pressure.

I love fresh cherries but don’t care for the lovely purple hue they turn my fingers while slicing or pitting them, so I sliced the cherries under running water. That fixed the problem before it became one.

Peach and Cherry Tart - Arrange fruit - Pintesting

Arrange the peach slices on the pastries and the cherries down the center.

Pintesting Peach and Cherry Tart

Bake at 425 for 20-25 minutes. (My convection oven compensates automatically, thus the temperature difference.)

Peach and Cherry Tart - bake - Pintesting

Done! That’s it. I brought these into work to be a morning tasty treat to celebrate my birthday. Make my own birthday treat? Yes! That’s just how I roll. Making people happy with food makes me happy.

Peach and Cherry Tart - Finished - Pintesting

So this is how the Peach and Cherry Tarts looked when I set them out mid-morning. They didn’t last long, though. Everyone loved the fresh taste from these that wasn’t super sugary.

Peach and Cherry Tart - Served - Pintesting

Oh, and those oddly shaped rolls on the left side are my way of using the other puff pastry sheet.

Bonus Recipe:

  1. Cut the puff pastry sheet into quarters and put a row of four miniature candies down the center of each section; I used Hershey Kisses and Rolos because that’s what I had on hand but you can use any kind of miniature candies. (Note: this is a PERFECT way to use up Halloween candy that didn’t get passed on to trick-or-treaters. You know – that extra bag that you got “just in case”.)
  2. Brush all the edges with egg wash and fold the pastry over in thirds like a letter. The egg wash will help seal the pastry so the chocolaty goodness doesn’t leak out.
  3. Place it seam side down on a parchment-lined sheet pan tucking under the edges.
  4. Brush the whole pastry with egg wash to make it brown and shiny and beautiful.
  5. I baked these with the tarts and they came out perfectly. Yes, there are only three. Yes, I made four. Don’t judge – I was testing for doneness.

The Pintesting Results:

Overall Rating: 4.55 Pins

5 Pins Overall

Accuracy: The recipe was thorough, well-written and simple to follow. I had to substitute for the mascarpone cheese, but that didn’t take away from the recipe at all. The tarts turned out fantastic. I love how the fruit took the spotlight and made a wonderfully fresh and naturally sweet dessert (or in our case, mid-morning snack) without a lot of added sugar. It was really spot-on with the recipe and presentation. 5 Pins

Rated 5 Pins

Difficulty: There are only 6 ingredients in the recipe, and normally they’re easy to find at my grocery store. (Sorry mascarpone.) When I make this again – and I definitely will – I’ll thaw the puff pastry on the counter rather than use the overnight method. A puff pastry novice might have been put off by the dough that wouldn’t unfold. And while I didn’t think that thinly slicing the peaches, and pitting and halving the cherries was any trouble, others at my office didn’t seem to agree. “Sure, it’s simple for YOU”. Of course, these are the people that think that I float through my kitchen and sing as I cook and bake, while woodland creatures come and do the dishes and clean my house. All I can say to that is… I wish!

Princess Wannabe

Yeah… In the real world, this gets 4 Pins.

Rated 4 Pins

Time: I whipped this up before work – including getting ready and without the help of any woodland creatures. The whole thing took about an hour. If I hadn’t had to roll out the puff pastry, it might have taken a little less time, so I’m giving this 4 Pins.

Rated 4 Pins

Cost: With only 6 ingredients, or 7 since I subbed the mascarpone by adding milk and vanilla, the total cost was still around $10, and we had extra cherries for lunches and snacks. 4 Pins.

Rated 4 Pins

Practicality: This recipe is simple, cost effective, delicious, healthy, and (in my humble opinion) quick and easy tart. It works equally well for dessert, brunch, lunch, or any other food option. 5 Pins

Rated 5 Pins