Author: Anne Hernandez

Pintesting Bechamel Sauce with Anne Willan from Secrets from the La Varenne Kitchen

Apr 12, 2016 by Anne Hernandez

Most things in life require a firm grasp of the basics before being able to successfully move on to more difficult or advanced levels, and cooking is no different. One of the things that I love about French cooking is that they start with basic techniques and build upon them. Take sauces, for example. There are just five mother sauces from which ALL other sauces are made. How nice to know that you really only have to master five – a nice small number. Compare that with the more than three pages of sauce recipes listed in the index of Mastering the Art of French Cooking by Julia Child, Louisette Bertholle, and Simone Beck.Pintesting Cook the Book Bechamel Sauce - Anne Willan Secrets from the La Varnne Kitchen
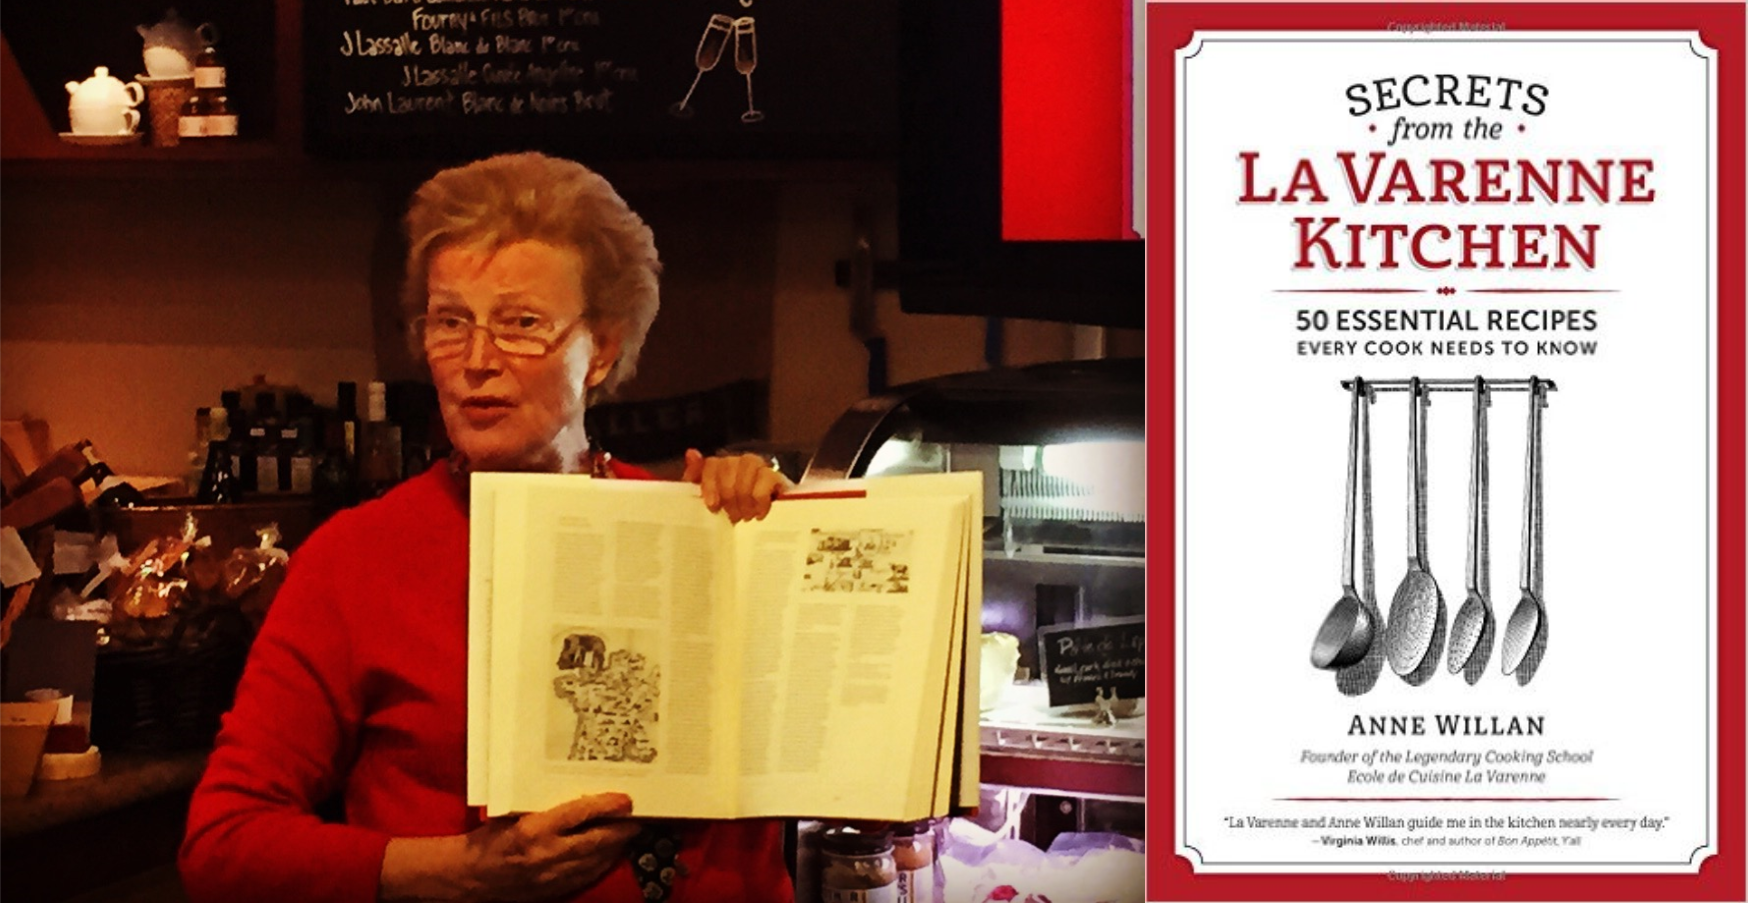
If you are familiar with influential cooks extraordinaire, then you might also know of Anne Willan. For those who don’t know her, she founded École de Cuisine La Varenne, a cooking school in Paris, after receiving her master’s degree from Cambridge University. She is included in the James Beard Cookbook Hall of Fame for her 30 publications including a 17-volume, photo-illustrated Look and Cook series that was showcased in a 26-episode PBS program. Impressed yet?

In addition to all of her accolades, Anne Willan is an exceptionally wonderful person. She was absolutely delightful during the Cook the Book event, and I very much enjoyed her tutelage. She loves to share her passion for cooking; the above picture is from another live event in a California wine shop called Vin Goat. Don’t you love that name? (Thank you, Erich!)

Cook the Book with Denise and Jenni

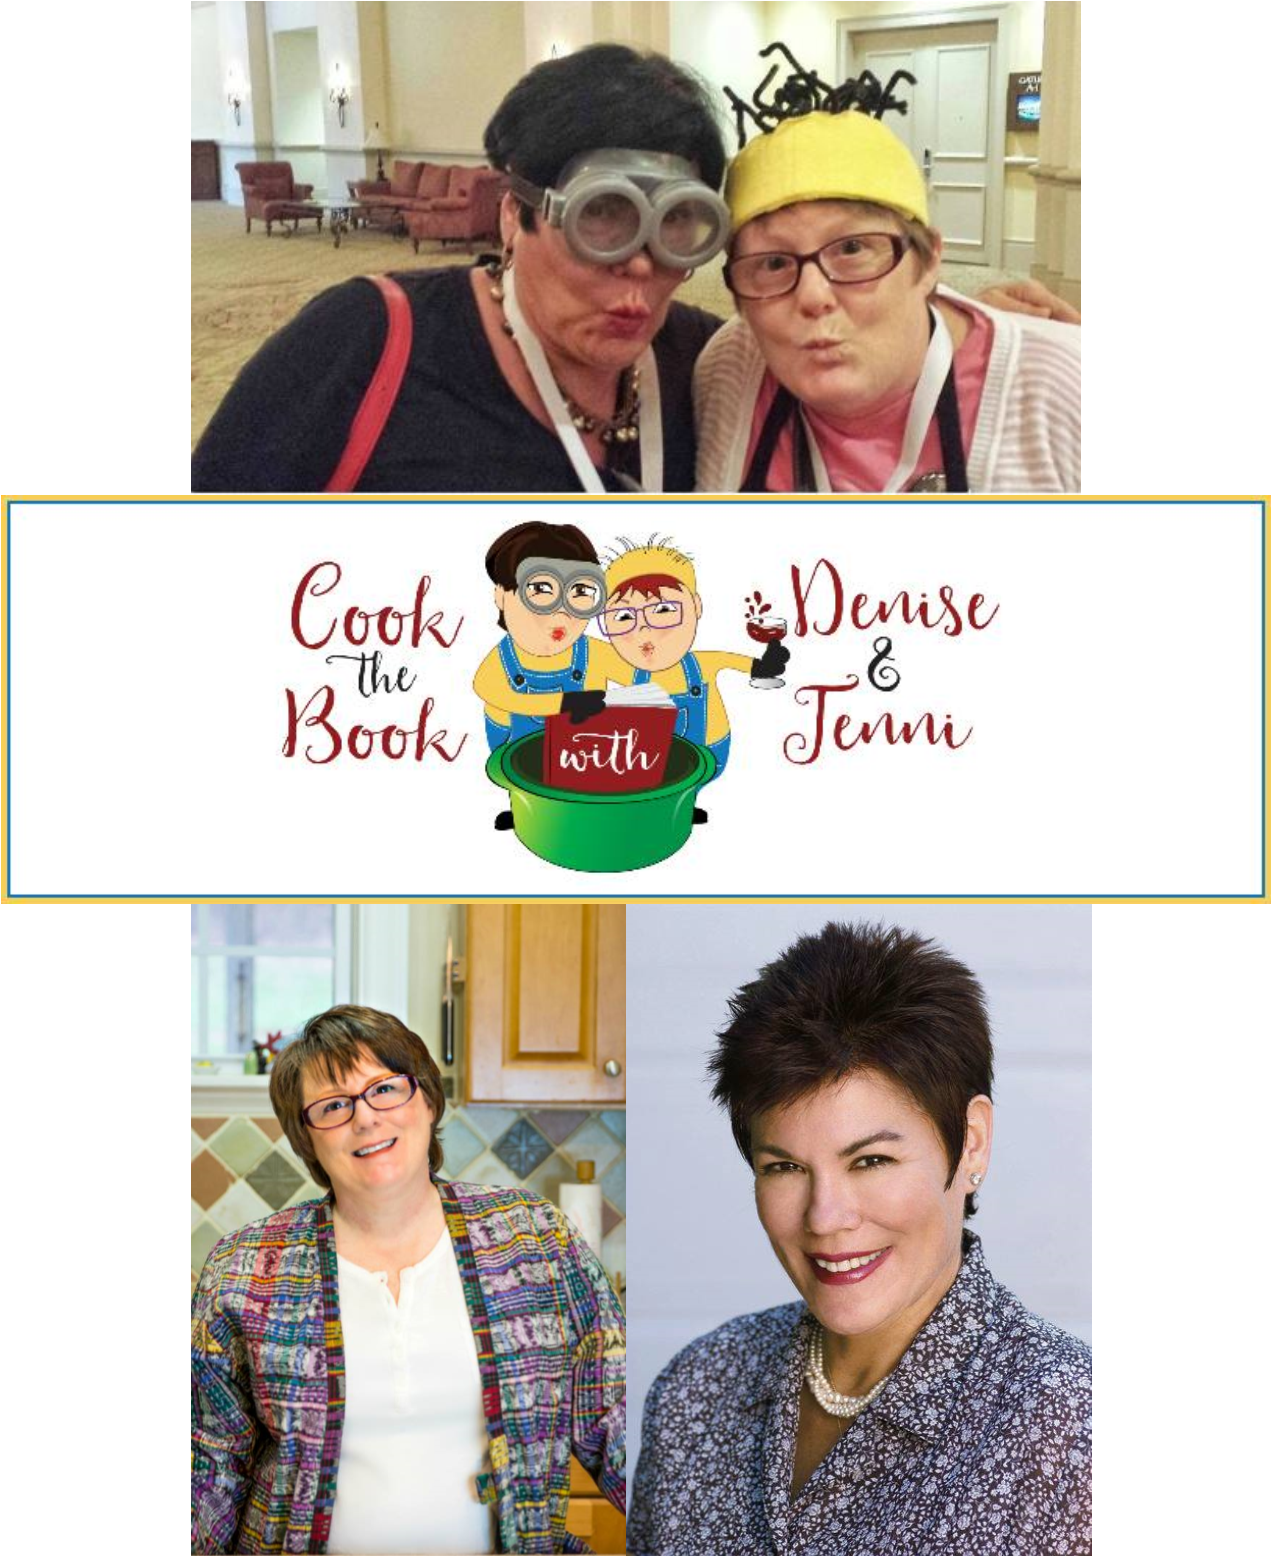
Imagine my surprise and delight to hear that Anne would be participating live in the Cook the Book event! (You can imagine squealing and happy dancing around the kitchen, and you wouldn’t be far off.) What’s Cook the Book? I’m so glad you asked. It’s a live-streamed cook-along with hosts Denise Vivaldo in Los Angeles and my friend Jenni Field outside of Raleigh, NC. Each month they feature a different cookbook and author. For more information, check out their Facebook page.

For this event, Anne showed us how to make a Bechamel Sauce from her cookbook Secrets from the La Varenne Kitchen: 50 Essential Recipes Every Cook Needs to Know. I’m including the link to the playback, but you will need a Blab account to watch it. No worries – it’s free and easy, and you’ll need one to participate in future events.

Here are the highlights including my own bechamel sauce which then became sausage gravy.

Pintesting Cook the Book Bechamel Sauce - The Event

This is a picture of the live event on my laptop. In the upper left is Chef Dennis Littley acting as the moderator. In the upper right are the Cook the Book hosts; Nancie McDermott with Jenni Field in Raleigh, NC. In the lower left corner is Denise Vivaldo with Anne Willan in Los Angeles. Those participating were welcomed to pop into the “Call In” lower right corner to say hello. Isn’t technology great?

Pintesting Cook the Book Bechamel Sauce - The Recipe 2

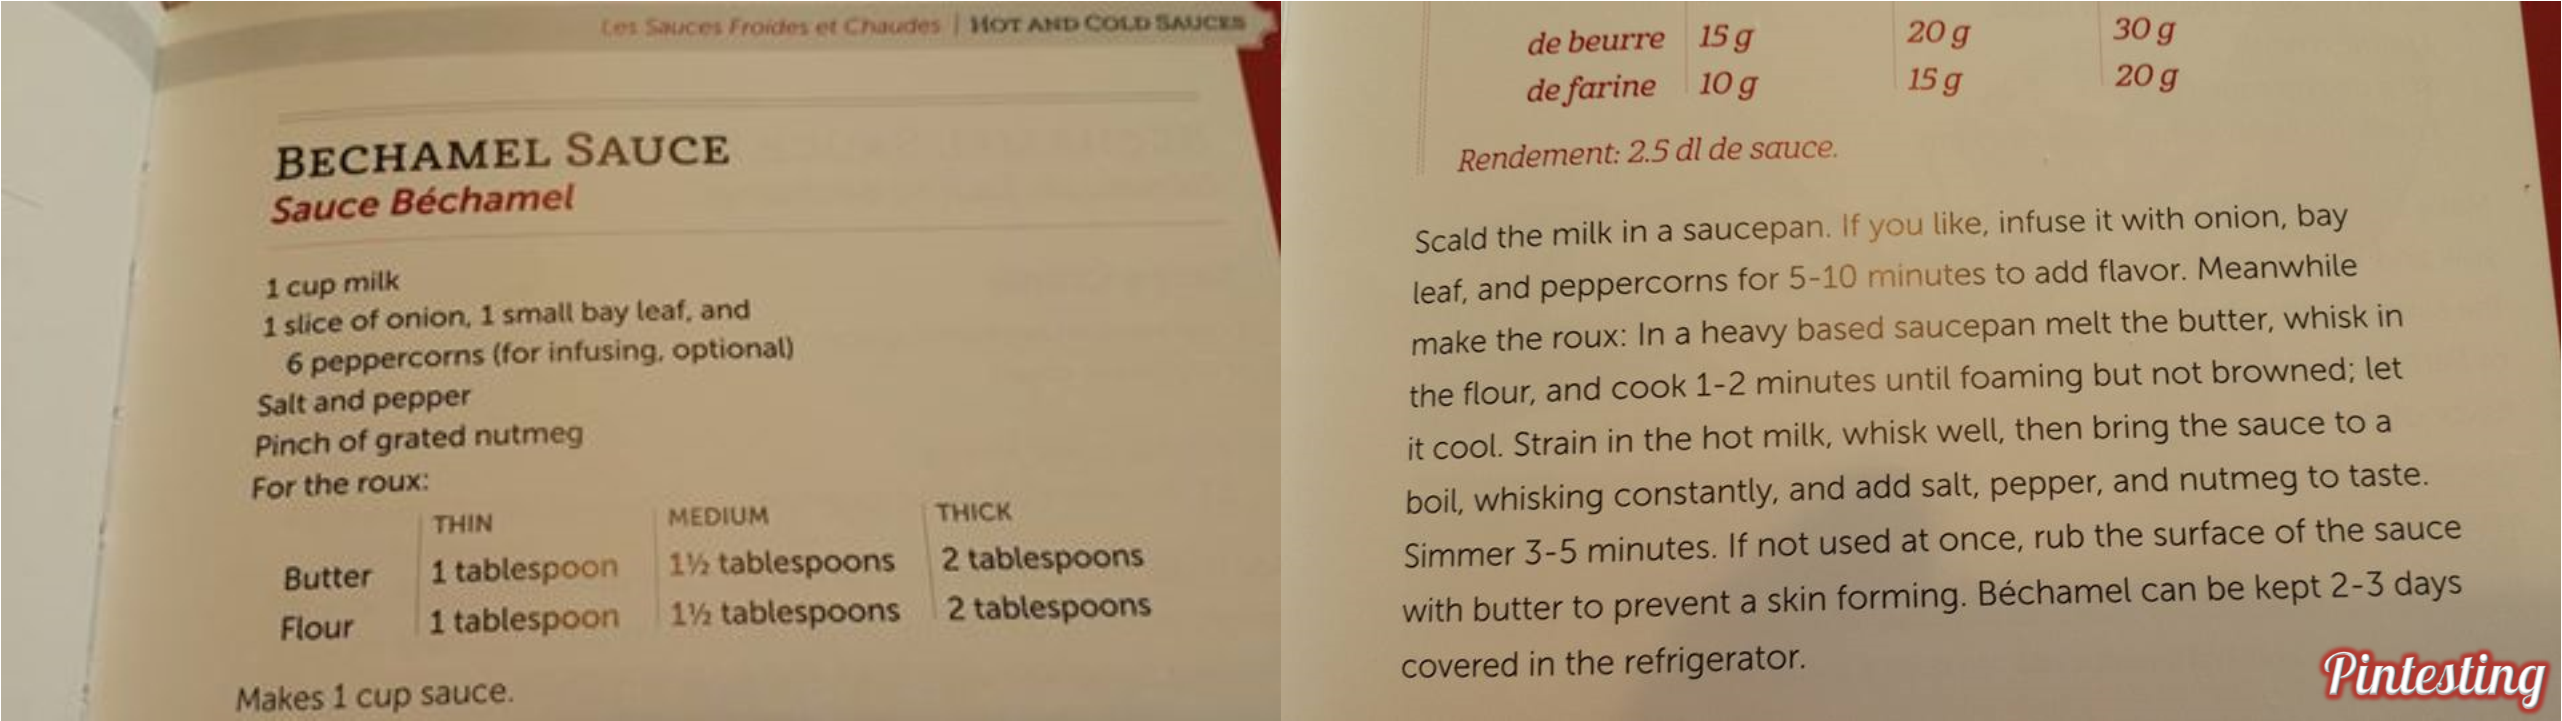
Here is the recipe that we used from the book. Notice that it gives three different butter/flour ratios depending on the desired thickness of the sauce. I used the medium since I was going to make it into a sausage gravy. Several other participants made cheese sauces for macaroni & cheese. If you don’t have this book in your library I highly recommend getting it – now. Go ahead, I’ll wait.

Okay, if you’re back then we’re ready to start the Pintesting.

The Pintesting:

Pintesting Cook the Book Bechamel Sauce - Ingredients

Due to a lactose intolerance in the family, I decided to try the sauce as dairy free by using Cashew milk.

Pintesting Cook the Book Bechamel Sauce - Simmer

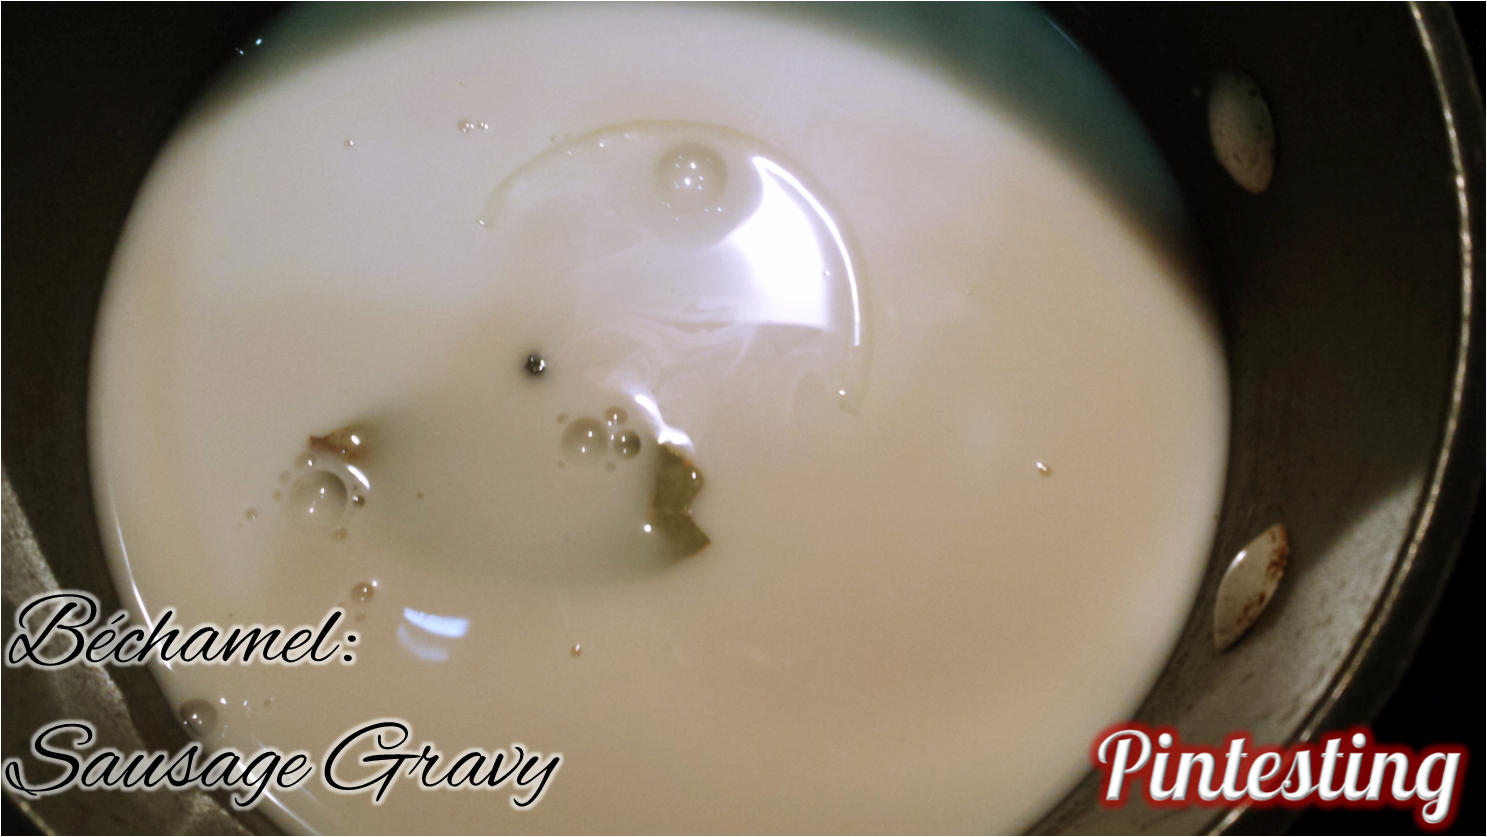
Heat the milk and, if desired, add onion, a bay leaf, and whole peppercorns to infuse more flavor.

If desired…. of course we want more flavor!

Pintesting Cook the Book Bechamel Sauce - Roux

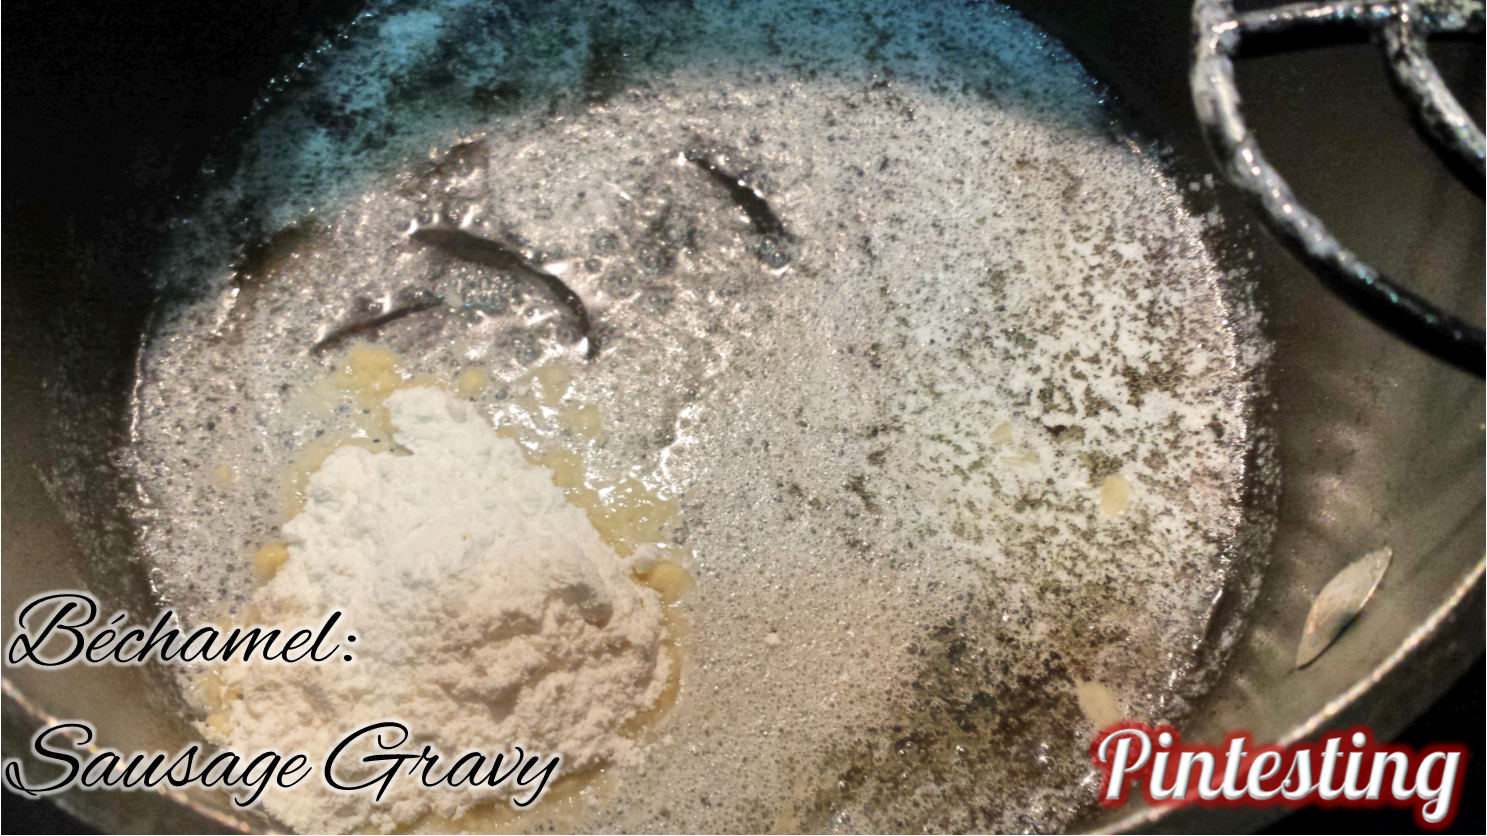
Start the roux by melting butter then adding the flour.

Pintesting Cook the Book Bechamel Sauce - Roux 2

Whisk it into a paste and let it cook for a minute or two, but don’t let it brown. This brings out the flavor of the wheat and cooks off any raw pasty taste. More flavor? Yes, please!

Pintesting Cook the Book Bechamel Sauce - Coat the spoon

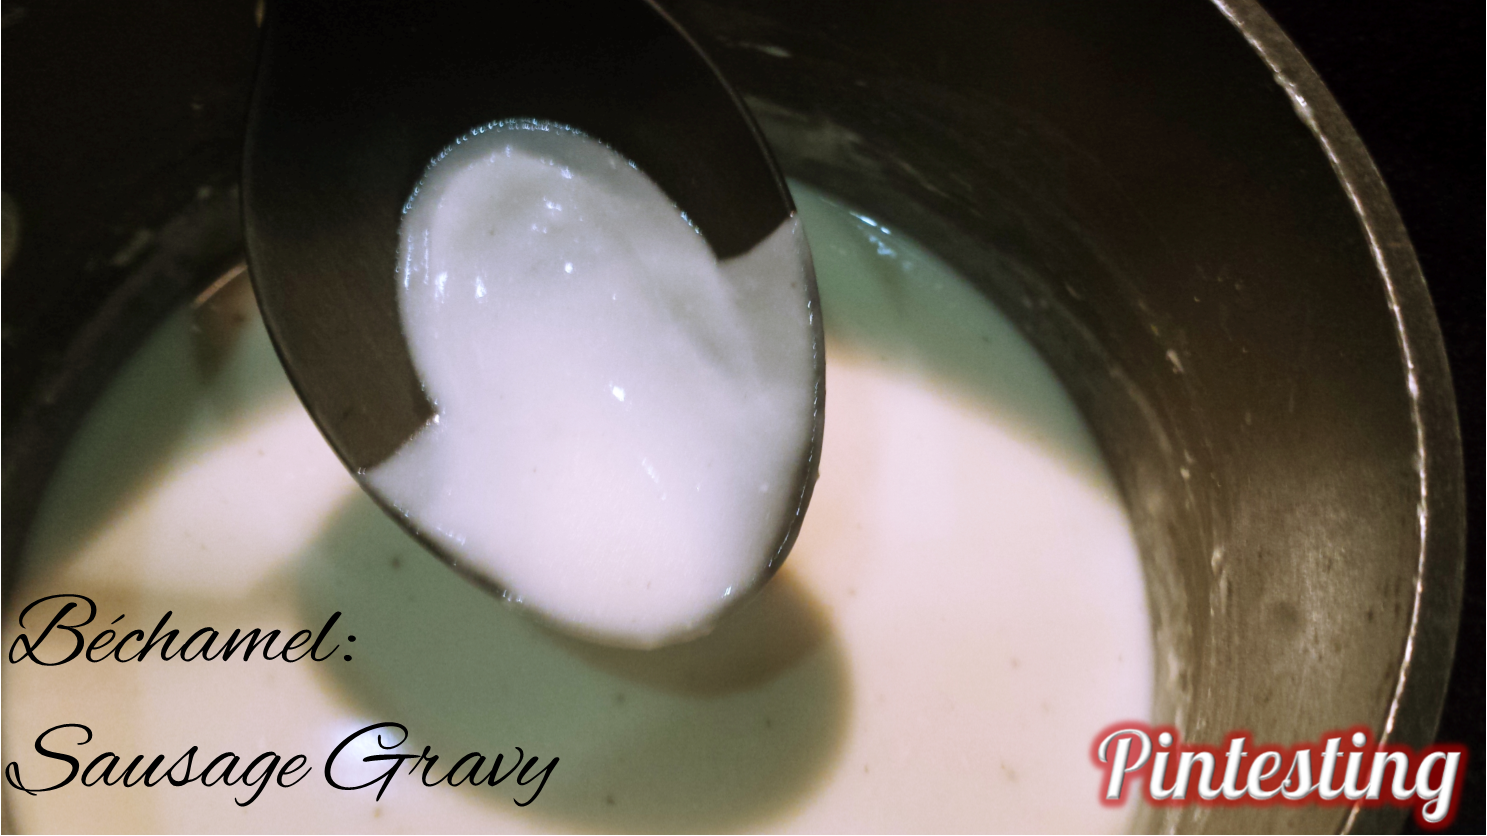
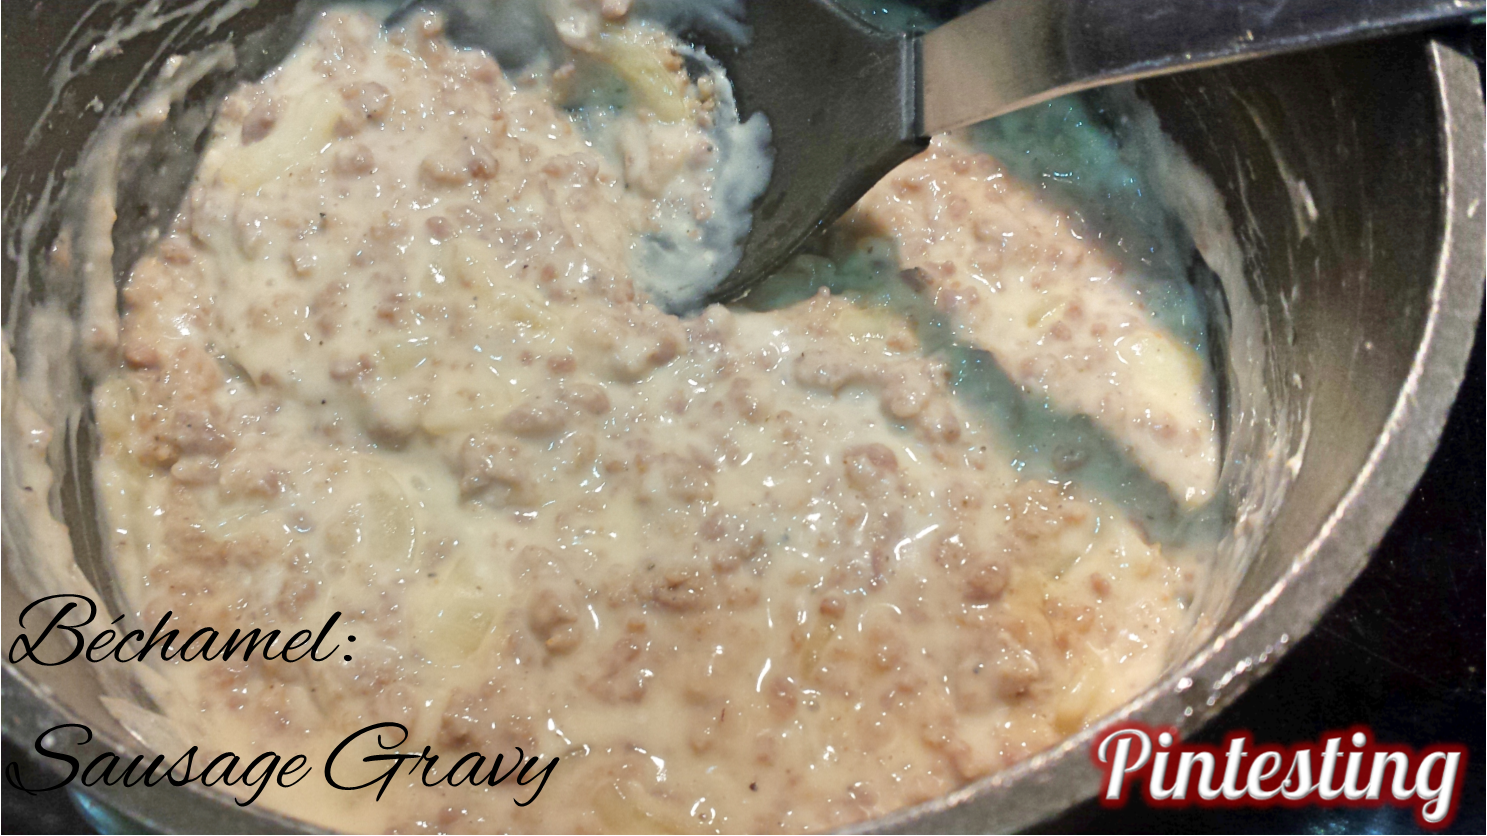
Strain the hot milk and add to the roux, whisking constantly over heat until the sauce thickens enough to coat a spoon and season with the salt, pepper, and nutmeg. Look at that beautiful coating.

Pintesting Cook the Book Bechamel Sauce - Sausage and Onions

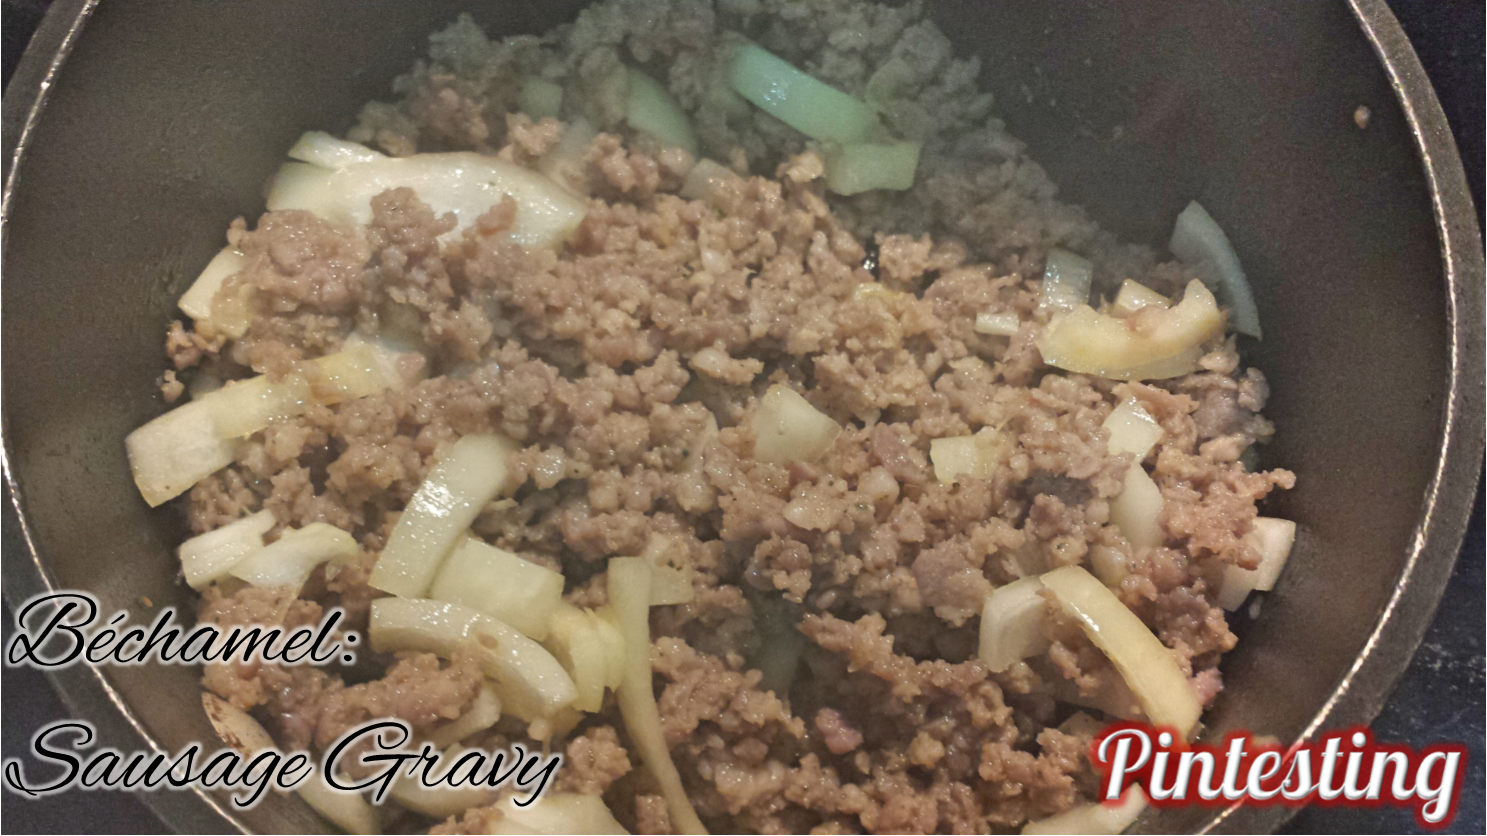
While this was happening, my HH browned the sausage and onions.

Pintesting Cook the Book Bechamel Sauce - Add Sausage
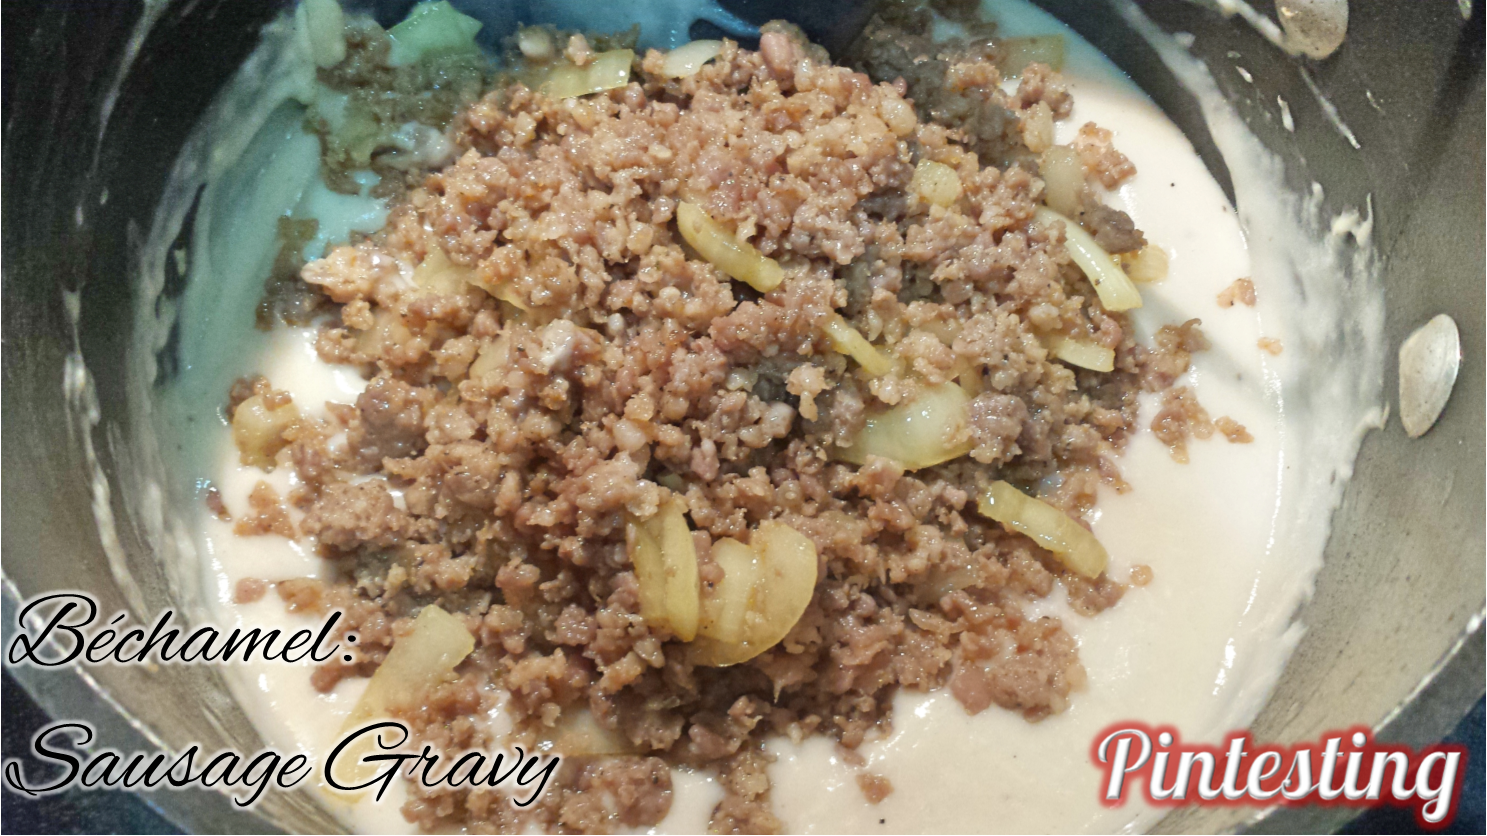
Then we added it to the bechamel sauce,

Pintesting Cook the Book Bechamel Sauce - Sausage Gravy

. . .and there you have it! My HH has been making southern sausage gravy since he was a teenager. He said that this was the BEST sausage gravy that he’s ever had. That’s saying a lot. It was incredibly flavorful with the perfect creaminess but without the gluey/pasty taste or texture.

Pintesting Cook the Book Bechamel Sauce - Served

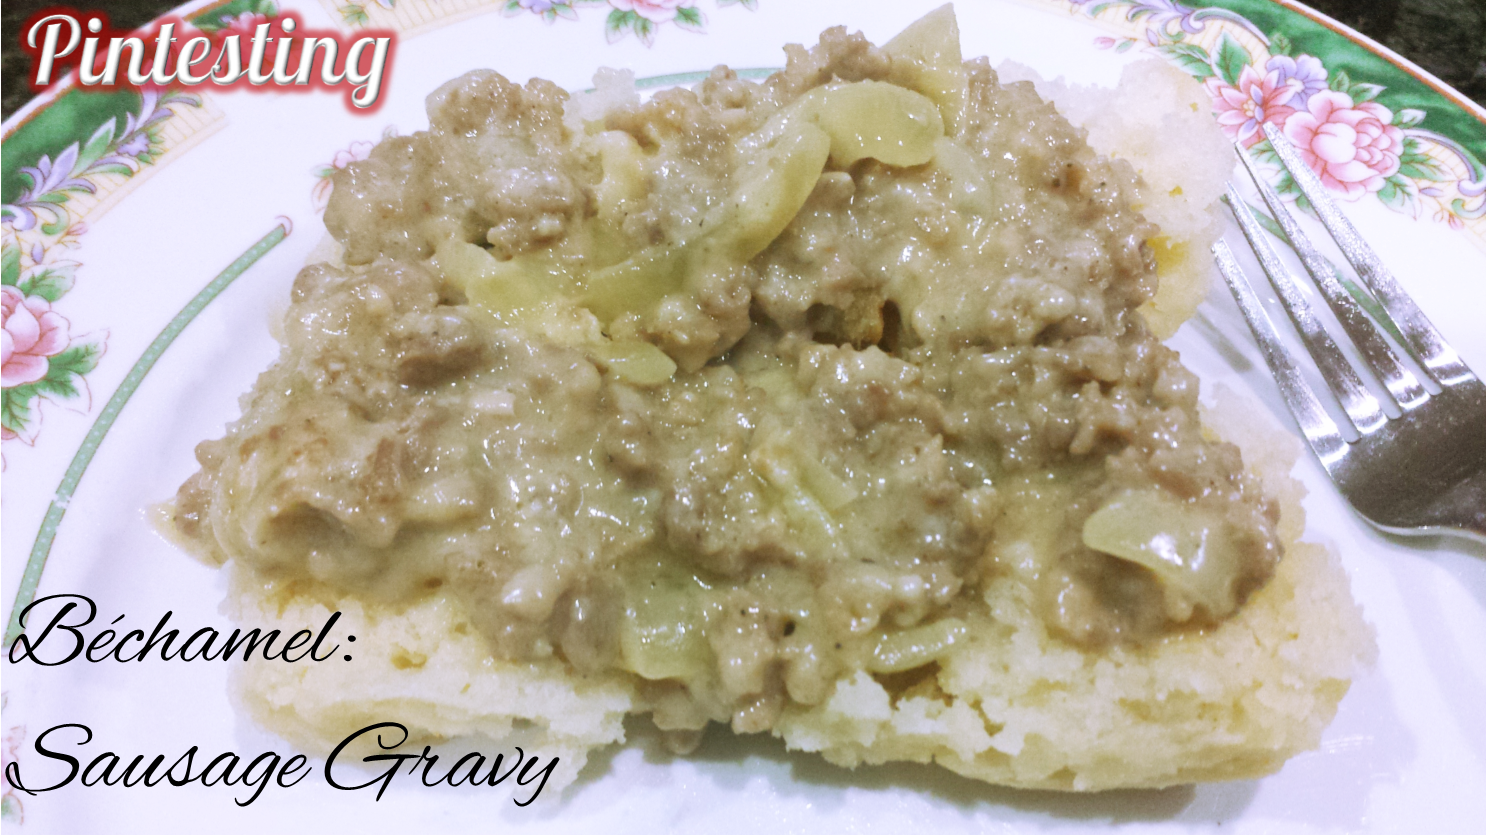
We were very happy to have breakfast for supper that night. The biscuit recipe will follow in a future Pintesting post.

The bechamel is a sauce that can be used in so many different applications beyond the sausage gravy or cheese sauce. I made a beautiful and delicious Soufflé au Fromage, or cheese souffle for our Easter Dinner. Just imagine what you can do with a mother sauce.

Pintesting Soufflé au Fromage - Bechamel Sauce

The Results:

OVERALL RESULTS: 5 out of 5 Pins

Pintesting - 5 Pins Overall Rating

Accuracy: The bechamel sauce turned out perfectly. Even using the cashew milk, the sauce was flavorful and behaved exactly as it would have if I had used its dairy counterpart. 5 Pins

Pintesting Rating - 5 Pins

Difficulty:  The bechamel sauce is a basic or mother sauce. It doesn’t require a lot of fuss, but keep a watchful eye toward the end of the roux so that it doesn’t brown – otherwise you’ll get brown sauce. 5 Pins

Pintesting Rating - 5 Pins

Time: I’ve made many roux for various dishes, but this is the first time that I heated the milk. I felt like this cut the thickening time down once the milk was added to the roux. Since the milk was heating while the roux was cooking, the whole process for the bechamel was roughly 15 minutes. 5 Pins

Pintesting Rating - 5 Pins

Cost:  Butter, flour, and milk are the three absolutely necessary ingredients. The rest definitely elevate the sauce, but you can use whatever you have on hand to give it a richer flavor. Since everything is a kitchen staple, I’m giving this 5 Pins.

Pintesting Rating - 5 Pins

Practicality:    This is one of those basic recipes that EVERYONE who cooks needs to know how to make. From a hearty sausage gravy to an airy souffle to creamy macaroni and cheese (that will make you never want to pick up another box with mystery orange powder), gratins, and scalloped potatoes – all are based on the bechaemel mother sauce. 5 Pins (but only because I can’t go any higher).

Pintesting Rating - 5 Pins

One Pan Mexican Quinoa

There seems to be a new obsession with short food videos on social media, especially Facebook. Videos made by Tasty, Buzzfeed, and Tip Hero are bringing food porn to a whole new level.

We like and share them thinking, “What a great idea. I need to try this,” but rarely follow through and make it.

Then I saw this pin for  One Pan Mexican Quinoa also make it onto my Pinterest feed, and I knew it was time to put it to the test. Here’s the video.

https://youtu.be/N6f8vlCw-uk

This recipe video is by Tip Hero, but they gave the inspiration credit to Chungah of Damn Delicious. I’ve tested her Egg Salad BLTA Sandwich and Slow Cooker Beef and Broccoli and both got great results. This made me more confident in the probability of success.

The Pintesting:

The ingredients are straight forward and easy to find.

Pintesting One Pan Mexican Quinoa

Sauté the aromatics, then add the beans, corn, and tomatoes.

Pintesting One Pan Mexican Quinoa

Then add the quinoa, seasonings, and broth.

Pintesting One Pan Mexican Quinoa

Cover and cook for 20 minutes and it’s done.

Pintesting One Pan Mexican Quinoa

This was going to be served with diced avocado as the recipe suggested, but the one we got was over-ripe so we had to throw it out. Here’s how it looked without any toppings.

Pintesting One Pan Mexican Quinoa

This has a bonus of being super healthy without trying hard. Don’t be scared to try it even though it’s vegan, gluten-free, and dairy-free. It’s also versatile. You can change or add more veggies, switch the broths, play with toppings; make it your own.

Pintesting One Pan Mexican Quinoa - Pinterest picture with the original post picture and Pintesting's updated picture

The Results:

OVERALL RESULTS: 4.85 Pins

Pintesting - 5 Pins Overall Rating

Accuracy:  This recipe was as delicious, easy, and fast as the video showed. 5 Pins.

Pintesting Rating - 5 Pins

Difficulty:  This is an easy recipe with little cutting/chopping. Using canned beans and veggies really simplified things. However, using jalapenos or other hot peppers requires caution as the juices can cause burning to your skin or eyes. Many sources say to always wear rubber gloves when seeding and chopping hot peppers. Because of this, I’m giving it 4 Pins.

***UPDATE: 07/28/2017*** I substituted a small can of green chilies instead of the jalapeno (because it’s what I had on hand) and it turned out great. choose your preferred heat level and just add it in with the tomatoes. EASY!

Pintesting Rating - 4 Pins

Time:  This took less than 30 minutes from start to finish. It required minimal prep work, and most of the time was just for simmering. 5 Pins

Pintesting Rating - 5 Pins

Cost:  Most of the ingredients are less than a dollar. At $9.50 for 30-oz, the quinoa was the most expensive ingredient, but I only needed 3 out of 29 quarter-cup servings, and that’s less than a dollar for the quinoa. Total cost was less than $2/serving. 5 Pins

Pintesting Rating - 5 Pins

Practicality:  When I served this, HH ate two bites and gave it a thumbs up. He ate two more bites and gave it two thumbs up. This is fast, easy, healthy and delicious. It’s a perfect dinner for busy weeknights. 5 PinsPintesting Rating - 5 Pins

Pintesting Pineapple Upside Down Bundt Cake

Jan 21, 2016 by Anne Hernandez

This is the post that wasn’t going to be and then wrote itself. I made the cake and took some pictures, but didn’t really intend on doing a proper Pintesting – until I shared the pics. The response was mind-blowing, so here’s the post complete with my first recipe.

The Pintesting:

It started with this picture of a pineapple upside down cake in a bundt pan on Pinterest. Because it’s my HH’s favorite cake, I wanted to surprise him with this.

Pintesting Pineapple Upside Down Bundt Cake

Sadly, the link went to a picture. Can we take a moment to talk about responsible pinning here? Check the pins before repinning them, folks.

I did a search for an original source but only came back to the same picture that was on Pinterest.

UPDATE: I found the original source for the picture! Her name is Tina Carver, this is her original idea, and she is very happy that her cake is getting so much fame. 😀

Pintesting Pineapple Upside Down Bundt Cake

Luckily, the picture was enough this time. Pineapple upside down cake traditionally starts with melted butter and brown sugar, then an arranged layer of the pineapple and maraschino cherries, over which the cake mix is poured. When the cake is baked and inverted onto the serving plate, then you see the design of the fruit. This is no different other than it’s in a bundt pan, and the pineapple rings are halved and arranged vertically.

I wanted to ensure that the cake would come out of the bundt pan cleanly, so I really greased the pan with my favorite pan release. (The recipe will follow.) I used a stick of melted butter and sprinkled a half-cup of brown sugar on top of it, then alternated the halved pineapple rings and cherries. I think it turned out just like the original picture.

Pintesting Pineapple Upside Down Bundt Cake

Substituting pineapple juice and milk for the liquid and adding a box of instant vanilla pudding makes this cake incredibly moist and flavorful.  Gently pour the cake batter on top. Then the cake gets baked, cooled, and flipped.

And let me tell you, you’re going to flip for this cake.

Pintesting Pineapple Upside Down Bundt Cake

Normally I give my Pintesting results at the end of each post, and this would get 5 Pins. Instead, I’m sharing my recipe. Enjoy!

The Recipe:

[amd-zlrecipe-recipe:1]

Best Ever Pan Release: from I Am Baker

Mix equal parts of vegetable shortening, vegetable oil, and all-purpose flour until smooth. Using a pastry brush or paper towel, apply to the bundt pan – or any pan – paying special attention to corners, nooks, and crannies.

I really think this is the BEST EVER pan release! Bundt pans are notorious for sticking due to the additional shapes, nooks, and creases. I’ve tried this with all different shapes and sizes of Bundt pans and this has never failed me!


Christmas Lights Manicure

Dec 24, 2015 by Anne Hernandez

I can’t believe it’s nearly Christmas! Since the day after Thanksgiving, my Handsome Husband and I have been busy decorating our home; even the laundry room has a wreath. Trees, garland, wreaths, stockings, snowmen, Santas, and the Nativity set are all in their proper places making nearly every room in the house festive. I’ve even decorated my office at work and changed my phone ring tone.

I’ve done some fun Pinterest inspired manicures that are seasonally appropriate every week, too. First I did my take on a beautiful Christmas Tree with a black background, which was a combination of two styles.

Pintesting Christmas Tree Manicure

Then I did a tipped manicure with some Santa Bling that was inspired by these two manis.

Pintesting Santa Nails Manicure

I needed another idea for a Christmasy mani, so when I saw this pin, I knew it was exactly what I was looking for. I was very excited to already have the same or very similar China Glaze polish and the cute bling, so it seemed like this was meant to happen.

Pintesting Christmas Lights Nails


If you follow my blog, then you know that I always, ALWAYS give credit to the original source. Unfortunately, the site listed on the photo, ArtigoBeauty.com, is down. Google searches did not produce any other way to trace this source. Thankfully, the picture was simple enough to follow.

The Pintesting:

Pintesting Christmas Lights Nails

First I did a base coat and two coats of China Glaze Glistening Snow. This polish has some texture, so I did a top coat of China Glaze Fast Forward Top Coat and gave it a day to cure well.

Pintesting Christmas Lights Nails


The next day I added the “string” for the lights with a black Sharpie marker. It gave the right look and was easier to control than a thin black nail polish. I had my HH do my right hand.

Pintesting Christmas Lights Nails

These are the rhinestones that I used. There were 3,000 in the case when I had purchased them from Amazon for less than $3.00. (What a great deal!)

Pintesting Christmas Lights Nails

To apply, I put a coat of the top coat and used tweezers to place them where I wanted them to go on the “string” of lights. Do this quickly.

Pintesting Christmas Lights Nails


This is how the first one turned out. Once I placed all of the rhinestones, I covered each nail with another coat of the top coat. One benefit is that because it’s fast drying, there is less chance of smudges or other accidents that would mar the manicure.

Pintesting Christmas Lights Nails

This is the finished results. I was so excited to wear my mani while doing some last minute Christmas shopping. Sadly, I lost one rhinestone on my thumb while trying to get my payment card from my wallet. Then I found this base and top coat specifically made for rhinestones at Sally Beauty Supply. It’s too late to use it as a base coat for this manicure, but I put two coats after replacing the lost rhinestone and haven’t lost any more since.

Pintesting Christmas Lights Nails

I got lots of compliments on all of the manicures, but this one seemed to get the most so far. Now for the Pintesting results.

The Pintesting Results:

OVERALL RESULTS: 4.55 Pins

Pintesting Seal 5 Pins

Accuracy:  The manicure turned out exactly like the picture. EXACTLY! 5 Pins

Pintesting Rating - 5 Pins

Difficulty:  Easy Peasy. Using a black Sharpie marker instead of the black nail polish really made this effortless. If you don’t like the way that the squiggly line turned out, just erase it with rubbing alcohol and do it again. 5 Pins

Pintesting Rating - 5 Pins

Time:  As fancy manis go, this one was fairly quick. One base coat, color, the squiggly line, the rhinestone application, and top coat. I let the base color cure overnight, but you could just use the fast-drying top coat and save the time. 4 Pins

Pintesting Rating - 4 Pins

Cost:  I happened to have everything on hand.  Even if I had to purchase everything except the base coat, it would still cost less than a regular manicure at a salon. The $3.99 for the special top coat was worth every penny, and it will last for many manis to come. 5 Pins

Pintesting Rating - 5 Pins

Practicality:  This is great for the holidays, but I was always worried that a rhinestone would fall off every time I reached in my wallet to remove a payment card since they’re wedged in there pretty tightly, or when I typed, cooked, ate, or did just about anything. It’s fun to wear and show off for an event, but this isn’t an easy manicure that would last for a week. Mine lasted 3 days so it gets 3 Pins.

Rated 3 Pins

TIP: How to Make Your Grill Nonstick

Oct 27, 2015 by Anne Hernandez

Sometimes it seems like living in Florida is living in “Opposite World” because when the rest of the country (aka Up North) is outside enjoying the summer, Floridians are staying cool inside in the AC. On the other hand, when my friends are posting their pictures of the snow, ice, freezing rain, slush, and the problems that come with the wintry weather, I’m beyond happy be live in Central Florida!

It’s been in the upper 90’s with triple digit feel’s like temps for most of the summer, but now that it’s in the 80’s with lower humidity my HH is ready to take on the role of grill master again. Since we moved a few times in the last couple of years and haven’t used our grill during that time, he gave it a good going over, and did some hamburgers and cheeseburgers on the grill to celebrate, but we had some sticking issues.

I can’t even describe how sad it is to watch chunks of my dinner stick to the grill, and then fall into the fire like a sacrificial ritual. The pain is real. So when I saw  this pin for How To Make Your Grill Non-Stick by Skip to My Lou, I was super excited to test it out.

Pintesting How to make your grill non-stick


There’s only 1 ingredient for this method – half an onion.

Pintesting How to make your grill non-stick


Of course, I needed to grill something besides the onion, so we decided to go with BBQ Chicken breasts. I use a mixture of rubs on the chicken to really give it some flavor. The BBQ sauce goes on once the chicken is cooked.

Pintesting How to make your grill non-stick


Get the grill heated to temp,

Pintesting How to make your grill non-stick


rub the cut onion on the heated grill grate,

Pintesting How to make your grill non-stick

and that’s it. The grill grate was clean, but you can see how the heat caused the onion to start to cook in just those few seconds. I trimmed off the ends, and we grilled the onion halves with the chicken.

Pintesting How to make your grill non-stick

Now throw something delish on the grill to see if it will stick.

Pintesting How to make your grill non-stick

Since the rub mixture had a little bit of sugar in the mix, I was concerned that it would caramelize and glue the chicken to the grill grate. NOPE! Look at those beautiful grill marks. The chicken didn’t stick at all!

Pintesting How to make your grill non-stick

Another flip and then my HH added the BBQ sauce. (Can you smell how amazing this is going to be?)

Pintesting How to make your grill non-stick

The BBQ sauce left the grill grate in need of some clean up, but let’s be realistic here. It’s sauce. Even so, the chicken didn’t stick to the grill. You can see the nice char marks (read flavor), and no additional sauce was added post-grill.

Pintesting How to make your grill non-stick


So here’s the non-stick BBQ Chicken dinner.YUM! I even like the way the grilled onion looks like a rose.

Pintesting How to make your grill non-stick

The HH/Grill Master weighed in with a big thumbs up on this. It definitely worked with chicken; I can’t wait to try grilling shrimp kabobs using this technique since they’re more delicate and often stick, to my dismay. Watch for the update on those. For now, here are the Pintesting results:

Overall Results: 4.85 Pins

Pintesting - 5 Pins Overall Rating

Accuracy:  The chicken did not stick. At all. Not even a little bit. 5 Pins

Pintesting Rating - 5 Pins

Difficulty:  This is a great tip that’s very simple. However, due to the need for caution when working with extreme heat, I’m giving this 4 Pins.

Pintesting Rating - 4 Pins


Time:  The whole process took just a couple of minutes. 5 Pins

Pintesting Rating - 5 Pins

Cost:  The price of half of an onion is maybe 50 cents (AND you can eat it!). 5 Pins

Pintesting Rating - 5 Pins

Practicality:  This is a tip that I’ll my HH will be using all of grilling season. 5 Pins

Pintesting Rating - 5 Pins

Infused/Detox Water Bar

Aug 25, 2015 by Anne Hernandez

It’s the end of August and school has begun again. (WHERE has the summer gone?) I’ve seen a lot memes on the interwebs about looking forward to hoodies, football, leaves, pumpkin spice everything, and cooler weather.

Well as you can see, cooler weather is nowhere in sight in my world. Yes, that’s Fahrenheit – at 5:10 pm after I’d been driving a few miles.

Pintesting Infused Water Bar

Now don’t get me wrong, I’m not really complaining because in a matter of weeks the temps will drop. In a few months I’ll be enjoying perfect weather while the cold starts to descend on the north, so I can put up with needing a fan and air conditioner. What I’ve been having trouble with is staying hydrated; meeting the minimum 64 oz. per day. I can usually get over half way there without problem, it’s just that after that plain water gets boring. (Sorry, but I’m just being honest.)

I have lots of friends who use water flavorings in order to give their water a boost of flavor, but they often have artificial sweeteners, fake flavorings, and chemicals that you need a PhD to pronounce.

I’ve seen lots of pins for infused water; like this, this, and this. Not only does infused water keep the boredom away, but it’s also very healthy and can help your body to naturally detoxify. This is more of a general review of several pins and a great concept.

Pintesting - Infused Water Bar

So we decided to get a variety of ingredients together, and have some friends over to see what we could come up with for a nearly calorie-free, fun, and healthy entertainment idea.

Pintesting - Infused Water Bar

The first one was cucumber, lime, mint. This was very cool, crisp, and bright.

Pintesting - Infused Water Bar

I’ve already done a Pintesting on Lemon Strawberry Detox Water, but since it was so delicious we made a pitcher for our friends. This one is a nice combination of sweet and tart.

Pintesting - Infused Water Bar

The apple and cinnamon surprised me the most, and was my personal favorite. It was sweet, cinnamony, and so refreshing.

Pintesting - Infused Water Bar

We were going to see how long they lasted before they went bad, but thee pitchers only lasted a couple of days. Not only were they a GREAT way to get excited about drinking water, but the flavorings made the garbage disposal smell wonderful once the water was gone.

Go drink to your health. Salude!

Overall Results: 5  Pins

Pintesting - 5 Pins Overall Rating

Accuracy: This was a fun and nearly calorie-free way to entertain some friends and get creative ideas for better hydration. You can use the combinations online or find what you like best. 5 Pins

Pintesting Rating - 5 Pins

Difficulty: The hardest part about this is deciding which combination you want to make that day. I liked making a pitcher-full for the convenience of having fancy frou-frou water all day. 5 Pins

Pintesting Rating - 5 Pins

Time: To make the fancy bar with all of the options took about 15 minutes including the time to soak the fruit in vinegar water to clean them. It too longer to get everything placed just right. 5 Pins

Pintesting Rating - 5 Pins

Cost: Since I was setting up for company and decided to play around with different waters, as well. Also, I wanted to have a LOT of options with the flavors, so I spent much more than if I was just making a specific “recipe” of water. On the other hand, we had a LOT of fun and I know that I spend a lot more than $20.00 when we entertain, so I guess I got off cheap. 4 Pins

Pintesting Rating - 5 Pins

Practicality: This is a great way to stay hydrated, add health and detox benefits, and take the boring out of plain water. The options are unlimited, so you never get bored. 5 Pins

Pintesting Rating - 5 Pins

Flower Shaped Mini Lemon Curd Tarts

Some days it seems like the angels sing, the stars align, and everything falls into place in order to make things happen. When that happens, life is easy as pie – or in this case, tarts.

My HH and I were thinking about how nice it would be to have just a little something sweet but didn’t want to go through a lot of fuss (or dishes). Then I remembered seeing this pin that had crossed my path recently. These Flower Shaped Mini Lemon Curd Tarts on the Inspired Dreamer site seemed like the perfect little treats. That I had one pie crust, one jar of lemon curd, and the exactly the right cookie cutter was just shy of divine intervention to make this. So let’s get on with this test!

The Pintesting:

Pintesting Flower Shaped Mini Lemon Curd Tarts - ORIGINAL PIN

There are only 3 main ingredients; one pie crust, a jar of lemon curd, and powdered sugar. Also helpful is flour for dusting while handling the pie crust. The hardware required is a flower-shaped cookie cutter and mini muffin pan.

Pintesting Flower Shaped Mini Lemon Curd Tarts

Roll out the pie crust and start cutting flowers with the cookie cutter. Does anyone else think the flower cutter looks groovy? Flower Power!

Pintesting Flower Shaped Mini Lemon Curd Tarts

Cut out 12 flowers; rerolling the scraps and cutting to make the 12.

Pintesting Flower Shaped Mini Lemon Curd Tarts

Carefully put them into a mini muffin pan.

Pintesting Flower Shaped Mini Lemon Curd Tarts

Fold 3 alternate petals toward the center, gently place the dough into the cup, then work the petals on the sides by overlapping the three inner petals.

Pintesting Flower Shaped Mini Lemon Curd Tarts

Bake for about 5 minutes.

Pintesting Flower Shaped Mini Lemon Curd Tarts

The flower tart shells pop right out of the pan – no greasing was required. Use some caution when removing them after baking as they are a little more delicate and can crumble if handled too roughly.

Pintesting Flower Shaped Mini Lemon Curd Tarts

Cool, dust with powdered sugar, and spoon with lemon curd.

Pintesting Flower Shaped Mini Lemon Curd Tarts

This almost can’t be called a recipe, but it was inspired, cute, and easy. It did perfectly satisfy our sweet tooth craving, and there were plenty left over to share. We had them with a cup of tea. It was a perfect pairing. Now for the results.

The Results:

Overall Results: 5 Pins

Pintesting - 5 Pins Overall Rating

Accuracy:  These tarts turned out PERFECTLY. The pin photo was almost step-by-step enough to make these, but the recipes’ detailed instructions help ensure great results. The little tarts were a lovely combination of sweet, tangy, crisp, delicate, and pretty. 5 Pins

Pintesting Rating - 5 Pins

Difficulty:  This very simple recipe would be fun to do with kids. The pie dough is very forgiving. I had several flowers tear a bit while I was working with them, but this was fixed while patting them into the tin. 5 Pins

Pintesting Rating - 5 Pins

Time:  These took about 20 minutes from start to finish, and that included the photos and dishes. 5 Pins

Pintesting Rating - 5 Pins

Cost:  I happened to have everything on hand this time, so there was no extra shopping costs.  I had purchased the lemon curd at World Market for $3.99 to serve with scones. The pie crusts come two to a package (mine was the leftover in the back of the fridge), and cost about $3.00. That’s 29 cents per tart. 5 Pins

Pintesting Rating - 5 Pins

Practicality:  These were quick, easy, and the tart shells are extremely versatile. You could fill them with any curd, custard, or pudding to make a bouquet of desserts. If you leave off the powdered sugar, you could use the shells with savory fillings, too. They’re perfect for a tea party, garden party, or mother’s day. 5 Pins

Pintesting Rating - 5 Pins

Easy Cheeseburger Sliders

Jul 30, 2015 by Anne Hernandez

The other day was National Hamburger Day. Who comes up with these “holidays”? Well, thank you to whomever, because even though I’m not a huge carnivore, I LOVE a good burger.

Burgers are like pizza in that there are so many different ways to approach them: big and juicy, stuffed with fillings, thin with a quick sear, to tiny little sliders. I used to love getting the sliders in the cute little boxes. Does anyone else remember these?

White Castle Burgers

When I saw this pin for Easy Cheeseburger Sliders by Kristina Vanni, I was all in! These use King’s Hawaiian rolls and a really different method for cooking. I went straight to the store to pick up the ingredients, and got cooking.

Pintesting Easy Cheeseburger Sliders - ORIGINAL PIN

The Pintesting:

The recipe calls for 2 lbs of hamburger. Because it’s just my Handsome Hubby and me, we didn’t need to make 2 pounds worth of sliders, so we halved the recipe with some help from Taste of Home website, and from the kitchn website for what size pan to use. Did you know that half of a 9×13 pan is an 8×8? I love learning new things!

Pintesting Easy Cheeseburger Sliders

Mix the ground meat, bread crumbs, onion, and salt in a bowl.

Pintesting Easy Cheeseburger Sliders

Put the mixture in a pan, press it nice and flat, then poke it with holes with a fork.

Pintesting Easy Cheeseburger Sliders

Bake it (SO much easier than grilling or pan frying a bunch of burgers). Look at that shrinkage!
Pintesting Easy Cheeseburger Sliders

Cover it with cheese and pop it back into the oven for a couple more minutes.

Pintesting Easy Cheeseburger Sliders

The big square cheeseburger patty came out of the pan easily, and I cut it into 9 squares to fit the buns.

Pintesting Easy Cheeseburger Sliders

Here you have the final results. Yes, I made 9 sliders. Yes, there are only 8 in the picture. My HH snatched one before I could stop him. He says that they smelled too good to wait.
Pintesting Easy Cheeseburger Sliders

The Pintesting Results:

Overall Results: 4.85 Pins

Pintesting Seal 5 Pins

Accuracy:  These cheeseburger sliders were very easy to make, as the title says. They produced a lot of delicious, juicy burger without having to flip a bunch of minis a bunch of times. I would pick these over their fast-food version any day. 5 Pins

Pintesting Rating - 5 Pins

Difficulty:  The recipe title didn’t lie. By baking the meat mixture in a pan, you let the oven do the work. 5 Pins

Pintesting Rating - 5 Pins

Time:  This one was a tough call. If you were making a regular burger vs. a slider, it takes about 5-10 minutes depending on how you like your burger cooked. These took 30 minutes of cooking time. That’s not a long time to cook supper, but it is longer than traditional burger cooking methods. 4 Pins

Pintesting Rating - 4 Pins

Cost:  These are an inexpensive way to feed a crowd, or to make ahead as for freezing. (Cheeseburger sliders ready to heat and eat? Yes please!) My local Fresh Market has ground chuck on sale every Tuesday for $2.99/lb. If you look at the ingredients picture, you’ll notice that the package of meat was $3.06. Add the cost of the rest of the ingredients, and that’s about 50 cents per slider. I was full at 2 sliders; HH was full at 3. The extra 4 sliders made both of our lunches – much better than fast-food. 5 Pins

Pintesting Rating - 5 Pins

Practicality:  If you need to feed a crowd, then these are absolutely the way to go. They were simple, juicy, flavorful, and I didn’t feel guilty about throwing away a bunch of cute cardboard boxes. Since the oven does the cooking, you don’t have to stand and flip anything. These are absolutely going into my recipe box! 5 Pins

Pintesting Rating - 5 Pins

Pintesting Weave Your Bacon BLT

Jul 24, 2015 by Anne Hernandez

Sometimes less is more, and there is a lot of minimalist going on lately. (Wait. Is that an oxymoron?)

Tiny houses are all the rage right now. Have you seen them? They look like glorified tree houses, or doll houses on steroids. They’re so cute, but I can’t live in a house that’s smaller than my kitchen. I already almost live in my kitchen. Almost…

Food portion sizes are shrinking, too – not that that’s a bad thing. Meal portions had gotten so big that most restaurant meals can equal 2-3 appropriate portions. Super sized is not a super thing.

The Minimalist decorating style is very popular and all over Pinterest.

And according to a business article, even our attention spans are shrinking (from 12 seconds in 2000 to eight in 2012), and so our meetings and emails need to be shorter.

So just as a fun experiment, I’m going to use as few words as possible to describe this Pintesting.

The biggest problem with the traditional BLT is that there are always those bites that either don’t have enough bacon, or they have none at all. *GASP*  This is NOT the time to be minimalist! Then I saw this pin for a video that solves the problem completely. Watch this 35-second video. (Even the video is short!)

Ingredients

Pintesting Basket Weave Bacon BLT

Bacon

Pintesting Basket Weave Bacon BLT

Cut Bacon

Pintesting Basket Weave Bacon BLT

Weave Bacon


Pintesting Basket Weave Bacon BLT


Bake Bacon

Pintesting Basket Weave Bacon BLT

Cooked Bacon

Pintesting Basket Weave Bacon BLT

Bacon – BLT

Pintesting Basket Weave Bacon BLT

Crumbs

Pintesting Basket Weave Bacon BLT

So there you have it – my minimalist post. Somehow I think the story got across.

Overall Results: 5 Pins

Pintesting - 5 Pins Overall Rating

Accuracy:  The video was detailed and self  explanatory. By using the cooling rack on top of the bacon, it cooked nice and flat. Most importantly, there really was bacon in every single bite. 5 Pins

Pintesting Rating - 5 Pins

Difficulty:  This was simple, and the video did a great job showing the step-by-step instructions. 5 Pins

Pintesting Rating - 5 Pins

Time:  The total time, including prep, weaving, baking, and sandwich assembly was less than 30 minutes. It took a little longer for the thick-cut bacon to cook, but it was sooooo worth it. 5 Pins

Pintesting Rating - 5 Pins

Cost:  The basic BLT ingredients are often already in my kitchen. I was lucky to find this thick cut bacon that normally sells for $7-8 on sale for $3.00. (Score!)  The rest of the ingredients work out to be about $1.00 per sandwich, plus there was lots of leftovers of everything. 5 Pins

Pintesting Rating - 5 Pins

Practicality:  This is a great way to cook bacon for any sandwich application; BLT, breakfast, burgers, etc. I’ve seen a similar idea in which you weave the bacon in a muffin tin to make bacon cups to fill with breakfast foods, salads, or what have you. I could see that being a possibility, but we’ll have to test it another day. THIS test gets 5 Pins.

Pintesting Rating - 5 Pins

Cheesy Broccoli Orzo

Does anyone else seem like you make and eat the same meals? The dinner rut is a tough one to deal with because we all have our favorites, comfort foods, and quick-on-the-table meals that are the family approved stand bys. Don’t get me wrong – pizza night is not to be trifled with, but you can completely mix it up with different types of crusts, sauces, and toppings. Taco Tuesdays are a close second, but even there you’ve got a lot of choices that can make it seem different from week to week. Sometimes changing the side dishes can change the taste and feel of a whole meal.

That’s why I was super excited when i saw this pin for Cheesy Broccoli Orzo by Kristin from Iowa Girl Eats. It’s the perfect trifecta of a side dish.

  1. It’s fast
  2. It’s easy
  3. It only uses a handful of ingredients (most are likely to be in your kitchen right now)

Pintesting Cheesy Broccoli Orzo

Well, who’s going to argue with a trifecta? Not me – I choose my battles, so let the Pintesting begin.

As I said, there are only a handful of ingredients – 6 if you don’t count the salt or water to boil the pasta and broccoli.

Pintesting Cheesy Broccoli Orzo

Boil the orzo pasta. Now this seems easy, but wait…

Pintesting Cheesy Broccoli Orzo

Kristin says to cook for 3 minutes, add broccoli, then cook for another 3 minutes or so.

Pintesting Cheesy Broccoli Orzo

My orzo box calls for 9 minutes of cooking time for al dente. You can see in the picture below that it still has a way to go, so I waited another couple of  minutes before adding the broccoli.

Pintesting Cheesy Broccoli Orzo

Next I added the broccoli and cooked it for about 3 minutes to let the orzo get to the al dente state and let the broccoli cook well.

Pintesting Cheesy Broccoli Orzo

Drain everything really well.

Pintesting Cheesy Broccoli Orzo

Return to the pot and add the cheeses, butter, and milk.

Pintesting Cheesy Broccoli Orzo

After mixing and per Kristin’s instructions, I checked the seasoning. Good call! I added a touch of salt and several grinds of pepper.

Pintesting Cheesy Broccoli Orzo

That’s it. Really! We’re done – except for the plating.

Pintesting Cheesy Broccoli Orzo

I love risotto, and this totally puts me in mind of that creamy dish but without the half hour of constant stirring. It’s the perfect alternative if you need something quick, and want to get some extra veggies in your meal. And who doesn’t need extra veggies? That’s what I thought. So let’s get to the Pintesting Results:

Overall Results: 4.6 Pins

Pintesting - 5 Pins Overall Rating

Accuracy:  The dish was delicious, uncomplicated, and quick. The flavors of the pasta with the broccoli and cheeses all played wonderfully together. But the pasta cooking time was off by 50%, and a novice cook might not catch that. In all fairness, it might have been the difference from one pasta brand to another, so keep an eye on what the directions on your box indicate. 4 Pins

Pintesting Rating - 4 Pins

Difficulty:  There’s nothing hard about this dish. I bought the broccoli florets pre-cut which eliminated a lot of the prep work. I did grate the cheeses to balance the level of work (and because I like fresh-grated cheese better). Boil, drain, mix, serve. 5 Pins

Pintesting Rating - 5 Pins

Time:  The whole recipe came together in under 20 minutes even with me taking the pictures. PERFECT for a busy weeknight dinner. 5 Pins

Pintesting Rating - 5 Pins

Cost:  The broccoli ($2.00 on sale) and orzo pasta (less than $2.00 – not on sale) were the only two ingredients that I had to buy, and there was enough of each to double the recipe and still have leftover broccoli. The remaining ingredients came to about $2.00. At $4.00 for 4 servings, that’s $1.00/serving.  5 Pins

Pintesting Rating - 5 Pins

Practicality:  The trifecta totally worked with this recipe. Not only is it a delicious side dish, but it has the makings for an easy casserole just by tossing in a cooked protein of choice. (I’m thinking this would be a great way to use up some leftover turkey next Thanksgiving…)I bet you could play with the cheeses for slightly different takes on the flavor, too. It’s also very kid-friendly – it’s practically mac & cheese with broccoli. 5 Pins

Pintesting Rating - 5 Pins